Shimano’s electronic groupsets give you crisp, precise gear shifts and are now commonplace on the bikes of professional cyclists. Shimano Di2 is also a popular option for riders buying a new bike or upgrading their current groupset.
However, there’s a lot more Shimano Di2 can do for you besides replicating a cable-operated groupset but with electronic shifts. There are plenty of small adjustments and custom configurations you can make to keep your Di2 shifting smooth and get the most out of an electronic groupset.
We talked to Julian Thrasher, head of training at Shimano’s UK distributor, Madison, to find out more. He’s an authority on Shimano Di2 and gave us his top tips for Di2 setup and using an electronic groupset.
How to check charge levels

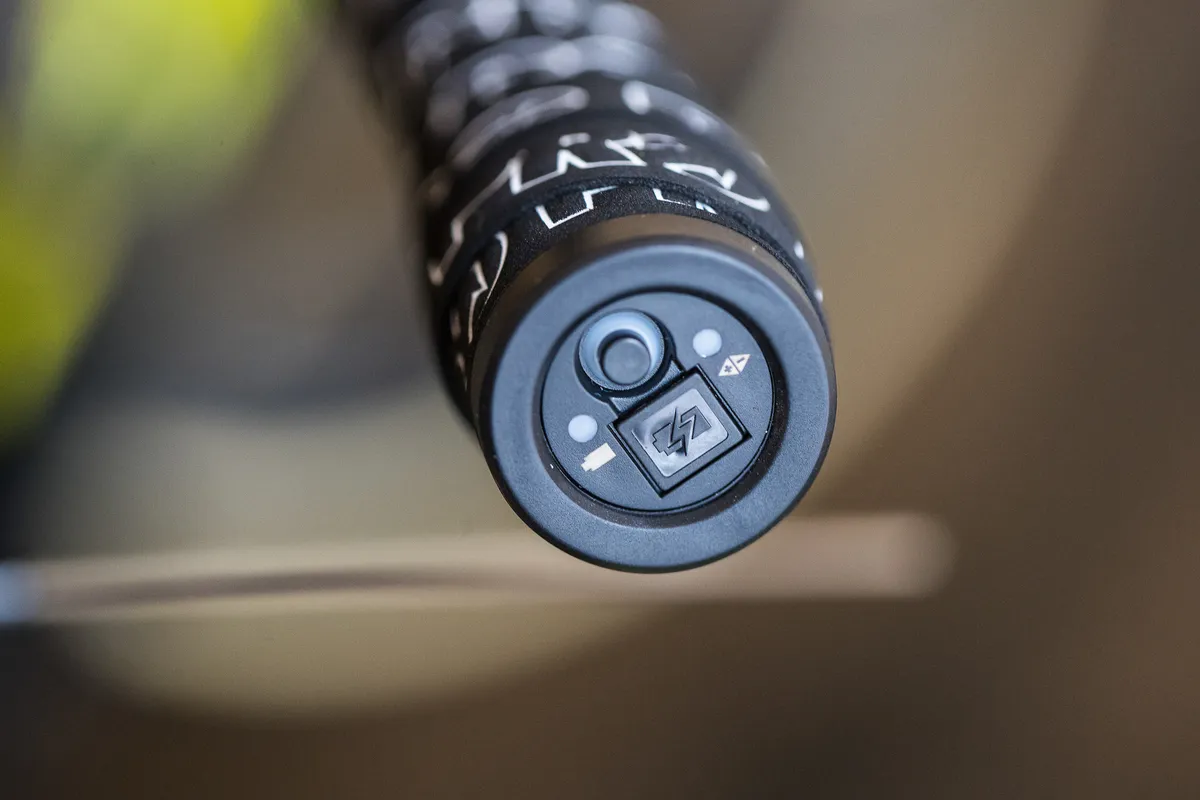
It’s easy to check your Di2 battery’s charge level: hold down a shifter for half-a-second or more and the LEDs on your Di2 junction box will flash.
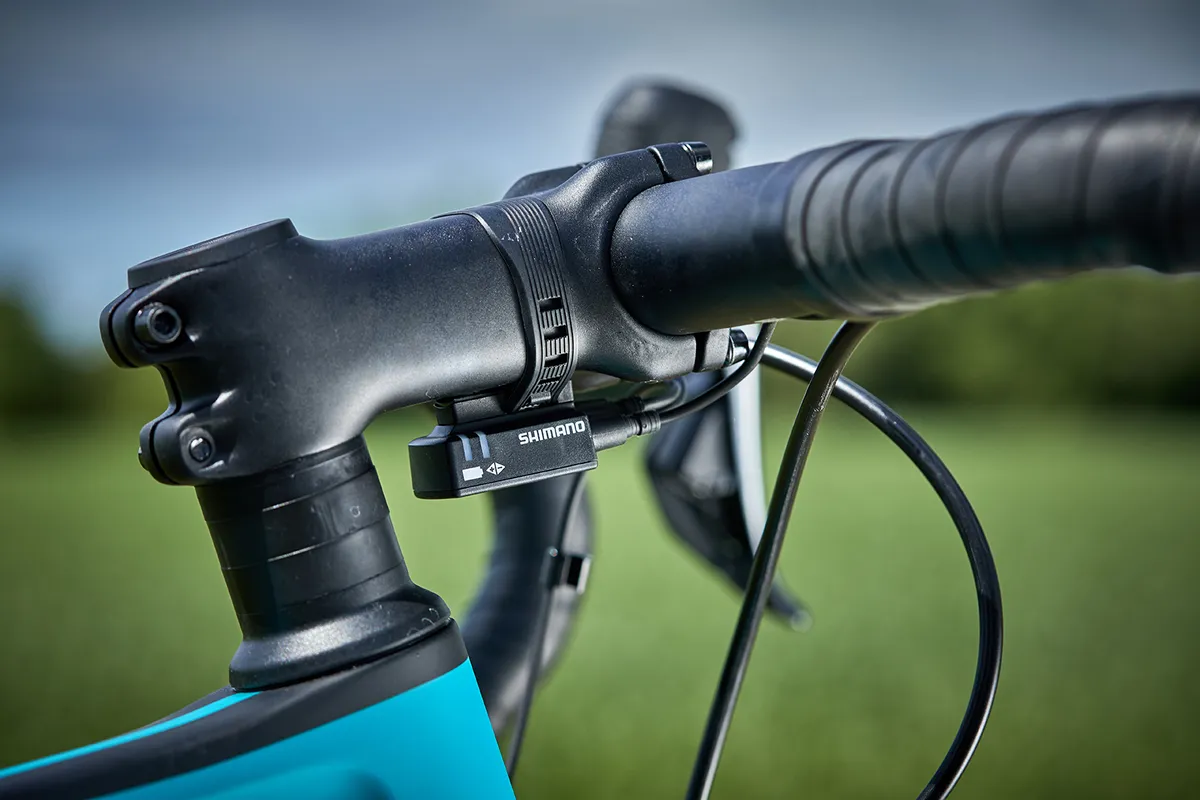
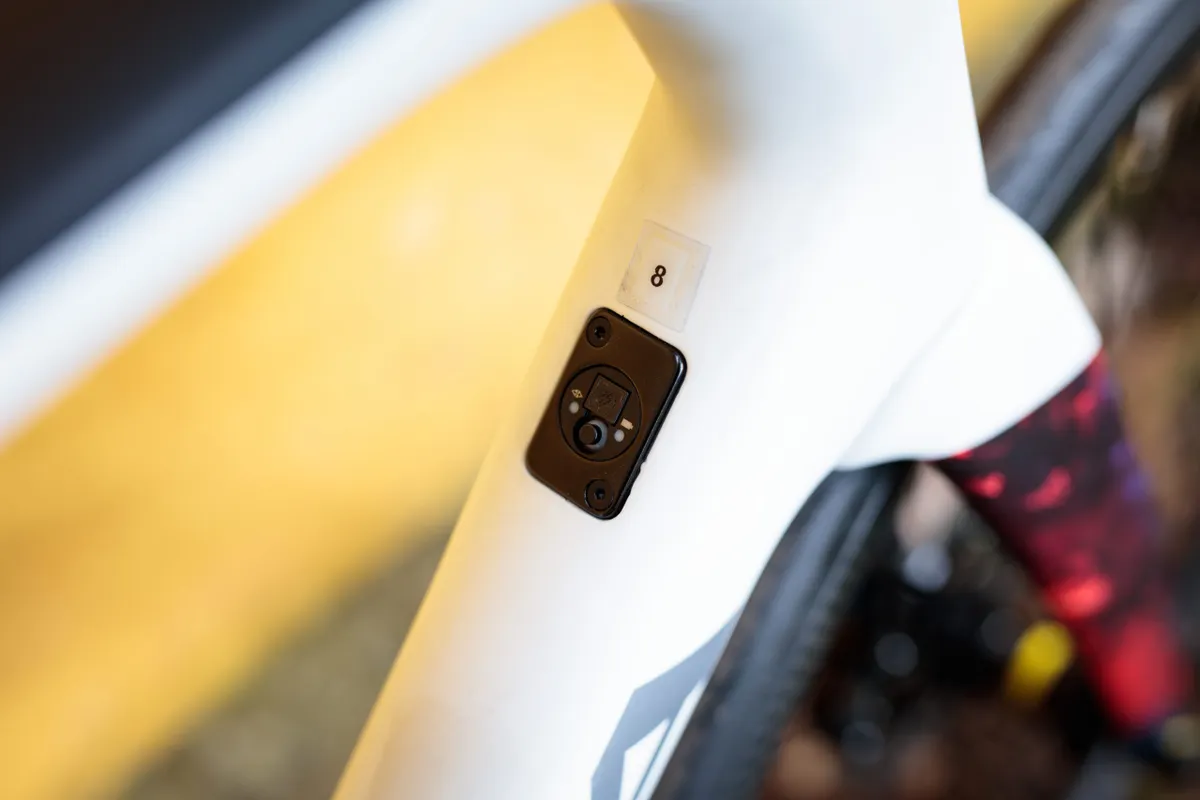
The junction box on road bikes can be located under the stem, in the end of the handlebars or, on some bikes, mounted in the frame.
If your battery level is at 100 per cent, you will see a continuous green LED. At 50 per cent or above, the green LED will blink five times. Once you get to between 50 per cent and 25 per cent, you’ll see a continuous red LED. Drop below this and you’ll see a blinking red LED displayed.
When the charge does get very low, your front mech will stop shifting first, leaving you with the rear derailleur only to get you home. It means that you won’t be left totally in the lurch by a low battery.
That said, a fully charged battery should get you thousands of kilometres.
How to set up and trim your rear derailleur
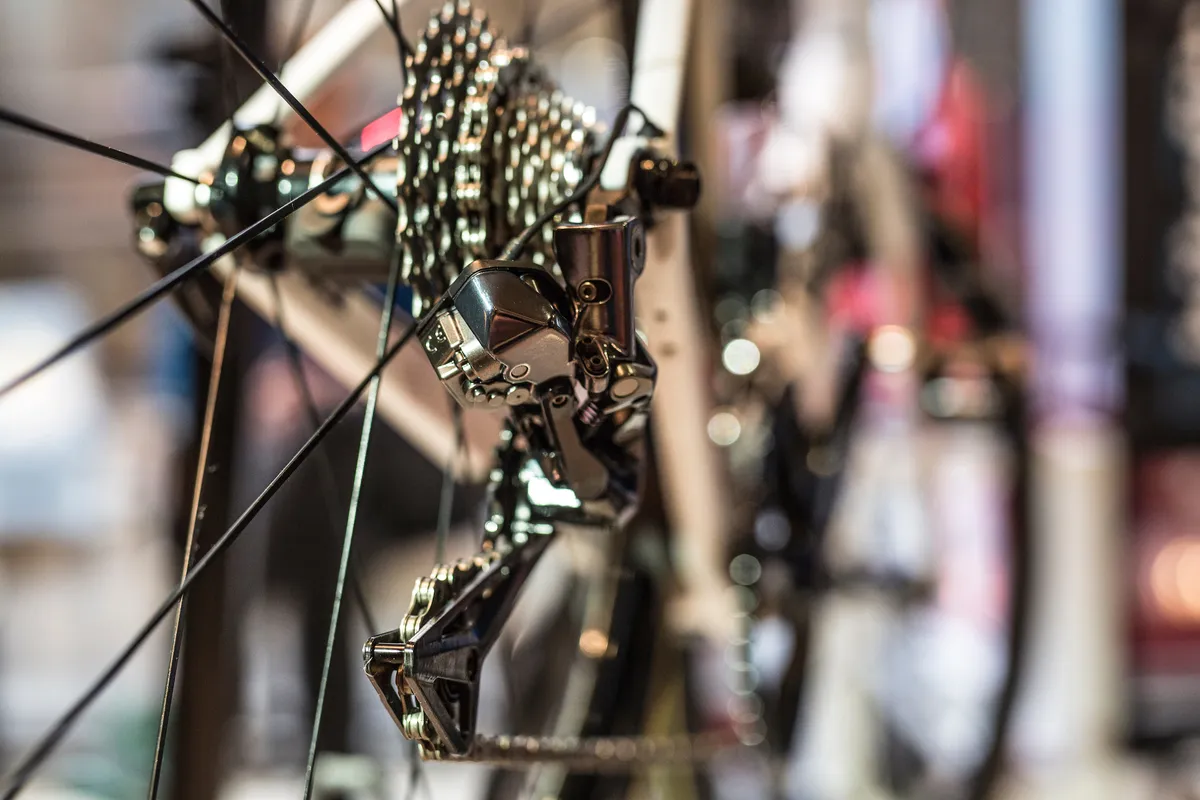
Start by shifting the derailleur into the smallest chainring (if running a 2x) and the largest sprocket of the cassette. Use the end adjustment screw to position the pulley wheels closer to the cassette teeth making sure that the chain does not jam.
If your rear derailleur is rubbing against the chain or not shifting precisely, you can trim it to adjust shifting for smoother, quieter operation.
First, you need to set the front mech to the small chainring and the rear to the fifth largest sprocket. You’ll then have to enter the system’s adjustment mode.
That’s done for road bikes by pressing the button on the junction box until the red LED lights up. If you’ve got a display unit on your mountain bike, you can select adjustment mode here by pressing the display button once.
You can then use the up and down rear mech shift levers to micro-adjust the position of your derailleur as you spin the cranks. Once you’ve got your rear mech running sweetly, press the junction box/controller button again to exit adjustment mode.
You’ll need to check that the high and low limit screws on your derailleur are set correctly and may need to adjust them too. This is important because poorly set limit screws can lead to excessive battery drain and damage to the derailleurs.
Shift the derailleur into the largest cassette sprocket and set the low limit screw until it just makes contact with (but does not move) the derailleur linkage.
Next, shift to the smallest cassette sprocket and adjust the high limit screw until it lightly contacts the linkage, as with the low limit screw, but then back the screw off one full turn to allow the derailleur to over-stroke (a feature that improves the shift speed)
How to set up and trim your front derailleur
First you need to set the high limit screw. Set the chain on the largest chainring and smallest sprocket and adjust the clearance so there is a very small gap (around 1mm) between the cage and the chain.
You can then trim the front derailleur. Set the bike to the small chainring at the front and largest sprocket on the cassette. Again, enter adjustment mode as described for the rear derailleur and then use the front mech shifter levers to fine-tune the mech position until there is a very small gap between the chain and derailleur.
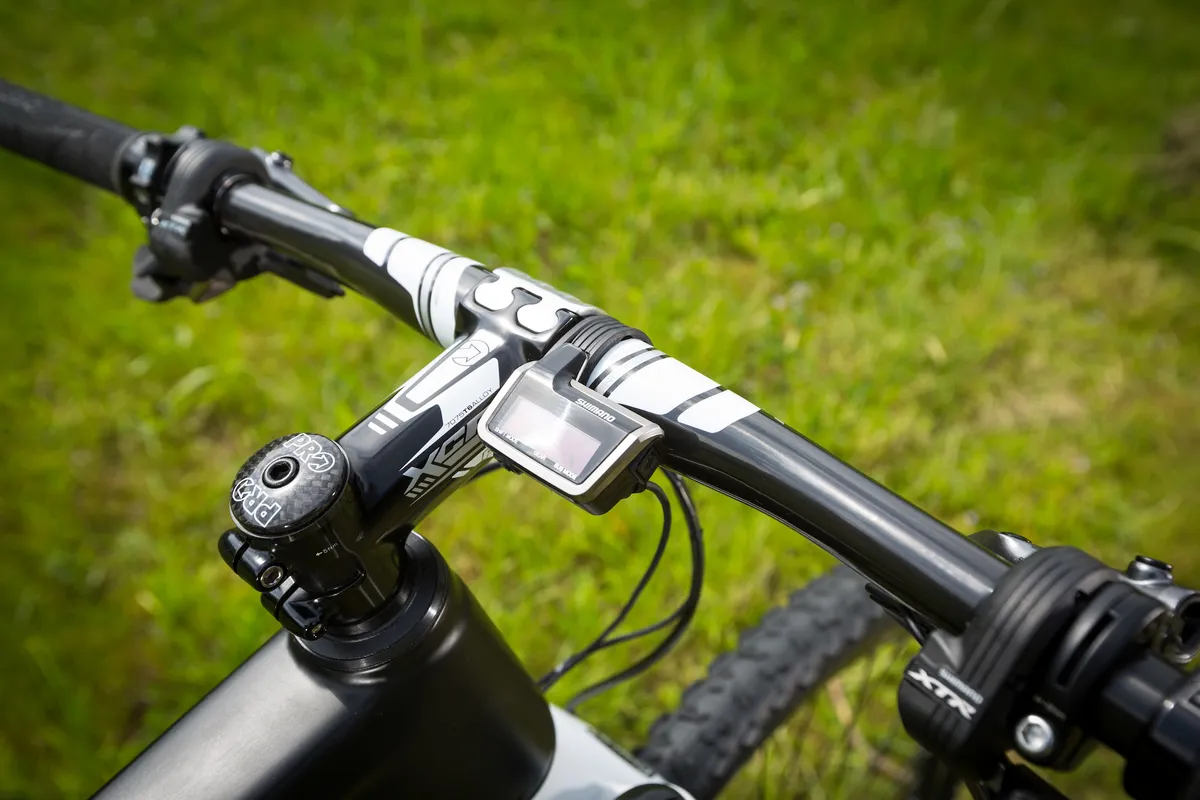
Once you’ve made the adjustment, exit adjustment mode and check that you can shift through all gear combinations without the front derailleur rubbing.
You can also connect up your bike to a computer, phone or tablet (see below for how to do this) and perform trim operations using Shimano’s e-Tube Project software.
Crash mode
If your rear derailleur stops working after a spill or a bash, it may have gone into crash mode, where the motor disengages to prevent damage.
To get it going again, you need to press and hold the button on your junction box for five seconds. Once the red light flashes, spin the cranks and the derailleur will shift through the gears to reset itself.
Don’t expect your derailleur to run sweetly again if you’ve sustained more serious damage like a bent mech hanger – you’ll need to get that checked out.
Checking your cables
Di2 cables are delicate and even invisible damage may stop them from working, so check them regularly for signs of wear. If you’re disconnecting and reconnecting them, use the Shimano tool provided (model code TL-EW02).
Although the system is weatherproof, you can still get dirt in the ports, so it’s a good idea to unplug the cables and clean the ports periodically using a cotton bud, particularly if you’re experiencing shifting problems.
Mixing and matching road and MTB components
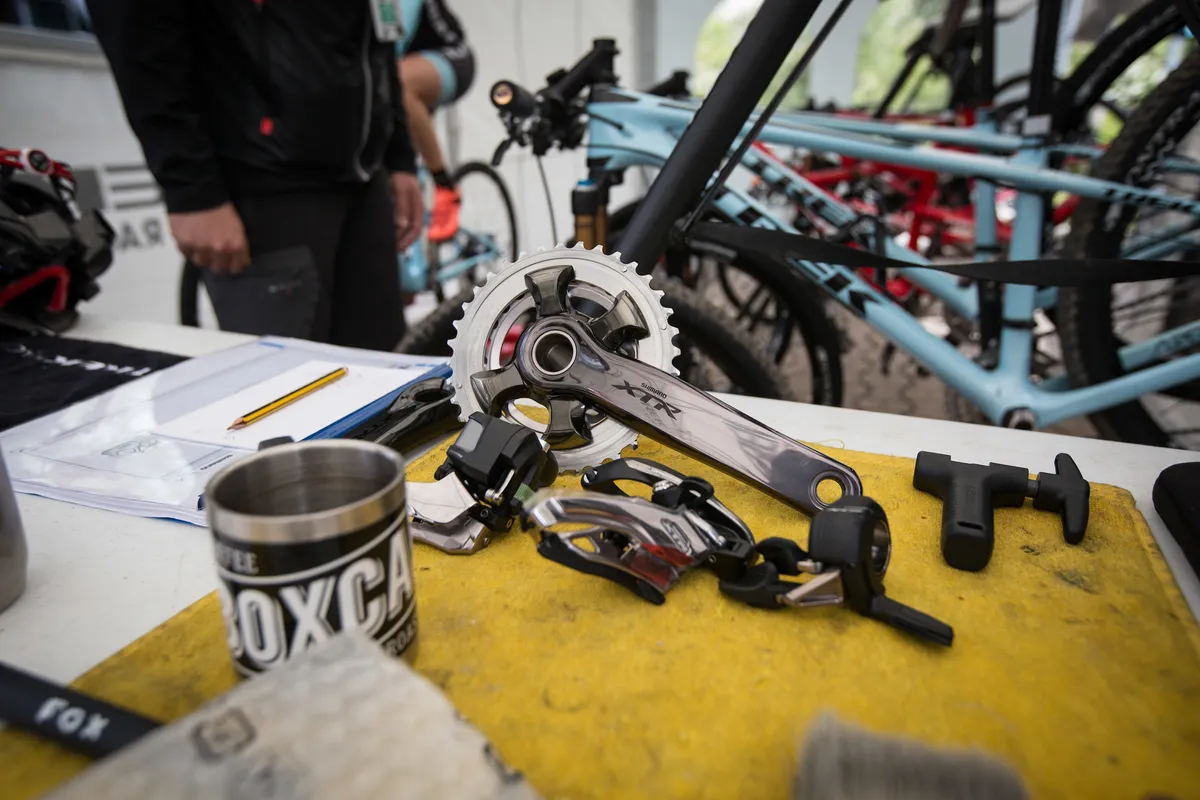
In general, you can mix mountain bike and road bike Di2 components as long as the shifters are both from the same family, e.g. using GRX Di2 shifters paired to XT derailleurs or vice versa.
That gives you the option, for example, to run a flat-bar road bike with MTB Di2 shifters and a display, or a gravel bike with an XTR Di2 rear mech, which in turn opens up the option of wider gear ranges.
If you want to do this, check the latest version of Shimano’s compatibility chart.
How to use Shimano’s e-Tube Project software

The key to getting more from your Di2 set up is Shimano’s e-Tube Project software. You can download this to your Windows PC (but not a Mac).
Now plug your bike into your computer using the battery charger to link it up to a USB port. This opens up a whole new world of functionality for your Di2 system, which we’ll run through below.
You can also run e-Tube Project software on an Android or Apple phone or tablet, but you’ll need a Wireless Unit in your bike to connect up. Not all Di2-equipped bikes come fitted with one – see below for further info.
Firmware updates
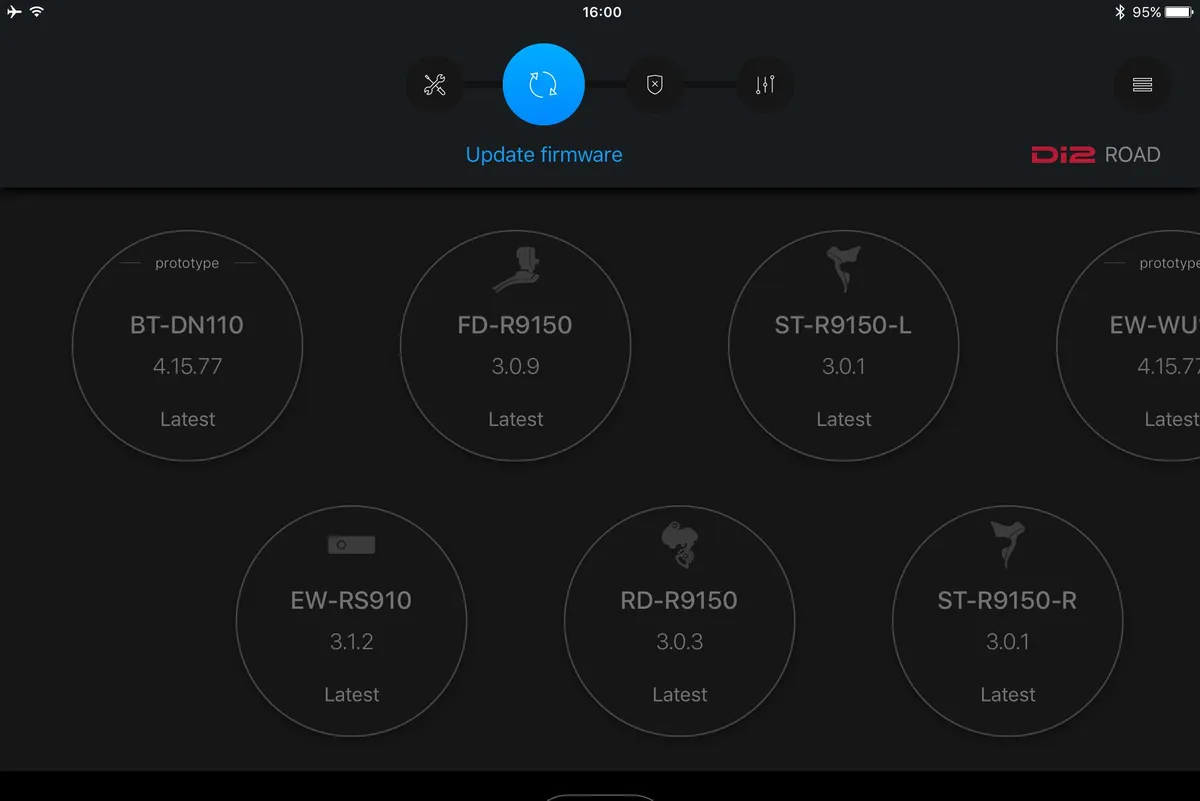
The e-Tube Project software lets you update your groupset’s firmware. It’s a one-click option to check that you’re on the latest version and install the update if not.
It’s worth keeping your firmware up to date, to get the latest functionality and bug fixes.
Hardware identification
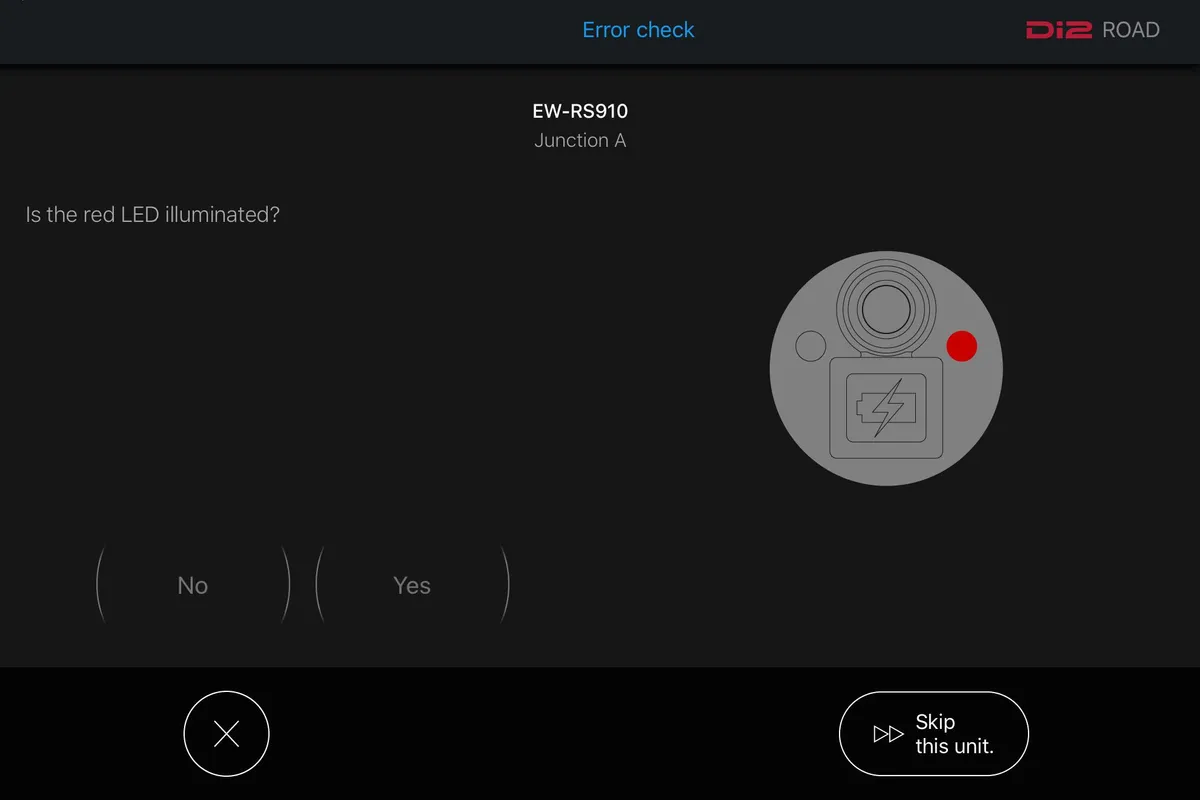
Shimano’s e-Tube Project software will automatically recognise the different components of your Di2 setup.
That includes the derailleurs and shifters as well as the battery and wireless and control units. Plus it will detect other components that are part of the wider system, such as Di2-compatible suspension units.
Changing and customising shifting modes
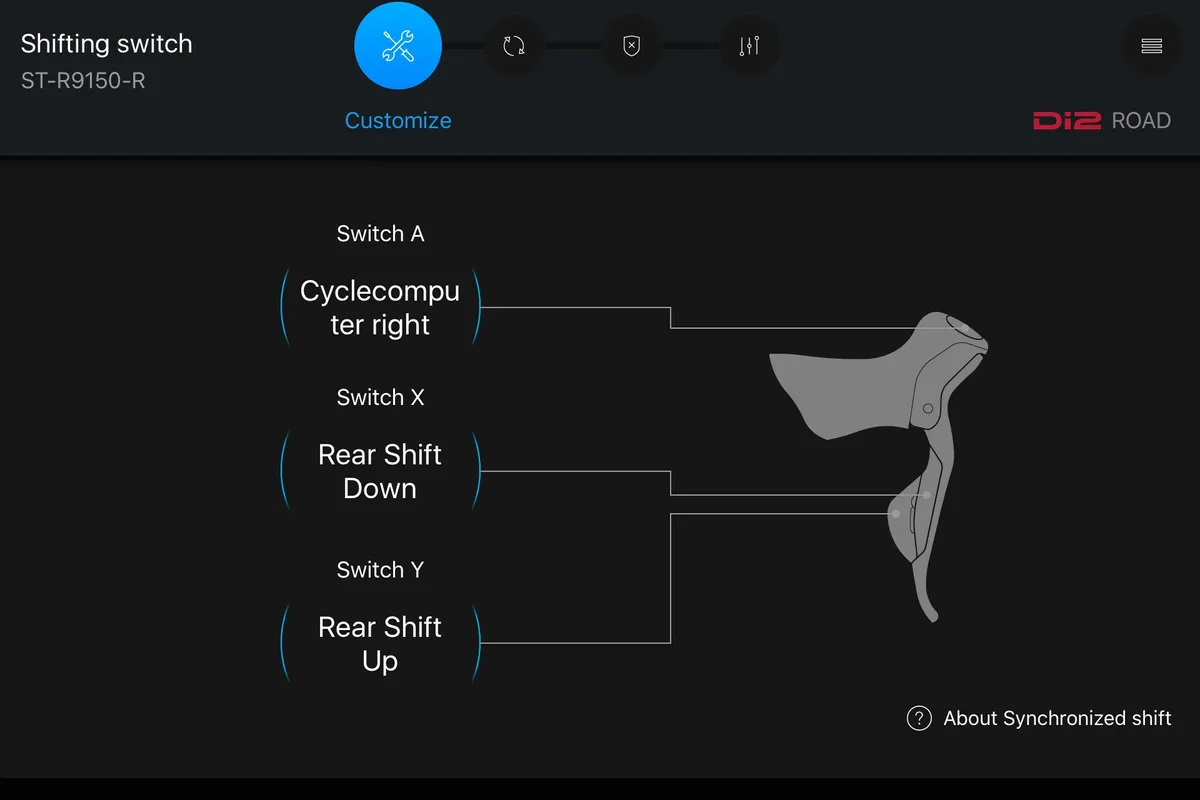
Once you’ve connected to e-Tube Project, you can use it to alter how your shifting works. That includes changing what the individual buttons on your shifters do and how many gears your rear mech will shift up and down if you hold down the shift lever.
You can also set up synchronised and semi-synchronised shifting, while electric bikes with Shimano’s Steps motor equipped with a Di2 specific internal hub gear can be set up to shift automatically.
Synchronised shifting means that you just use one shifter button to shift up gears and another to shift down. Once you reach a point on your cassette specified via the software, Di2 will swap you between chainrings and at the same time change rear gears to give you the next ratio.
There are two factory presets you can use, but you can also specify at what point on the cassette the chainrings will shift up and down.
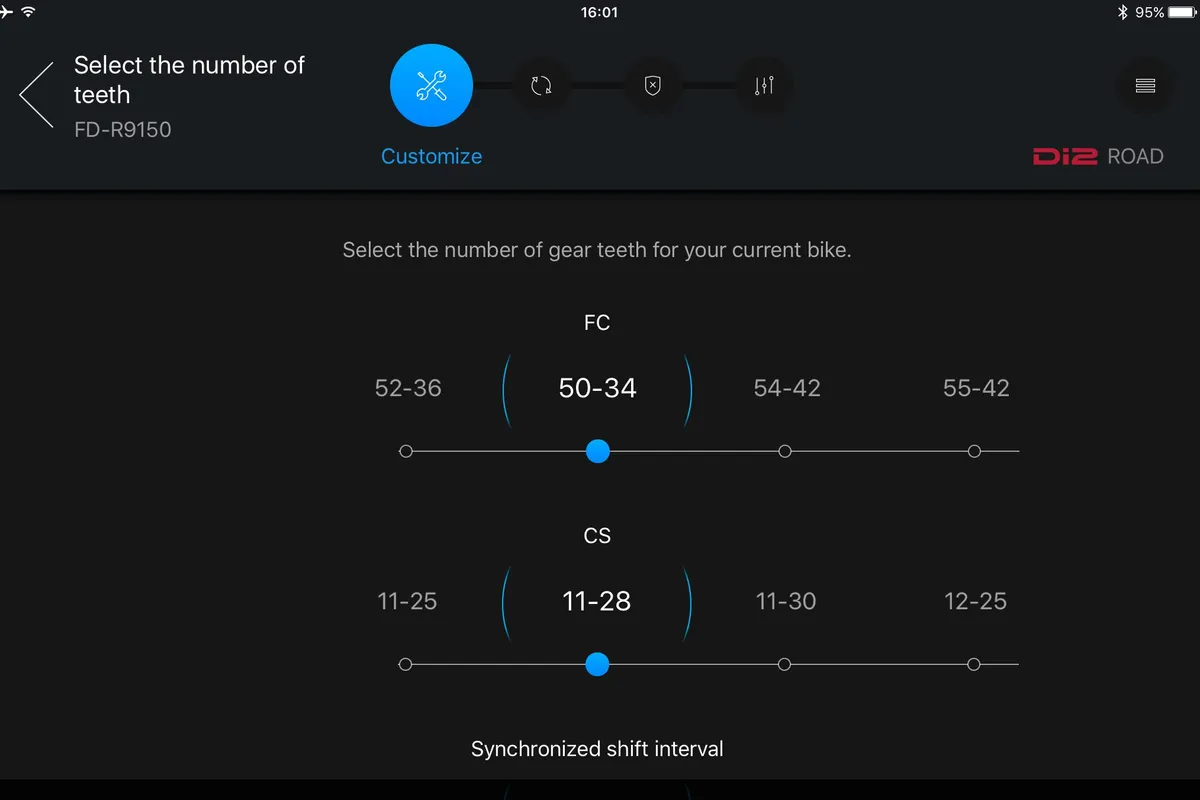
If you go for semi-synchronised shifts, your rear mech will make a compensating gear shift when you decide to change between chainrings, so you’re not trying to turn too high or too low a gear immediately after the shift. You can select how many sprockets the rear mech shifts up or down when you change chainrings.
To alternate between semi-synchronised and fully synchronised modes (and manual mode) when out riding, press the button on the junction box or display twice. On a road bike the lights will flash according to which mode you are in (a stationary flash for full manual, two flashes for semi-synchro and three for full synchro).
On a mountain bike with a display you can switch between the S1, S2 and M setting.
Satellite shifter setup
If you want the option to shift gears from your bar tops, the drops or tri bars, Shimano sells a range of different Di2 satellite shifters.
The wired satellite shifters plug into the backs of the main shift levers, with the wires run under the bar tape or through the tri bars to where you want them positioned.
Wireless connectivity
Your Di2 bike can connect wirelessly to your phone and other bike hardware such as a GPS unit using either Bluetooth, ANT+ or both.
But to do this, it needs the Di2 Wireless Unit (commonly known as a ‘D-Fly' unit or by its model code, EW-WU111) to connect up. Not all Di2 bikes come with this because it’s an optional component, and not all Di2 junction boxes are compatible.
So, if you don’t have one, you’ll need to buy it and have it fitted into your Di2 wiring harness. It’s a fairly simple process to plug it into one of your shifter wires.
Linking up to other bike hardware

Di2 can be used as the gateway to a lot of other bike hardware, including many GPS bike computers, although you’ll usually need wireless connectivity.
If you use synchronised shifting or you’ve got a single front chainring, you’ll have two shifter levers that you don’t need to use to control your gears.
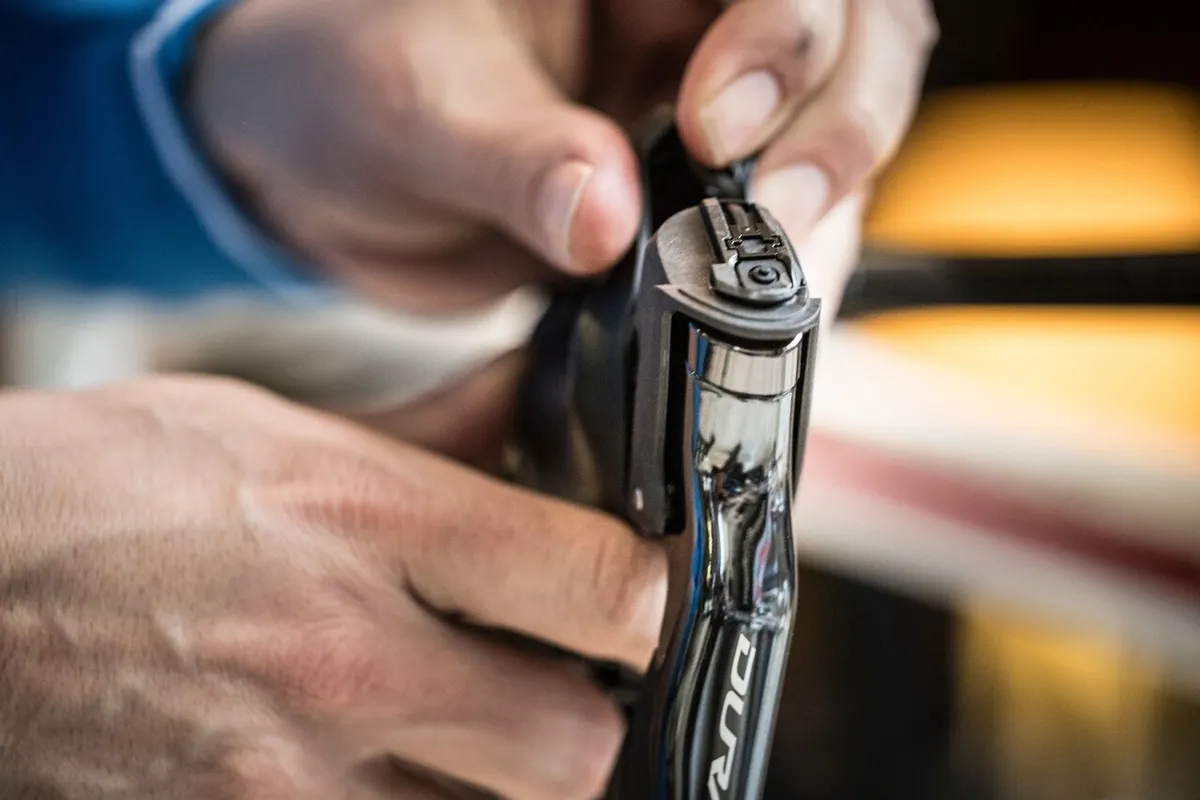
You can assign these to use for other things, using e-Tube Project to set up the shifter in D-Fly mode. Some road and all GRX Di2 shifters have a third button under the hood which you can also programme to work as D-Fly controllers.
Many GPS devices from brands including Garmin, Wahoo and Lezyne have a field that will display which front and rear gears you’re using. If you’ve got a compatible Shimano Steps ebike, you can get battery level, range and system status info on your GPS screen. Set up unused shifter buttons in D-Fly mode and you can use them to scroll through the screens on your GPS.
You can also link up MTB hardware, such as Fox forks with Live Valve tech, although this hook-up is cabled rather than wireless and uses a separate battery to control the suspension valves.
Get more stats and data
Di2 will provide loads of stats on your rides. If you’ve got a Garmin or Wahoo Elemnt GPS linked up, you can see which gears you’ve been using for how long and how many times you’ve shifted. Plus, you can download a .fit file from your GPS to di2stats.com for additional analysis and visualisation.
Ask an expert
As you’ll have gathered, Di2 setup can be complex if you want to get the most out of the system. There are a lot of options to fine-tune your setup and add extra hardware.
It’s always a good idea to talk to your local Shimano Service Centre and if you’re not sure how to do something, let them handle it for you.

