


Even when left alone, Shimano SPD pedals will last seemingly indefinitely. However, servicing Shimano pedals is ludicrously easy, and performing this super quick, five minute pedal refresh will ensure they keep spinning smoothly for years to come.
The following process applies to both Shimano road and mountain bike SPD pedals — it also applies to Saint, XT and DX flat pedals.
Get to know your Shimano SPD pedals
Bearings: All Shimano SPD pedals still use cup-and-cone style loose ball bearings. If you feel so inclined to take apart the bearing assembly — though you shouldn’t really ever have to fully dismantle it if you regularly service your pedals — be warned that it’s a bit of a faff to put it back together.
Pedal body: Shimano pedal bodies are generally made of alloy or carbon composite. Don’t worry too much about any cosmetic damage they might incur; my experience suggests that they’re almost impossible to break through impact.
Springs: The coiled steel springs give Shimano’s SPDs their most defining characteristic: that solid and reassuring click as the insertion of the cleat forces the pedal jaws open before they snap shut again.
Axles: Shimano prefers the stiffness and reliability that steel provides over lightweight metals such as titanium for its pedal axles. All Shimano SPDs use 6mm or 8mm Allen keys to screw the axles in and out of the crank arms. Some cheaper models also include 15mm wrench flats.
Adjuster screws: Not everyone likes or wants the same level of resistance from their pedal springs. Old, tired knees might prefer less resistance and hardcore cross-country racers on bumpy tracks might want a bit more. Thankfully, Shimano includes 3mm hex key adjusters, so you can dial in your preference easily.
Threaded collar: The threaded collar — or lockring by its other name — is an important component that keeps the pedal body attached to the axle. On budget models, the alloy collar is replaced by a nylon cap. A set of sturdy mole grips or Shimano’s own proper TL-PD40 tool can be used to loosen this. Our super-quick, five minute pedal service will keep your Shimano SPD pedals spinning smoothly for years to come.
Five minute Shimano pedal service and set up
Service any Shimano pedal In less than 5 minutes
I’m first going to talk you through a super-quick pedal ‘refresh’ to start, with a more involved guide on how to fully service your bearing assembly below.
- Time: 5 minutes
- Skill rating: Moderate
- Cost: Well under £10
What you’ll need
- 7mm and 10mm spanners
- Allen keys
- Thick, waterproof grease
- Degreaser
- Rag
- Medium-weight oil
- Shimano TL-PD40 tool or mole grips (if your pedals have a plastic lockring)
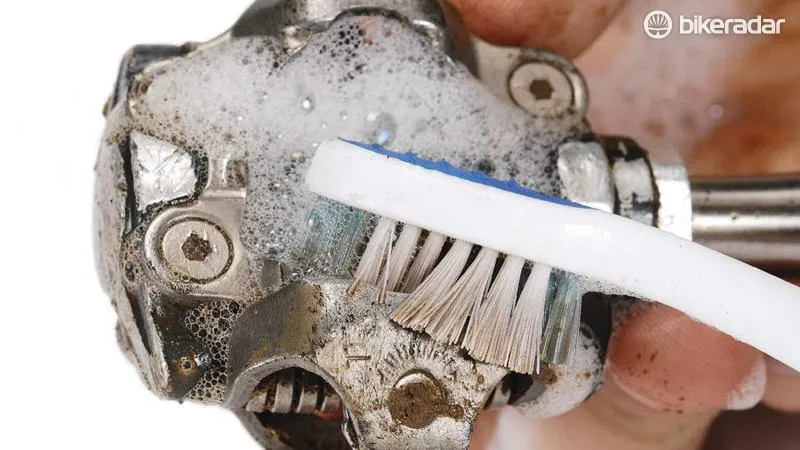
1. Wash the pedals
It’s good practice to get your pedals clean before servicing as it reduces the chance of introducing dirt into the pedal body.
Give the pedals a good rub down with degreaser, or even better, a wash with hot soapy water and dry, ideally with a compressor before servicing.
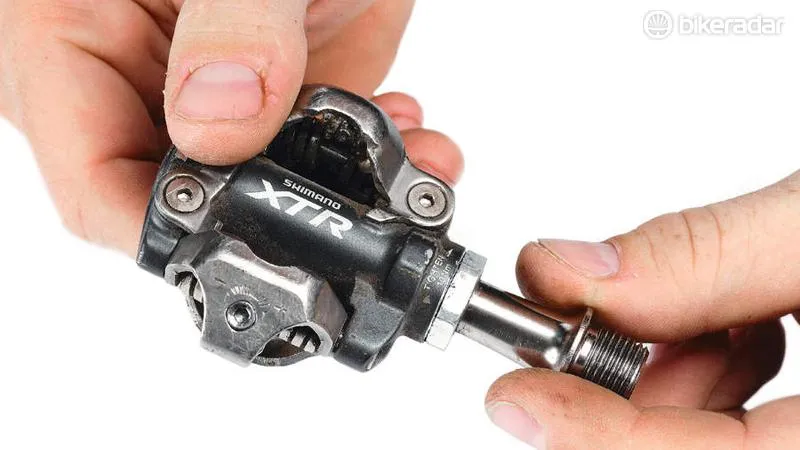
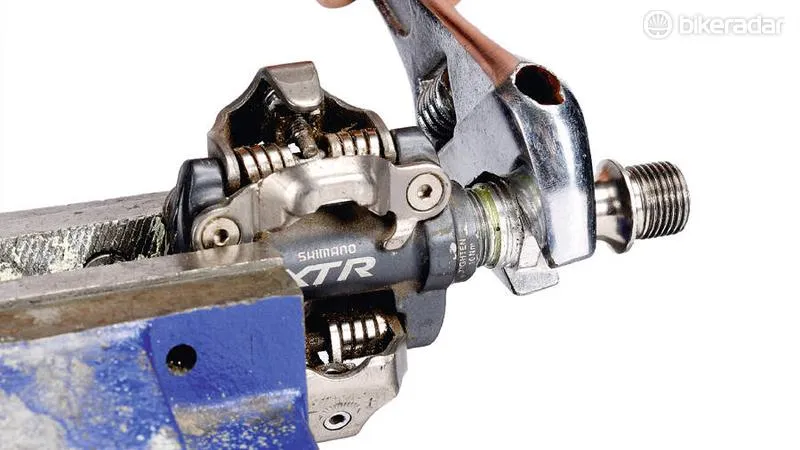
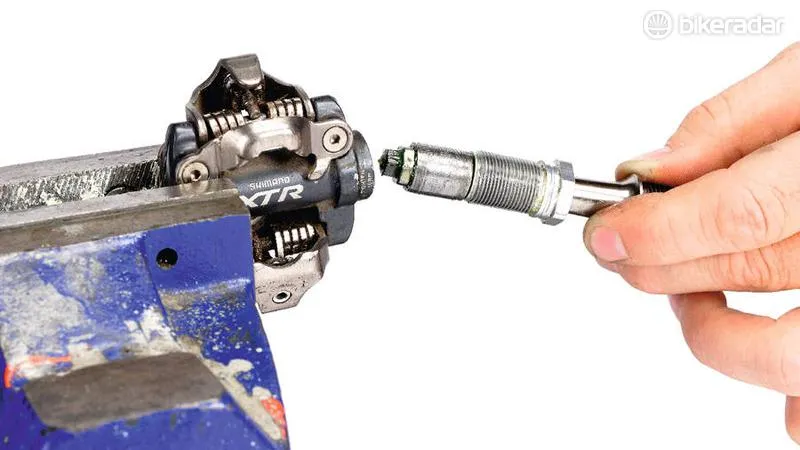
2. Remove axle from body
Lightly clamp the pedals in a vice and begin to undo the lockring/threaded collar — you’ll need a 17mm spanner if your pedals have wrench flats or a Shimano TL-PD40 tool if it has a splined collar.
Note that the right (driveside) pedals collar is reverse threaded. This can be quite tight, so be careful not to round it.
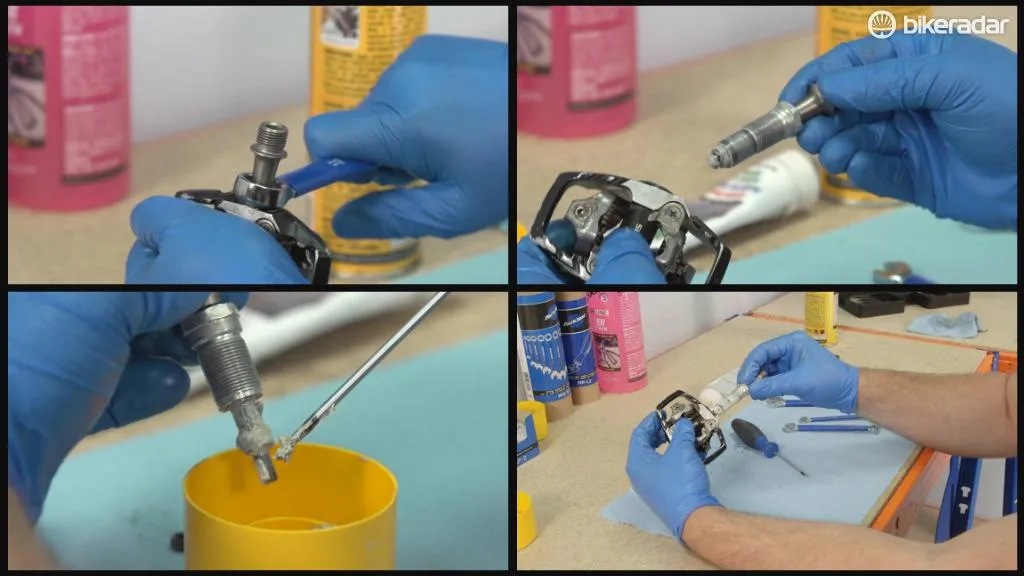
3. Clean axle and pedal body
Once the collar is free of the pedal body, you should now be able to slide the pedal apart.
If you’ve used your pedals for any length of time, you’ll see that most of the factory-installed grease has turned a gungy black colour.
The process I’m about to describe flushes any old grease from the bearing assembly, but if you’re the type who likes to do a job thoroughly (i.e., you’re not lazy like me), flush the pedal body and axle with degreaser then wipe it down with a lint-free rag — a cotton bud or rag wrapped around a screwdriver is very helpful for getting into every nook and cranny inside the pedal body.
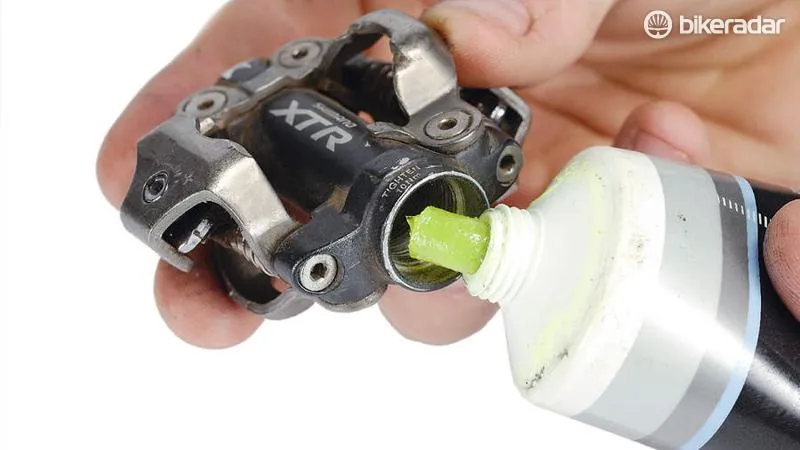
4. Reassemble the pedals
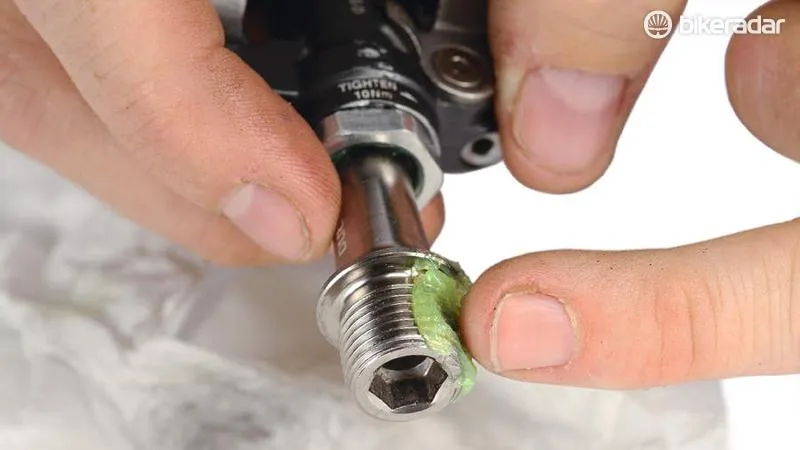
Fill the pedal body, almost to the brim, with a heavy waterproof grease. If you prefer your pedals — particularly road SPD-SL pedals — to ‘drop’ into place, you may want to use a lighter grease, but you will likely service them more often.
Insert the axle back into the pedal body and screw the two back together with your fingers.
Grab your spanner (or TL-PD40 tool) and tighten down. If your SPD pedals have nylon collars, be particularly careful not to cross-thread them as you tighten the pedals.
As you tighten down the lockring, the axles reinsertion will force the old contaminated grease out — if you’re particularly lucky, it’ll make deeply satisfying farting noises during this process.
There’s absolutely no harm in repeating this process twice if you want to be certain all of the nasty old grease and dirt has been driven out of the pedal.
Once tightened to spec, carefully wipe off the excess grease that’s been purged from the pedal body.
If the grease has forced it out, poke the little o-ring back into the lock ring with a pick or paperclip.
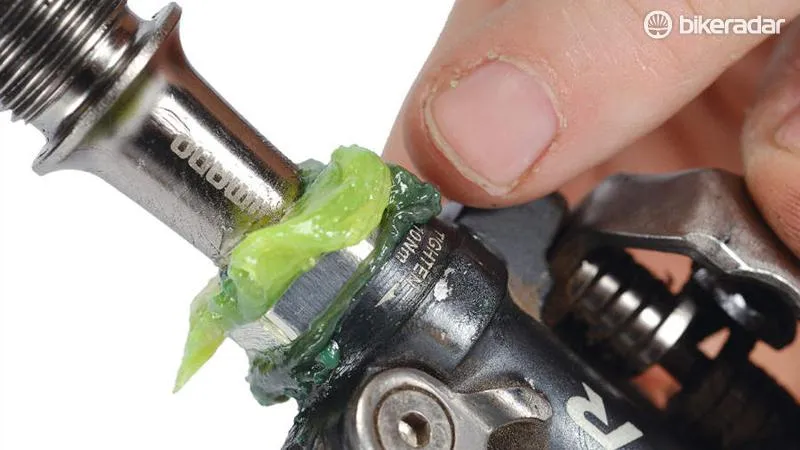
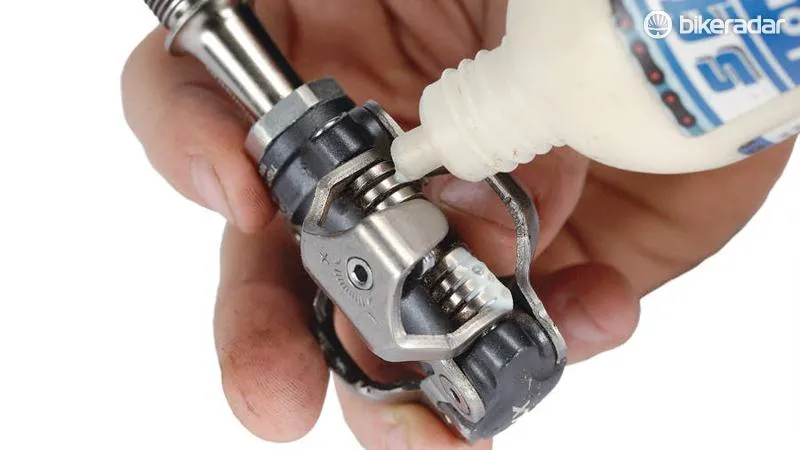
5. Lube cleat jaw springs
This is a good time to inspect the cleat jaw springs — the pedals’ performance relies on the ability of the coil steel springs to operate freely and with the minimum of friction.
When the pedals are factory fresh, they come with a glob of green Shimano grease, but you only need to lube the springs with a drop of medium-weight oil. Adding too much oil will just attract excess grit to the area.
6. Clean threads
Clean the pedal threads in the crank arms with a bit of degreaser. Clean the threads on the pedals the same way. Now lightly grease both sets of threads — cranks and pedals — refit pedals and you’re good to go!
Full bearing assembly service
If you're interested in performing a full strip down on your pedals, check out this other guide on our YouTube channel.
How to service Shimano pedals
The following steps are largely unnecessary, as the process of filling the pedal body with grease and replacing the axle flushes any old grease out of the bearing assembly very effectively.
However, if your pedals have developed any play or just really, really want to make sure everything is as clean as can be, this may be useful for you.
1. Undo bearings
With the axle clean and free from contaminated grease, use a 7mm and 10mm wrench to undo the locknut on the end of the axle.
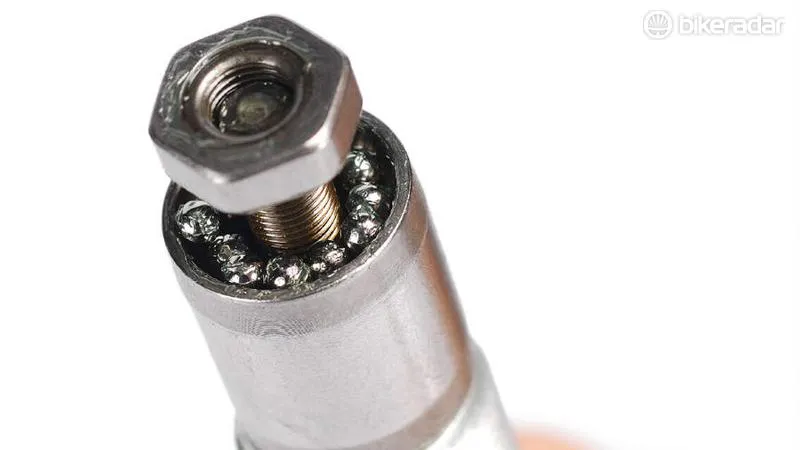
2. Inspect bearings
The bearings in modern Shimano pedals are pretty well sealed.
That said, it’s still good practice to check the condition of the bearings — if it’s all good, grease it lightly before loading the 10mm nut.
3. Adjust bearing tension
Tighten down the 10mm nut until there is no play — it might take a couple of attempts to get the bearing smooth with no play or binding. As you screw down the 10mm nut, make sure none of the tiny balls manage to creep out of their race.
Once you’re satisfied that the pedals are running as smooth as possible with no play, lock down the 7mm nut and back the 10mm nut off the tiniest amount to cinch everything up.
4. Reassemble the pedal
Jump back to step four in the 'Five minute Shimano pedal service and set up' above for instructions on how to put your pedals back together.
Top tips
How to service Shimano pedals with nylon lockring
Older model SPDs (and some modern budget models) use a threaded nylon locking collar to keep the axle and pedal body together.
This can be tricky to remove — especially the first time — so go easy with the mole grips, or better still, use the special plastic TL-PD40 tool and fit that to a bench-mounted vice.
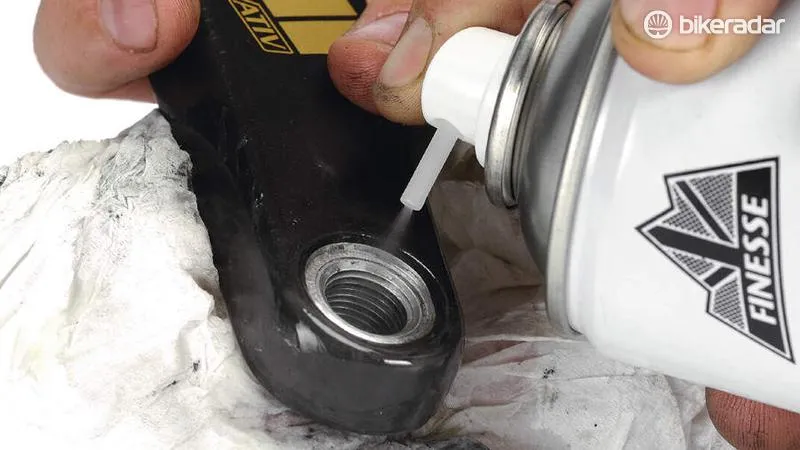
How to make it easier to clip into SPD pedals
Some shoe and cleat combinations aren’t immediately well suited. You can create a smoother entry and exit from the pedals by gently trimming away some of the rubber surrounding the cleat recess on the sole of the shoe with a sharp blade.
This means less sole material is pressing on the pedal. Go carefully though, since removing too much will make the union between pedal and shoe sloppy. And be careful with the blade, too!
How to stop SPD cleats from squeaking
If your cleats won’t stop squeaking, particularly in wet weather, try rubbing a bit of candle wax around your cleats and on your cleat jaws. This lasts much longer than any lube and won’t attract dirt.