Handlebar grips provide a comfortable connection between you and the steering of your bike. They’re very much a consumable item and sooner or later you’ll be swapping them for a new set.
There’s nothing worse than pulling on your handlebars only to find your grip twists freely, causing a loss of control.
Follow our guide for a fast, easy and safe method of installing a pair of grips.
How to replace grips
Video: How to replace handlebar grips.
This video is part of the Park Tool Maintenance Monday series. You can purchase the Park Tools used in the video at a number of dealers across the UK and internationally. For more maintenance videos, subscribe to the BikeRadar YouTube channel.
Tools for the job
- Degreaser
- Flathead screwdriver
- Multi-tool/Allen/hex keys
- Three long cable ties
Removing regular grips
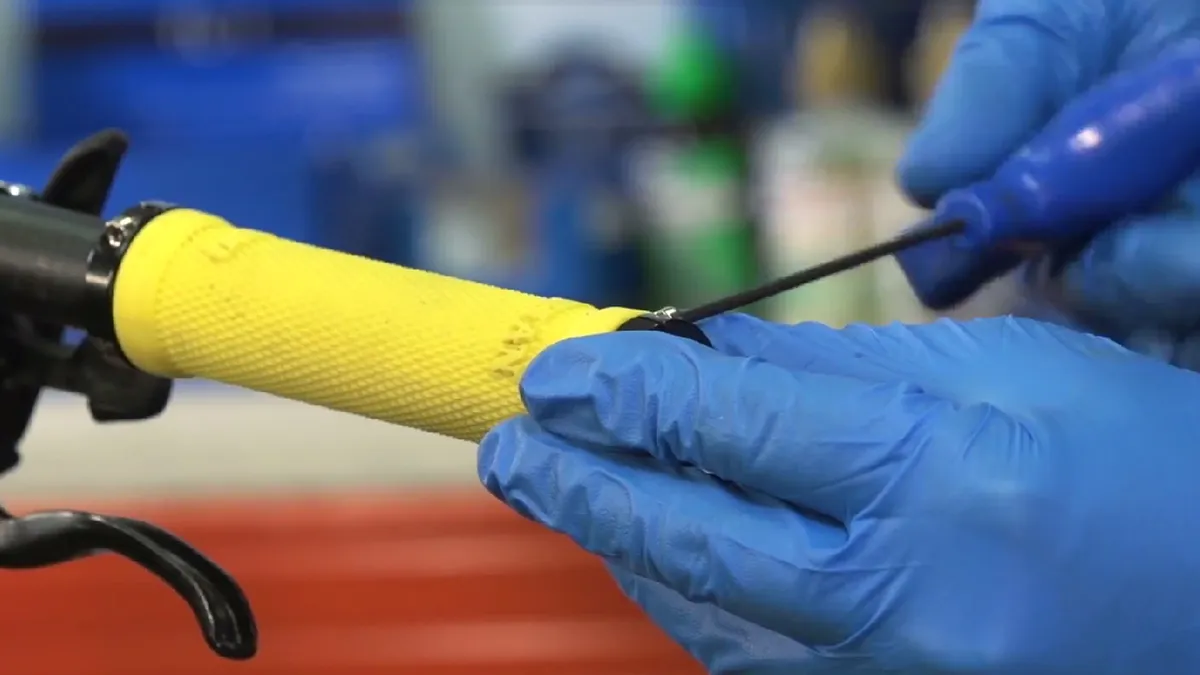
Prise the inner end of the grip up from your handlebar with a flathead screwdriver, being careful not to scratch the handlebar. Then spray a quick shot of degreaser under the grip.
The grip should now be quite easy to work loose from the handlebar, if not, more degreaser is probably necessary.
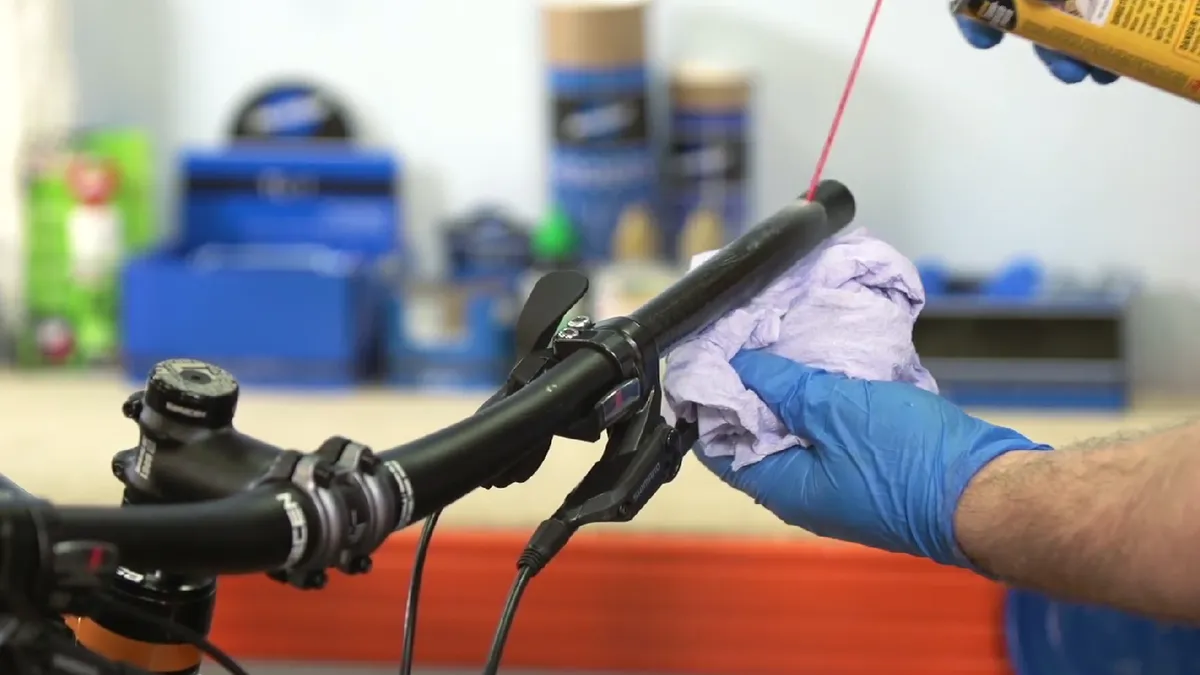
Once the grip is removed it's a good idea to clean up the handlebar surface in preparation for the new grips. Use degreaser and be sure to wipe dry afterwards.
Installing regular grips
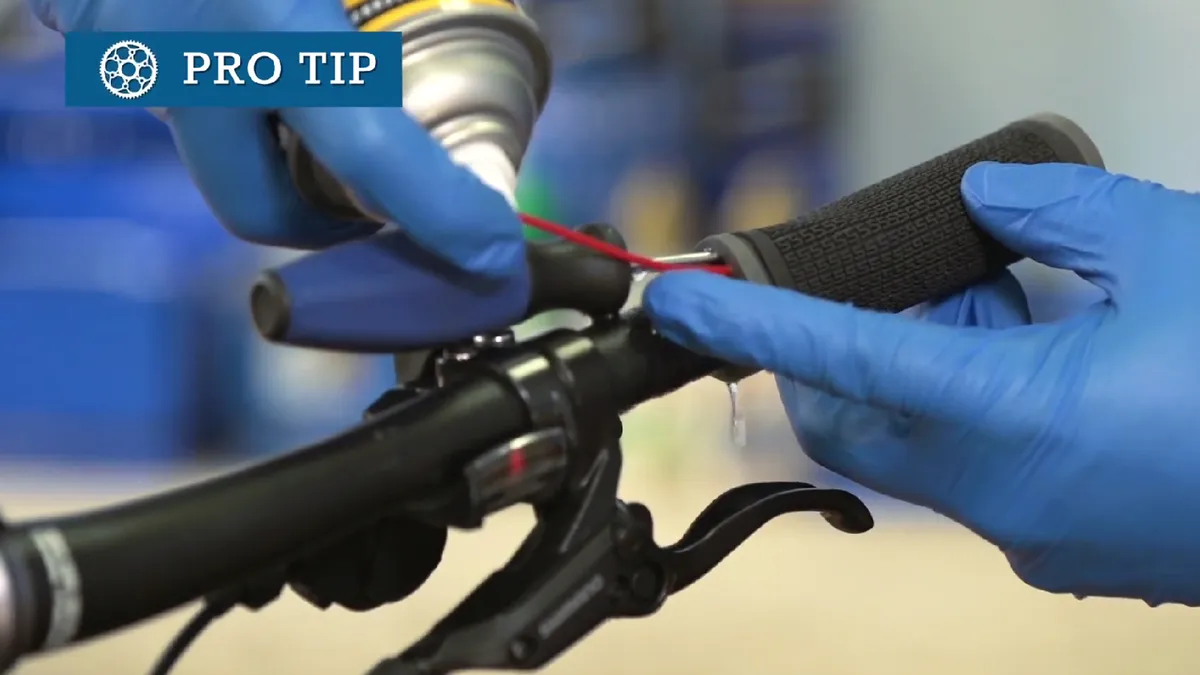
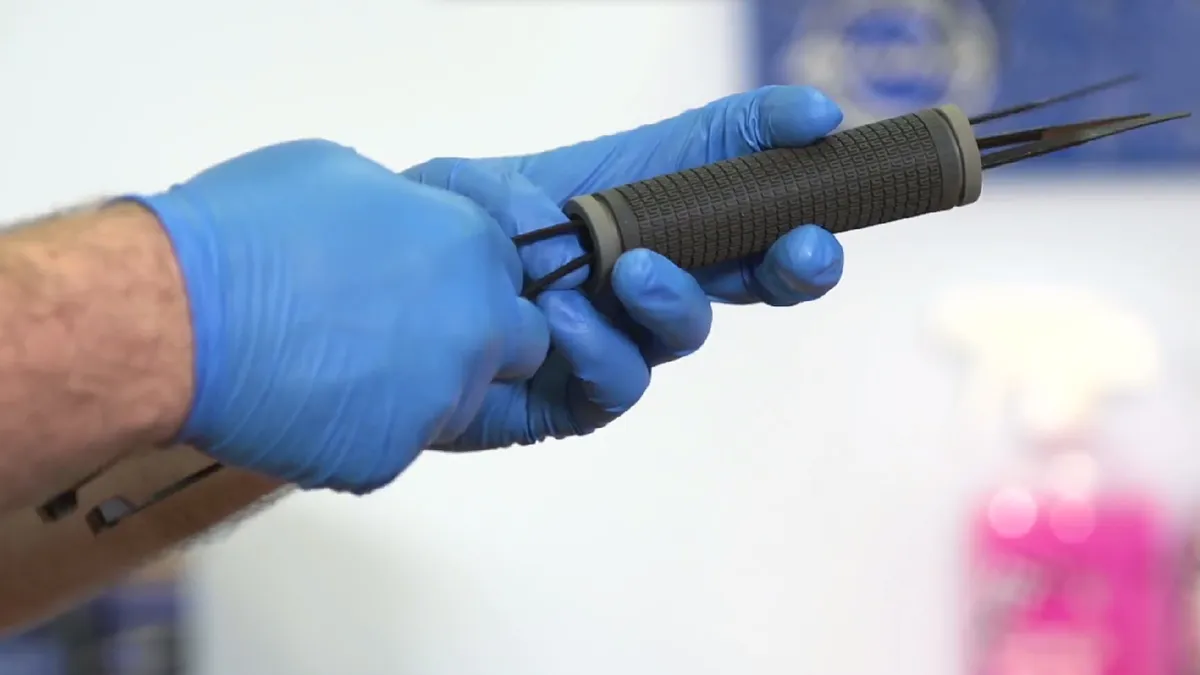
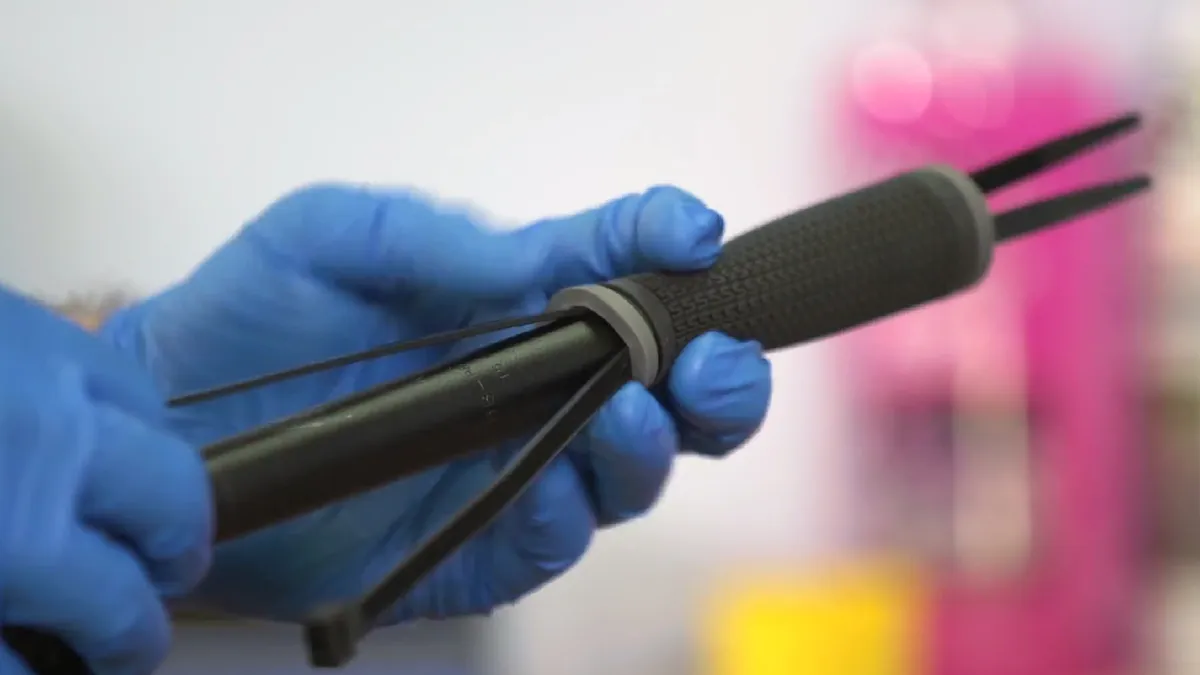
Place three long cable ties through the grip, as demonstrated in the image below. These will act as a low-friction rail for your grip to slide over.
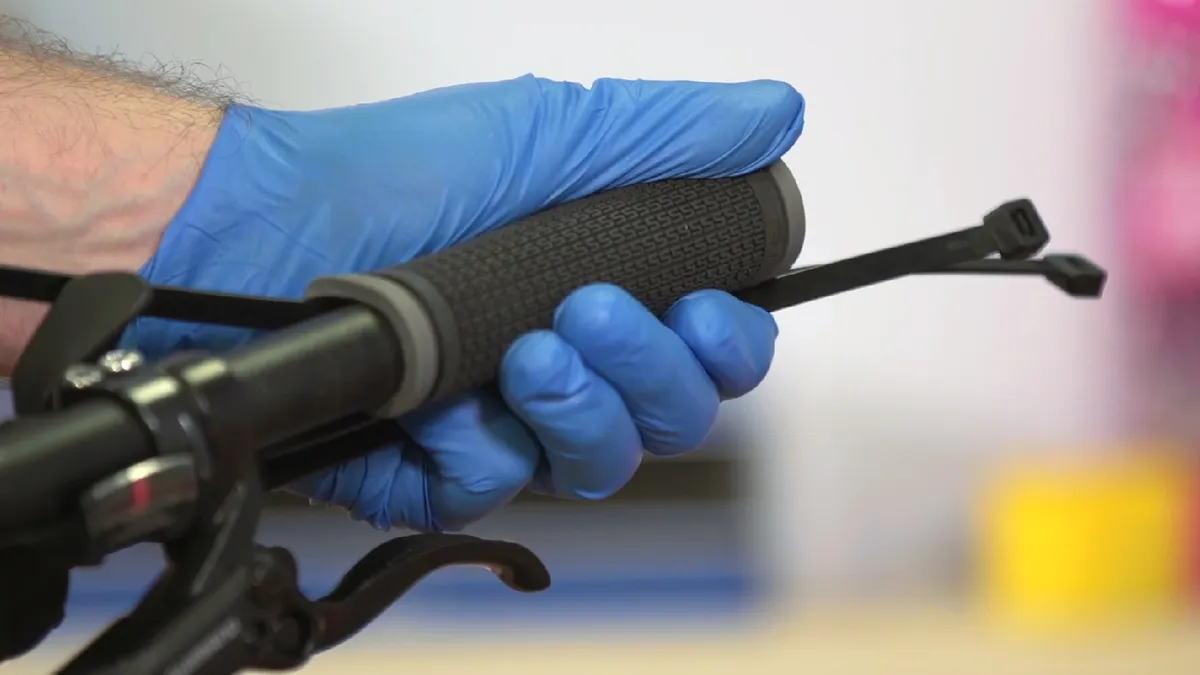
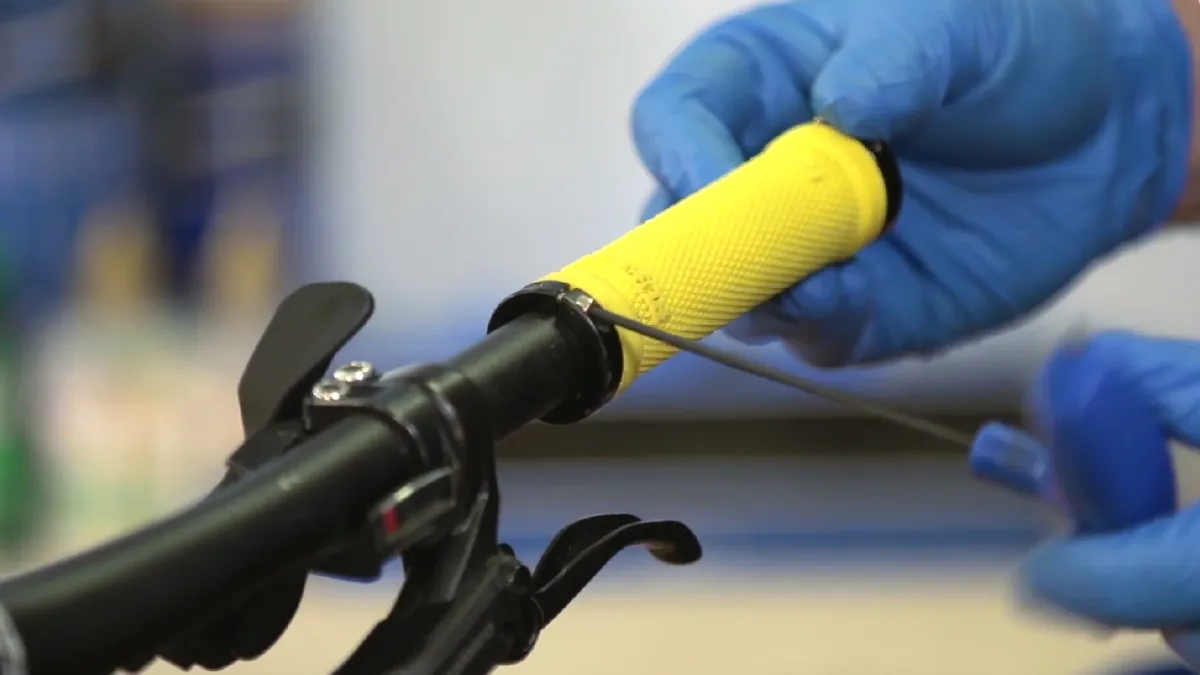
Begin to fit the grip onto the handlebar with the cable ties in place. The grip should pull along the handlebar with relative ease.
Once the grip is in place, the cable ties can be removed one at a time.
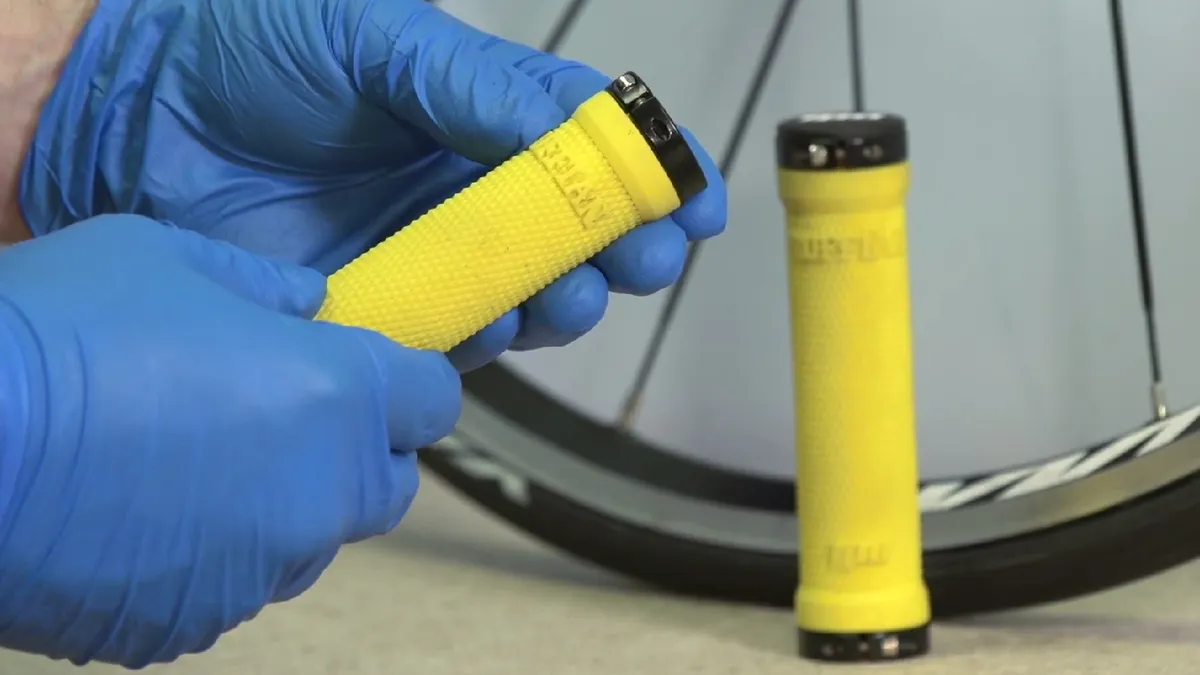
Removing lock-on style grips
Loosen any Allen key/hex heads. Some designs use one clamp but most use two.
Pull the grip towards the end of the handlebar – a light tug should also remove any plastic end caps that are attached.
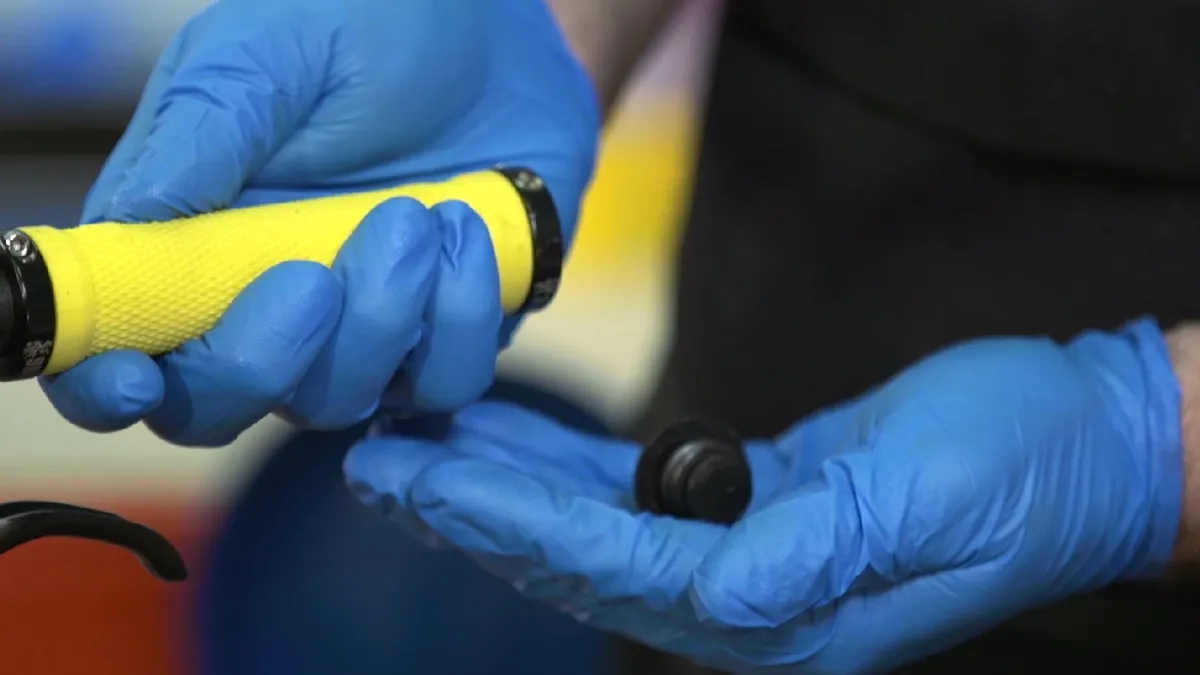
Ensure new grips are assembled correctly – the alloy collars will often need to be pushed into the plastic body of the grip.
If you've got an end cap then now is the time to attach it.

Slide the entire assembly into place and firmly tighten the allen/hex heads on the collars to secure the grip.