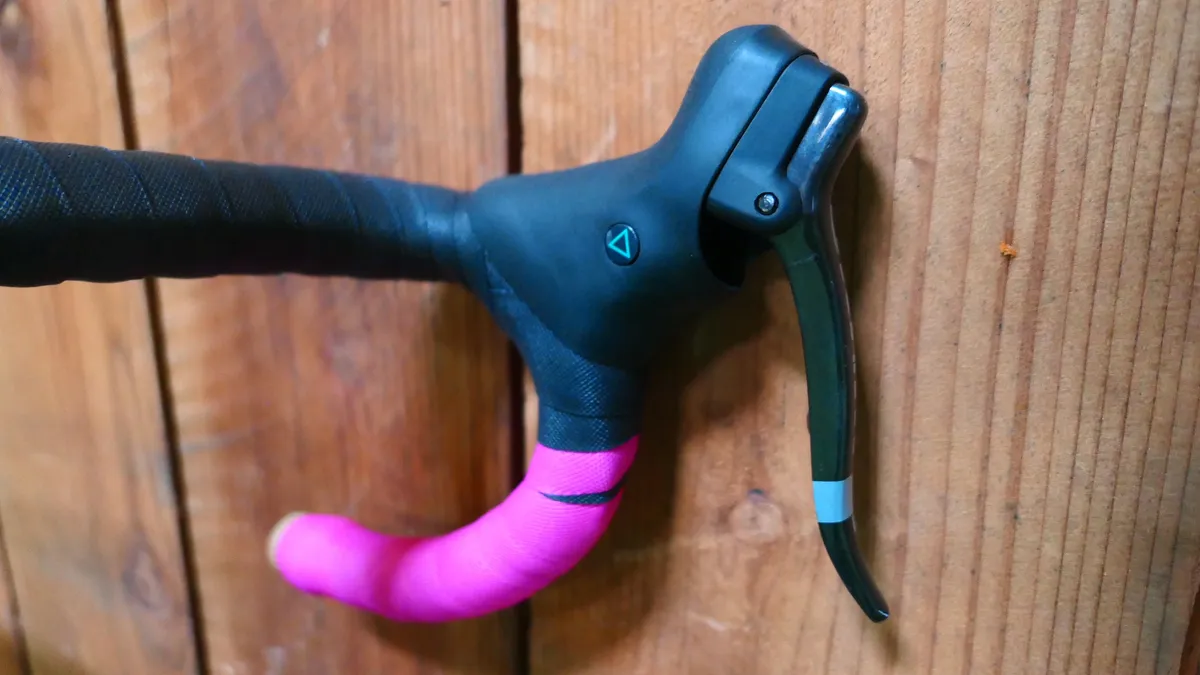
We recently spotted this amazing mashup of SRAM levers, Shimano Di2 climber switches and a PlayStation remote on the Instagram account of Specialized mechanic, Tyler Angelo Marchesano.
Keen to learn more, we spoke to Tyler to find out how, but more importantly, why, he decided to make this unique custom lever.
- Specialized S-Works Stumpjumper 29 long-travel first ride review
- Innovate or die: Robert Egger's wildest bike designs
What inspired you to use PlayStation buttons on the shifters?
The original button and housing on the Shimano Climber shifter is extremely bulky and attaches to the bike with zip ties, which has always bothered me.
If you remove the button housing, the actual switch inside the housing is very small. This opens up a realm of possibilities and got me thinking about other ways the switch could be used.
With the button housing removed, I had to figure out what buttons had the right size and height profile I was looking for. What better than the buttons from an old broken PlayStation controller I had laying around at the house? I had taken them apart as a kid and knew it wouldn’t be hard to get the buttons out…
How exactly did you make the shifters?

To start with, I removed the switch of the Di2 climber shifter from the original housing. I then removed the internals from a set of 10sp SRAM levers I had laying around.
After checking the fit, I proceeded to experiment with how I would mount the buttons on the switch.
There are springs that snap into the switch, and with the buttons so small, I wanted to use those to ensure a good feeling. The spring threaded into an M5 nut perfectly, so I used a two-part epoxy to bond the nut to a carbon plate, on which I would mount the button.
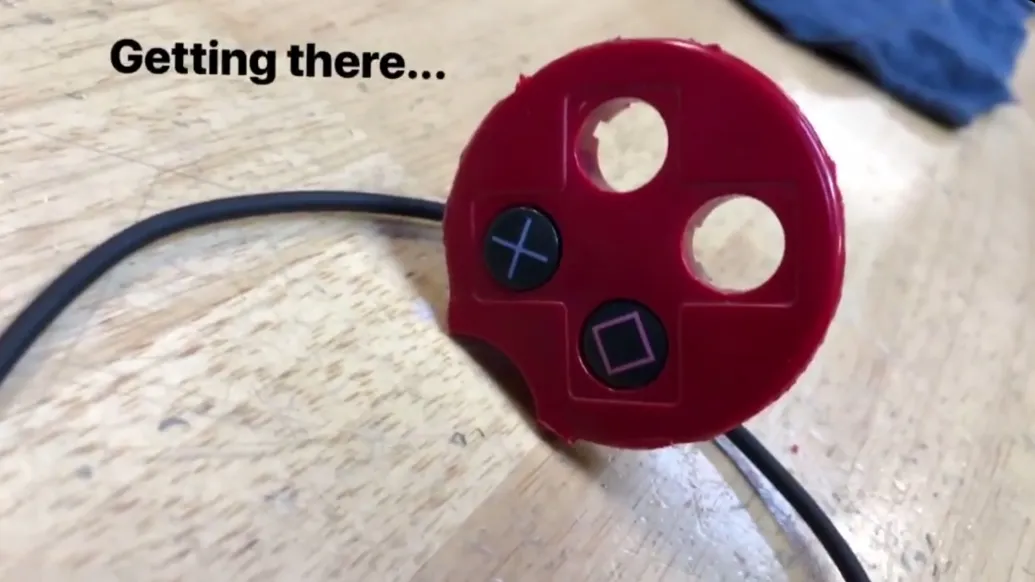
With a little grinding, an M5 nut also fit perfectly into the PlayStation button, so I pressed them in to give a solid surface to mount the button to the carbon plate.
After mounting the buttons, I had to find a way to stabilise them. I decided to cut the housing out of the controller and Dremel it down to fit in the shifter.
I was able to use one of the original screws to fasten the button housing to the controller.
In my original hoods, I used an Exacto knife to cut holes for the buttons, but I wasn’t fully pleased with the aesthetics of the holes. For the final hoods, I ground down a 20mm thru axle skewer, and used it as an oversized punch. This produced a factory-looking cut that I was very pleased with.
Why did you go for that precise mix of components – i.e, why SRAM brakes with Shimano shifting?
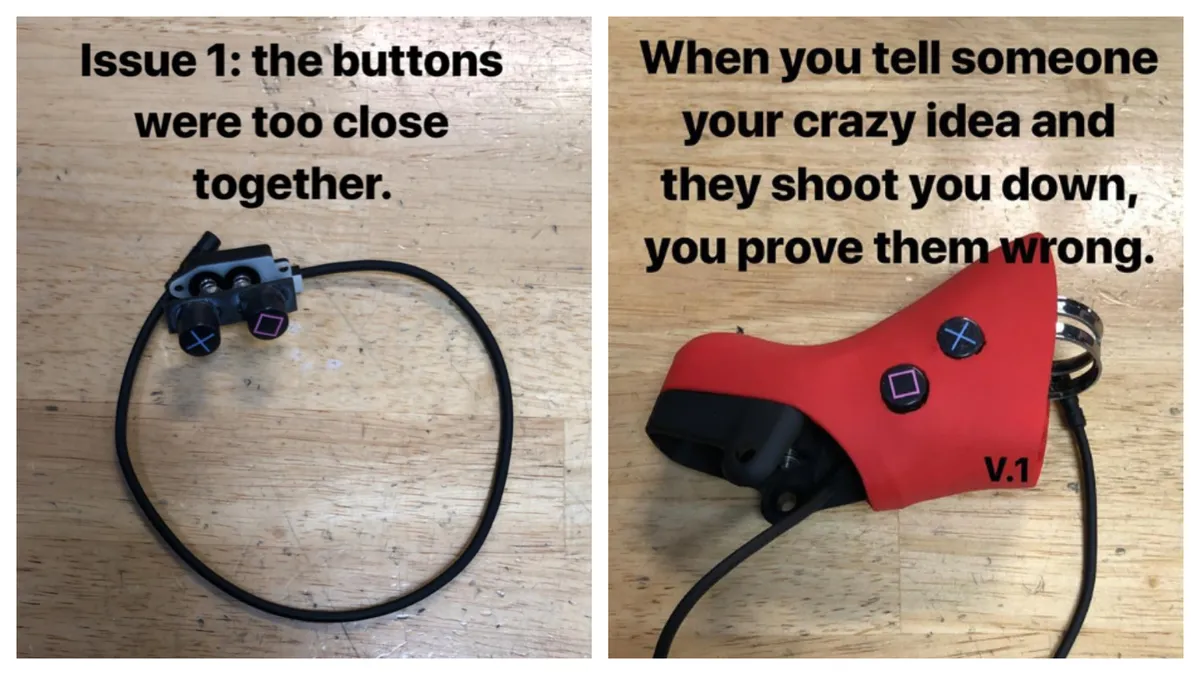
This project started as a wild ‘what if’, based on the parts I had laying around. So many people shot down the idea that I had no choice but to make it happen.
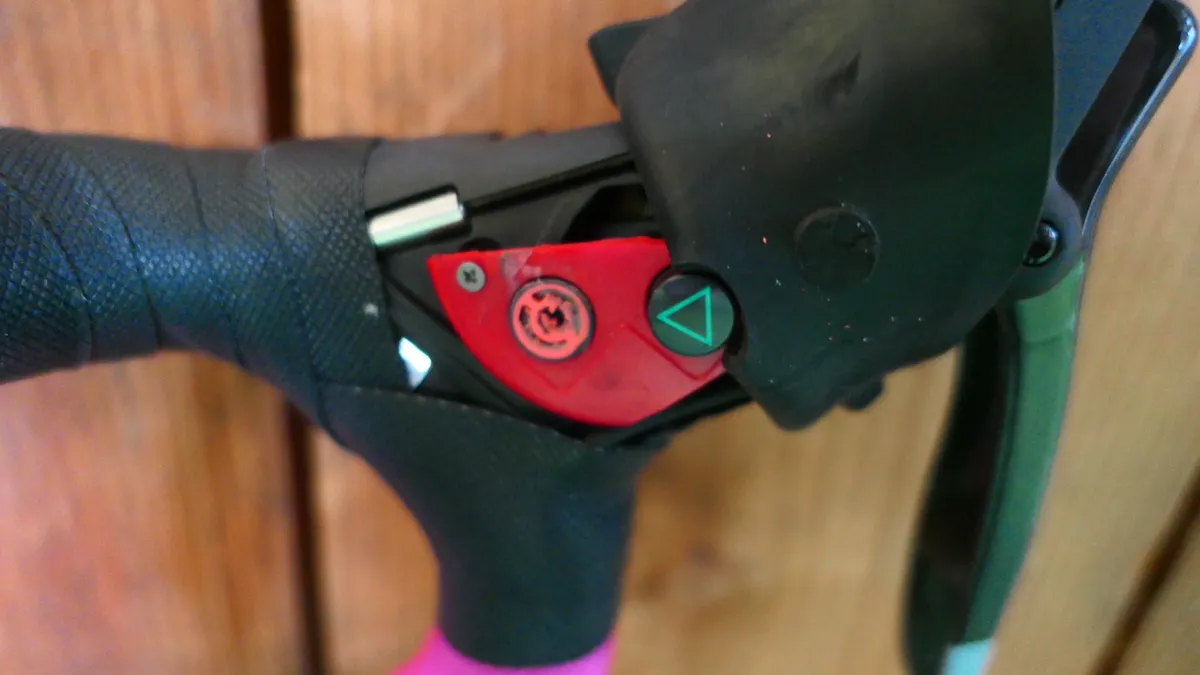
I had gutted SRAM levers a number of times before for 1x or single speed set-ups and knew that with the internals removed, there was quite a bit of room to work with.
I had also taken apart Shimano’s Climber shifter for other projects and had a feeling I could fit one in a SRAM lever. The fact it is a complete paradox just happens to be funny in itself.
What other mechanics ‘hacks’ are you most pleased with?
I wouldn’t say too many 'hacks' to be honest — I'm always trying to find a way to make things look cleaner and do them more efficiently, so the majority of my tinkering is directed towards that.
In my opinion, the worst aesthetics currently in the bike industry are Di2 cockpits and housing. Half look like birds’ nests simply due to a lack of effort or a shop's priority to get something done in a limited timeframe instead of doing it right.
Some quick tips from Tyler
- Use a leather hole-punch to create a clean hole for the sprinter shifters
- File down the edges of a bar-end junction to allow you to get the junction all the way in the bar and eliminate the bulge at the base
- Shrinkwrap is your best friend — no one said it could only be used for Di2, look into cleaning up that 1x setup you have
- Thanks to Tyler for taking the time to answer these questions. To keep up with his latest creations and projects follow him on Instagram

