Zwift is an online cycling game and training platform that enables users to ride, train and compete in a virtual world.
Aimed at eliminating the excruciating boredom of simply sitting on the trainer and staring at the wall, Zwift has exploded in popularity since its release in 2014.
There are a number of different indoor cycling apps available, but Zwift is arguably the most fully featured, and almost certainly the most popular – reports suggest more than half a million people have signed up for an account so far.
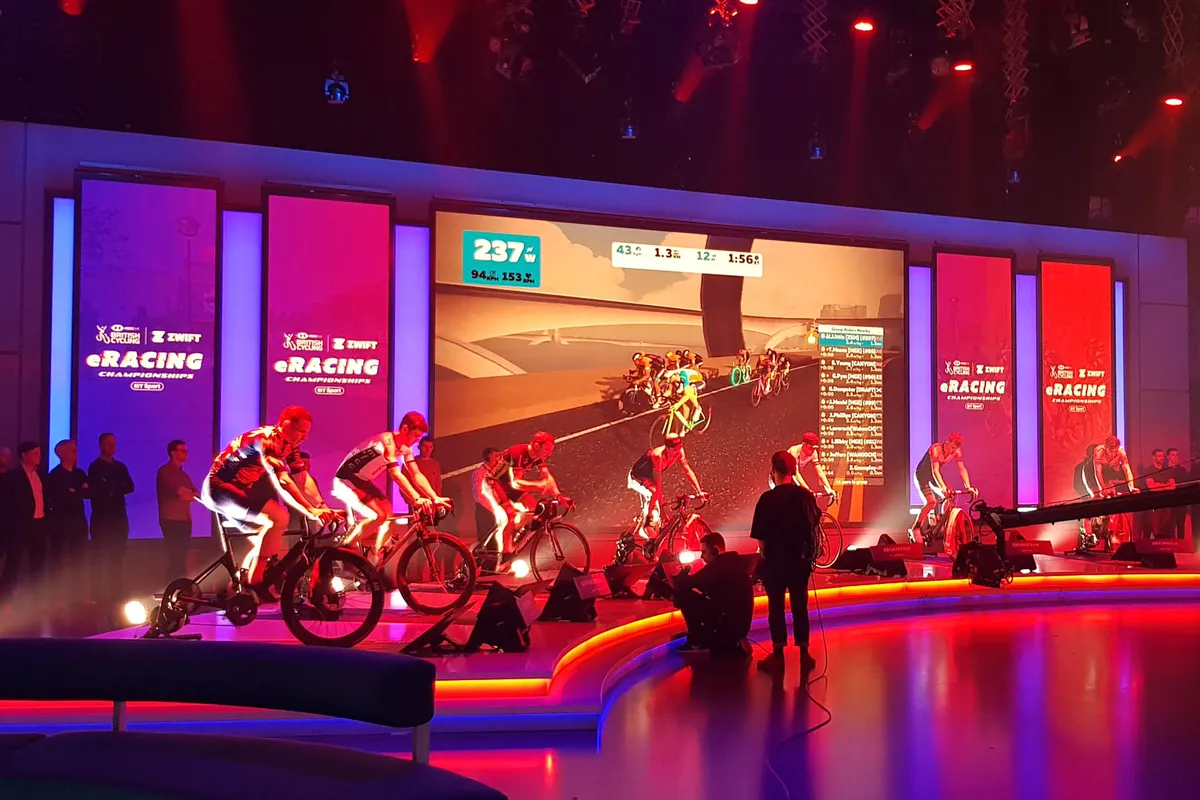
More and more features are being added to Zwift, which is mostly great because it brings a lot of value to an already impressive package.
However, it can also make knowing how and where to start quite daunting.
There’s no need to worry though. We’ve done a mountain of research and put together a comprehensive guide to the virtual training and racing platform. Here’s everything you need to know about Zwift.
What is Zwift?
Zwift is an online, interactive training and racing platform. By pedalling on an indoor trainer or bike, you send your avatar around a virtual course. The harder you pedal, the faster you go.
Zwift has 12 worlds (more on these later), and within each you can navigate the roads as you go.
You can ride with thousands of others on Zwift. You can join group rides and races – and even get a draft from other riders – or just join one of the worlds and jump on with those riders when you want to. You can also do structured power-based workouts.
It features a multitude of gamified elements that encourage you to ride longer and harder, with the goal of increasing your fitness. After all, Zwift’s catchphrase is ‘Fun is fast’.
Of course, if that doesn't sound like your cup of tea, there are many other great apps to try, such as Wahoo Systm, TrainerRoad and Rouvy.
How does Zwift work?

Zwift takes the input from your bike – either via a power meter, a smart trainer or just a speed/cadence sensor using ANT+ or Bluetooth – and uses an algorithm to translate your input data into your avatar’s speed on the virtual course.
It takes into account your weight, your power or calculated power, the road or trail gradient and the draft, or lack thereof, from other riders.
You can use Zwift on a computer (PC or Mac), an iPhone, an iPad or an Android smartphone or tablet.
Zwift is also compatible with Apple TV, so if you’ve got one of those you can set yourself up right in front of the TV.
How much does Zwift cost?
Initially, it's free; although sadly not long-term.
You can get a free 14-day trial if you register for a Zwift account online, but after your trial period ends it costs £17.99 / $19.99 (plus sales tax) / €19.99 per month to continue using it.
o Annual membership costs £179.99 / $199.99 (plus sales tax) / €199.99. New members get 12 months for the price of ten.
What equipment do I need to use Zwift?
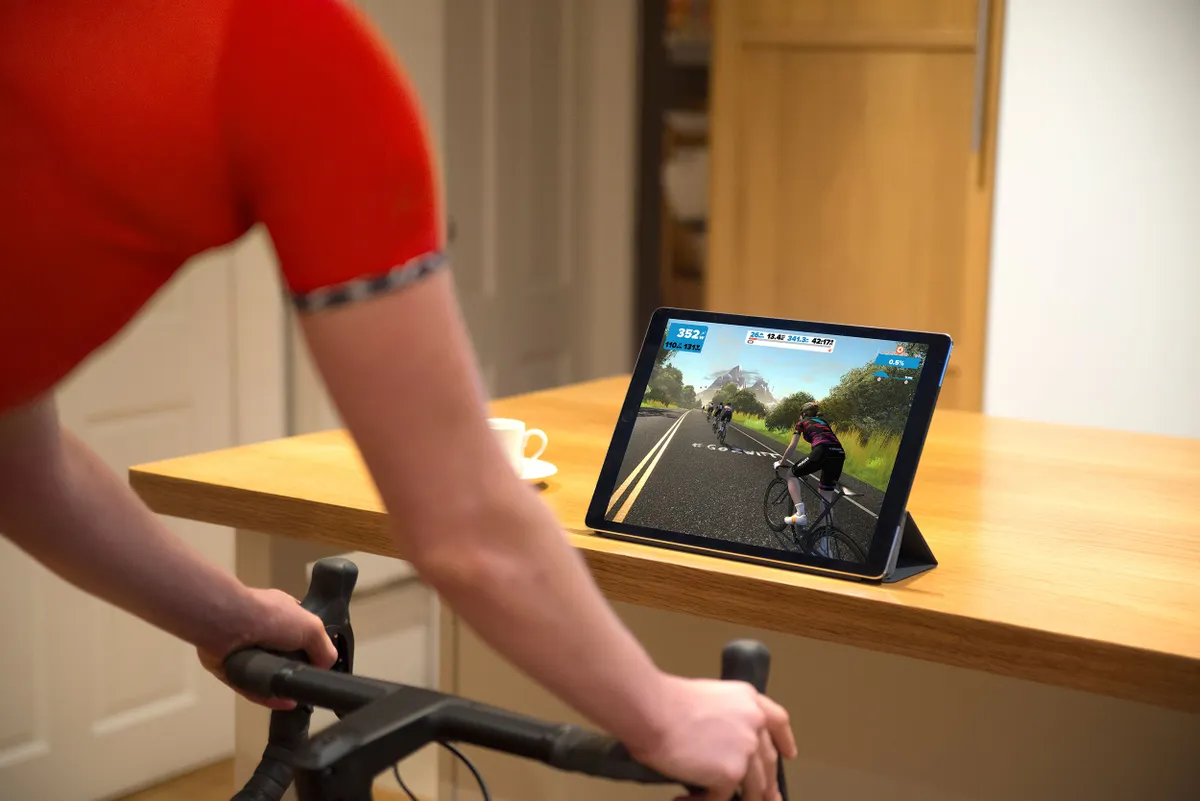
The basic list of equipment you need is:
- A bike (or smart bike)
- A trainer or a set of rollers
- A Bluetooth, WiFi or ANT+ measurement tool: a power meter, smart trainer or speed/cadence sensor
- A computer, smartphone or tablet with Bluetooth or ANT+ (or an ANT+ USB dongle).
As the main source of input data for the virtual world, the Bluetooth, ANT+ or WiFi-enabled measurement tool you use is the key piece of equipment (after your bike, obviously).
If you’re really committed to your indoor training (and have the required cash lying around), you can get a dedicated indoor bike.
Zwift sells its own Zwift Ride Frame, which is an affordable way to convert a smart trainer into a smartbike.
You can attach the Zwift Ride Frame to a range of trainers from Wahoo, Elite, Decathlon and others, or buy Zwift Ride bundled with a Wahoo Kickr Core smart trainer for a ready-to-ride package.
Zwift Ride includes the Zwift Cog, which offers virtual shifting from a single rear sprocket.
More expensive alternatives include the Wahoo Kickr Bike and Wattbike Atom. These offer fully integrated indoor-training solutions, although they're a lot less portable than Zwift Ride Frame.
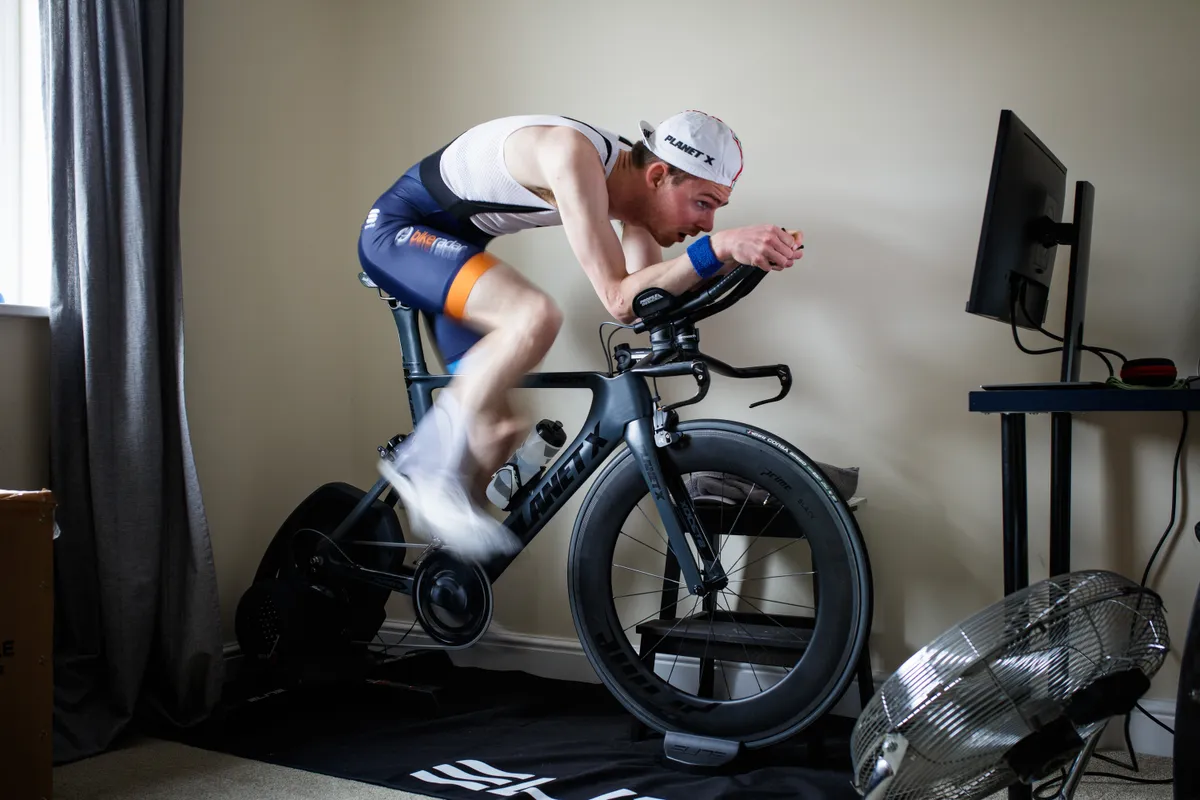
A smart trainer is the next option. Like an indoor smart bike, a smart trainer will measure your power directly and transmit that data straight to Zwift.
Beyond simply measuring power, smart trainers are also able to simulate course gradients – changing the resistance according to the slope – and can be controlled by Zwift in Workout mode to make sure you’re hitting the prescribed wattages of a training session (again, more on this later).
Smart trainers still aren't cheap, but prices have come down in recent years as the market has become more competitive. If you want to know how to get the most out of Zwift on a budget, be sure to check out our guide.
If you have a power meter, you can make do with any kind of trainer or rollers. Zwift will use the data from your power meter to calculate your in-game speed, but obviously you’ll miss out on simulated gradients and controlled Workouts that come with using an indoor training bike or smart trainer.
A speed/cadence sensor is the most basic option and enables you to use your regular bike (with no power meter) attached to a conventional trainer.
Zwift will then crunch the numbers to estimate your power. It’s not the most accurate or realistic option, of course, but it does have one major advantage: it’s the cheapest way to get started on Zwift.
For more on this topic, check out our guide to the best Zwift setups for every rider.
How do I get started on Zwift?
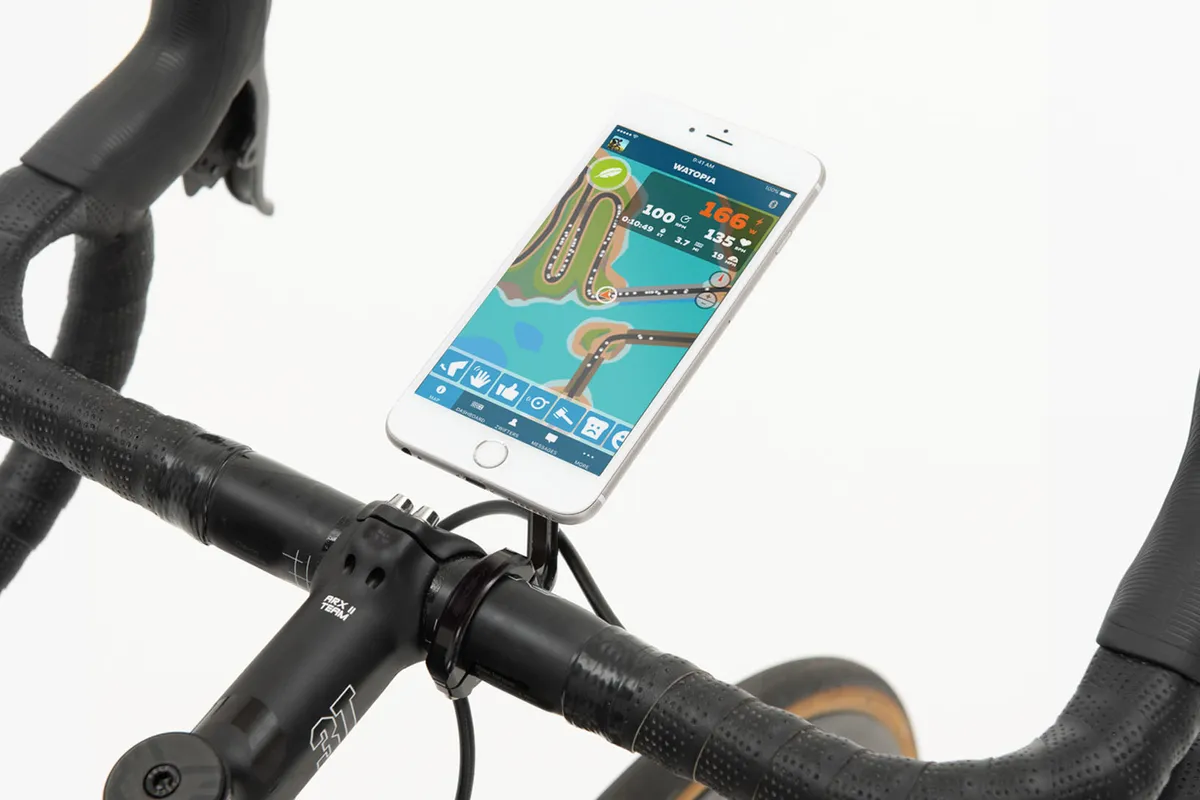
First, you need to sign up for an account.
Using your Mac or PC, you can do it online on the Zwift website. On a tablet or smartphone, you can download the Zwift app from the Apple App Store or Google Play, and sign up through that.
You can sign up for a subscription (£17.99 / $19.99 plus sales tax / €19.99 per month) straightaway or start a free 14-day trial. Zwift also offers an annual membership, which works out less expensive.
If you’re using a computer or Apple TV for Zwift, we also recommend downloading the Zwift Companion app from the App Store or Google Play.
This app puts a number of convenient features at your fingertips, such as changing the direction of your avatar and messaging other Zwifters.
The Companion app is also a great way of exploring and signing up for the many events that Zwift offers – such as group rides, group workouts and races.
Once that’s all set up and you have the app running, you need to pair your devices. These should appear on-screen as clickable options once you’ve woken them up.
Next, you simply choose which world you want to ride in.
What about Zwift hardware?

The foundation of Zwift's hardware platform is its Zwift Cog.
Zwift Cog is a smart single-sprocket cassette, which attaches to your trainer and provides virtual shifting, so there's no need for a derailleur.
Version 2 offered easier alignment and quieter running. You can use the Zwift Cog with your own bike attached to your trainer.
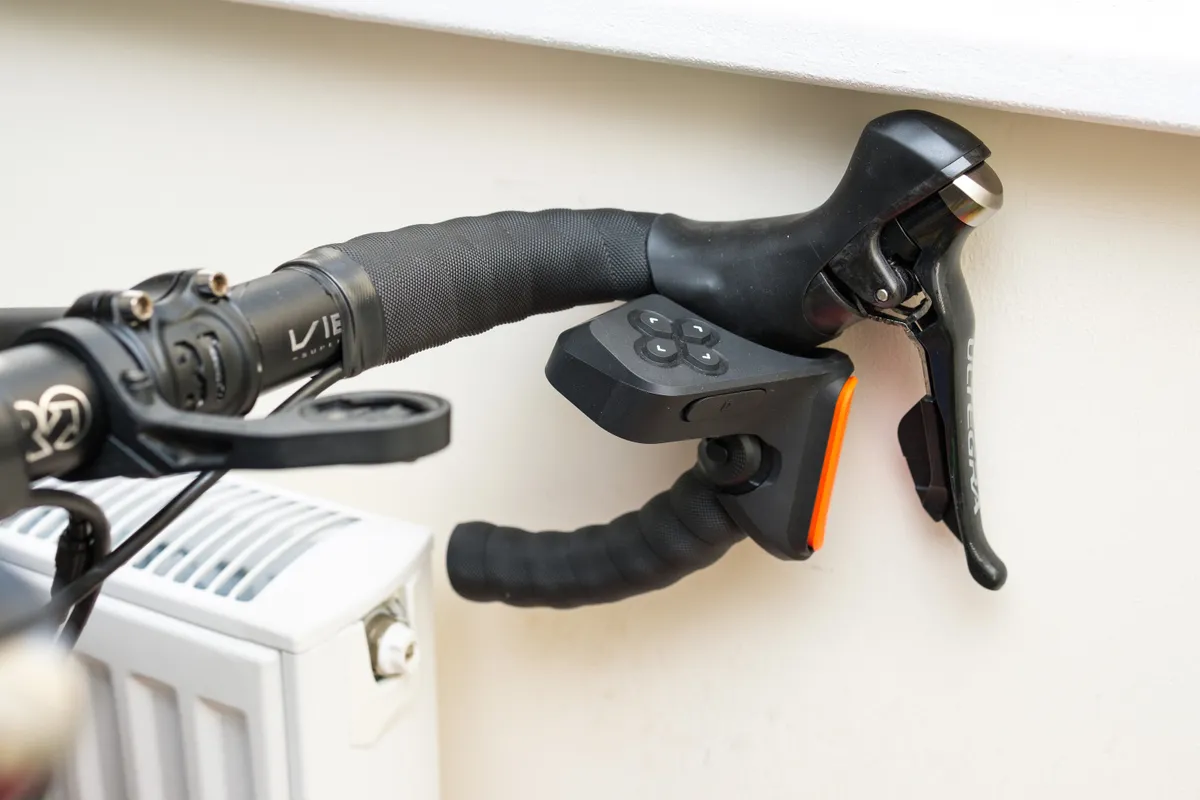
Resistance and shifting can be controlled using the small Zwift Click controller, which sits on your bars and uses Bluetooth to alter the resistance in the Zwift Cog.
Zwift also offers the Zwift Play controller, which adds in-app steering and braking, as well as enabling you to navigate menus and other Zwift functionality.

Zwift has gone further by offering a modular smart bike platform, which uses Zwift Cog and Zwift Play to provide a complete indoor-riding environment.
Zwift Ride was initially launched as a package with the Wahoo Kickr Core smart trainer, to provide a smart bike that significantly undercuts other options, priced at £1,199.99 / $1,299 / €1,299.
Zwift Ride can now be bought as a standalone Smart Frame as well, priced at £749.99 / $799.99 / €799.99.
This enables you to use it with an existing trainer, with a range of different models compatible with the latest version of the frame.
These include the popular Wahoo Kickr V6 and compatibility is being extended to a number of other trainers.
Some of these will be sold with the Zwift Cog pre-installed and boxed with the Zwift Click controller. You'll be able to recognise them by the Zwift Ready decal on the box.

The Zwift Cog, enables you to use almost any bike with an 8- to 12-speed drivetrain.
Rather than shifting between gears on your bike, you can select from the wide range of 24 virtual gears using the Zwift Click wireless shifter included.
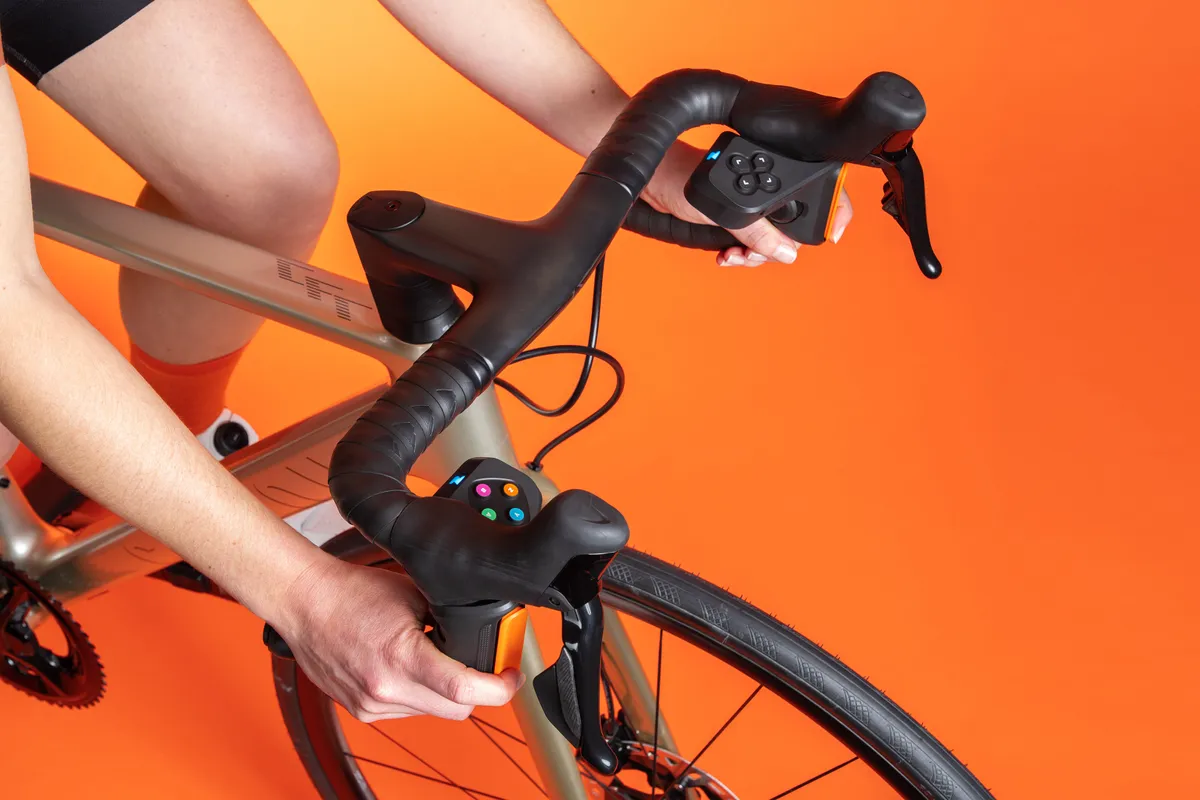
The Zwift Play controllers can also activate Zwift's virtual shifting and can be used with or without the Zwift Cog. These drop-handlebar mounted controllers look just like video game controllers and essentially eliminate the need for a touchscreen or keyboard and mouse.
Functionality ranges from steering and shifting to navigating menus, using PowerUps, changing workout intensity and more.
Zwift Play can be purchased separately for £99 / $99 / €99.
Which courses can I ride on Zwift?

There are currently 10 different worlds in regular use on Zwift:
- Watopia
- France
- Innsbruck
- London
- Makuri Islands
- New York
- Paris
- Richmond
- Yorkshire
- Scotland
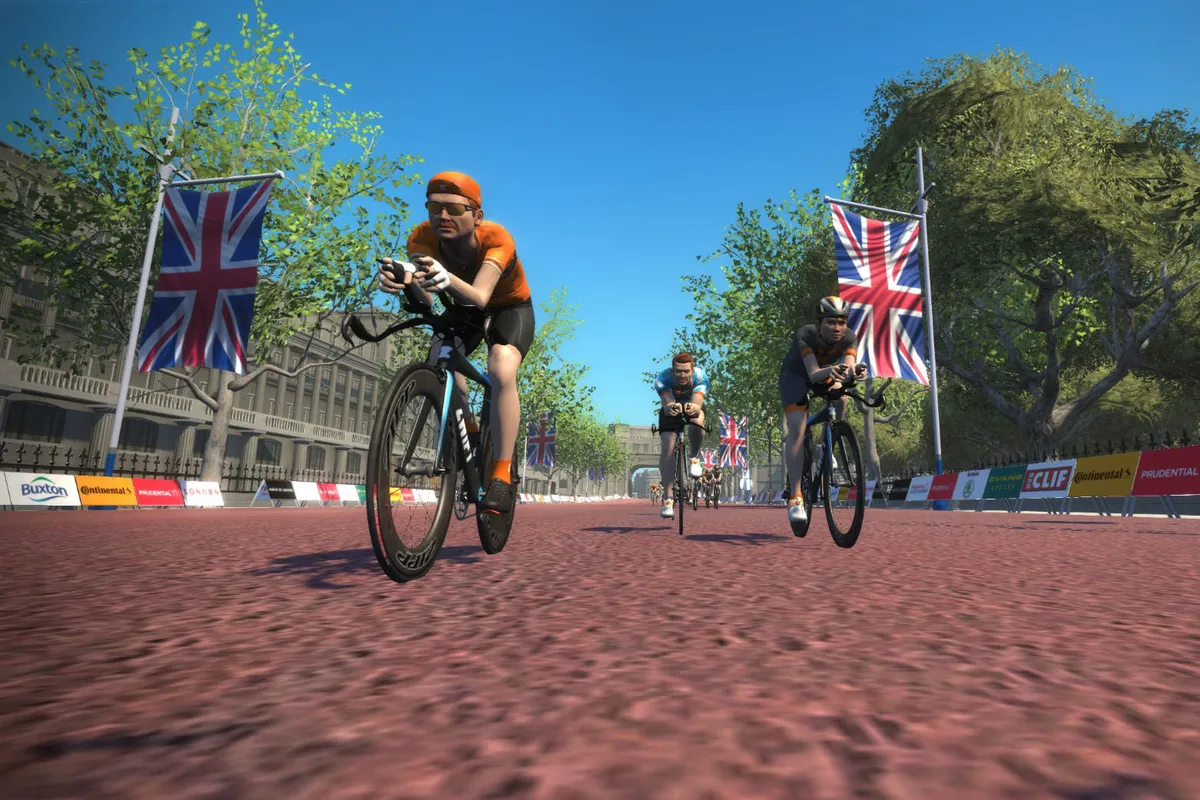
Each of these Zwift worlds has several preset courses for you to ride, or you can just pedal freely around each map.
Zwift periodically adds to its worlds too, adding an expansion to the Watopia map in November 2024, for example.
There is a catch, though. On any particular day, there will be only three worlds available to ride: Watopia (Zwift’s original and most fully featured virtual world) and two 'guest worlds’ (two of the others).
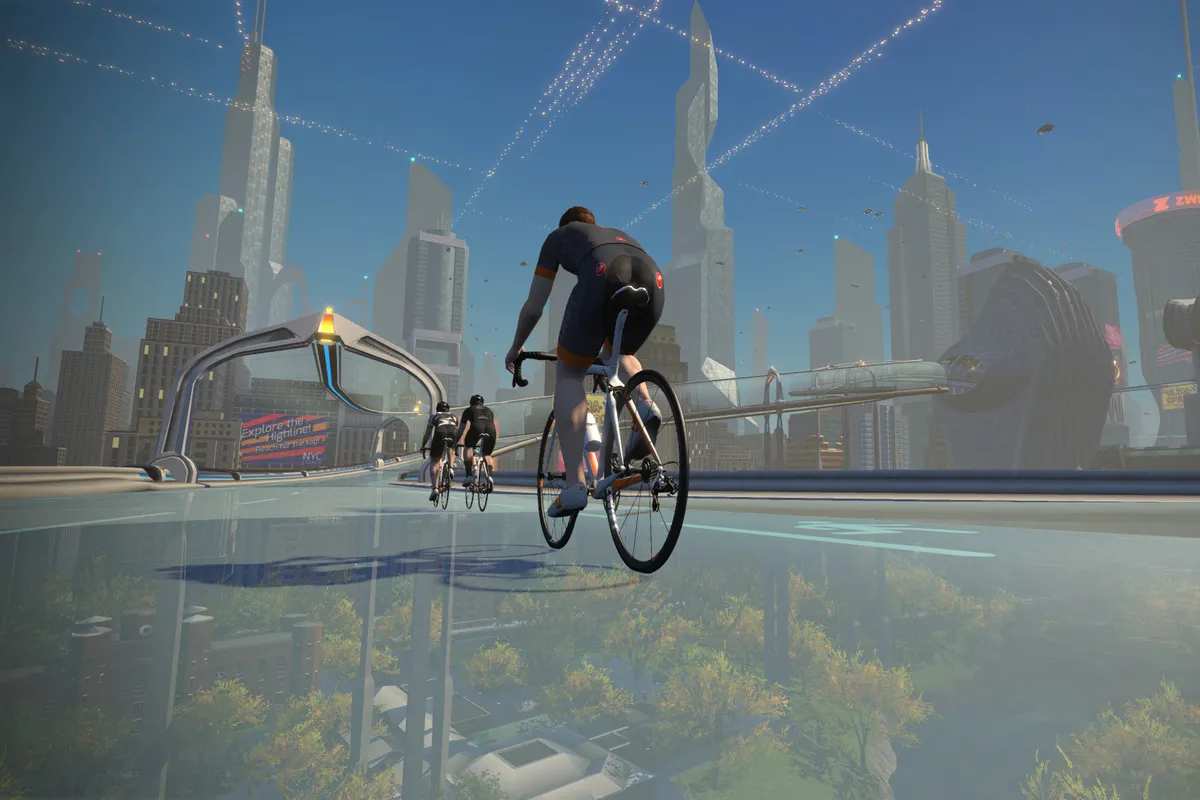
This might sound restrictive, but Zwift is designed to be a social platform, and this stops the user base spreading out too thinly across the platform.
With this feature in place, you’ll always have other people to ride with (and against).
If you want to know when a particular world will be available to ride, you can see the schedule for the coming month on the right of the World Choice screen.
Alternatively, you can schedule rides with your friends in any of the 10 worlds using the Meetups feature in the Zwift Companion app.
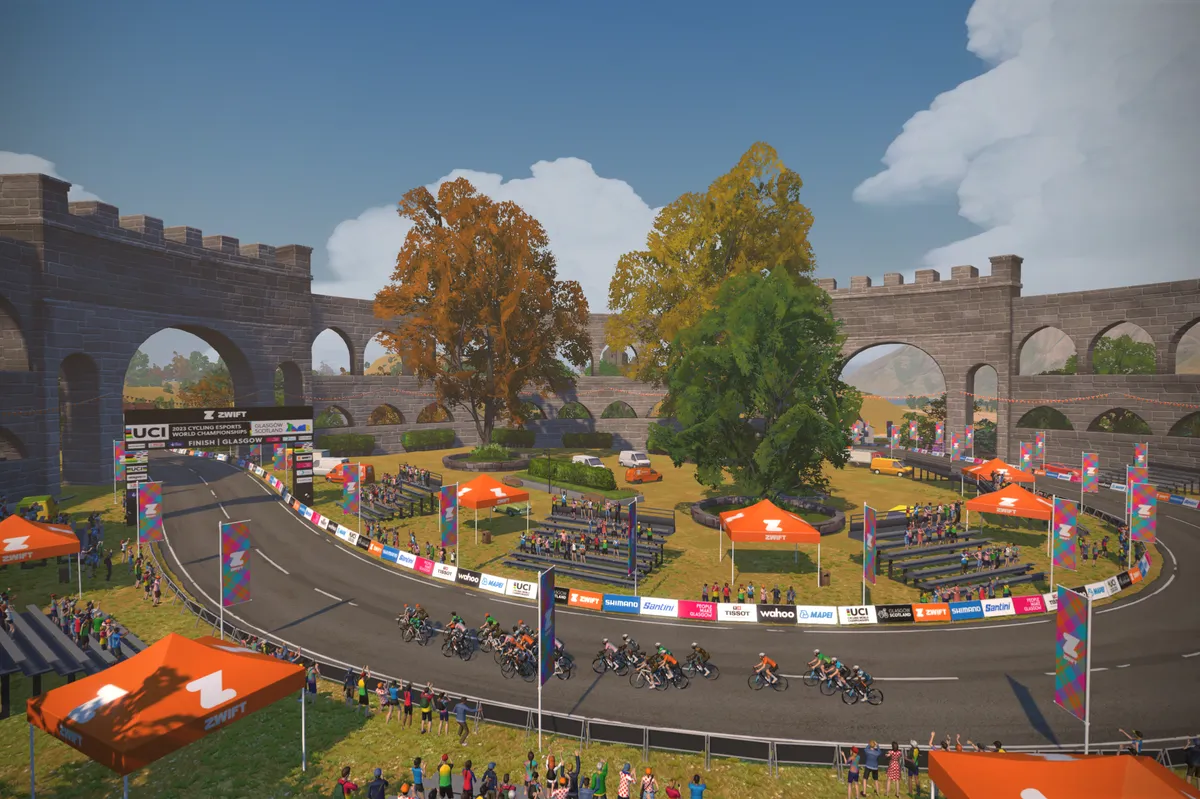
There are two other event-only world maps:
- Bologna
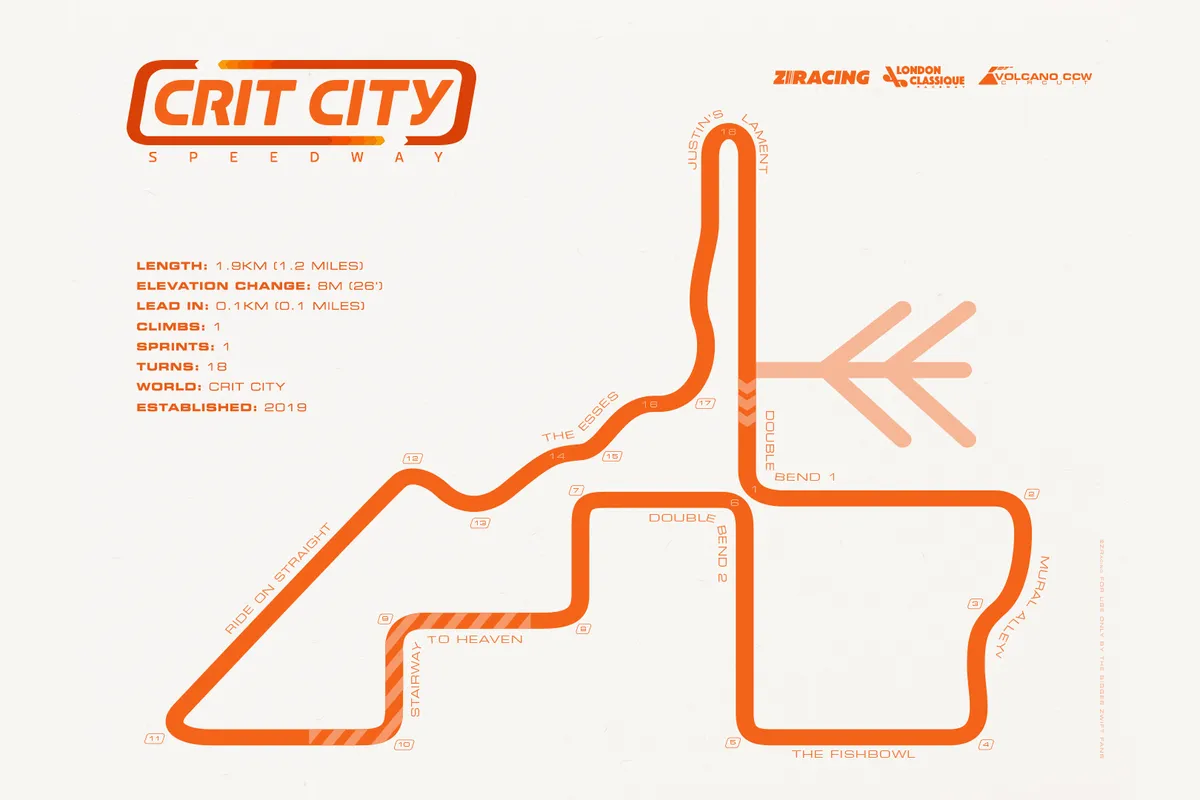
- Crit City
These two maps are not part of Zwift's regular 'guest world' rotation and can only be accessed via in-game events such as races (more on Zwift racing below).
How do I join a group ride on Zwift?
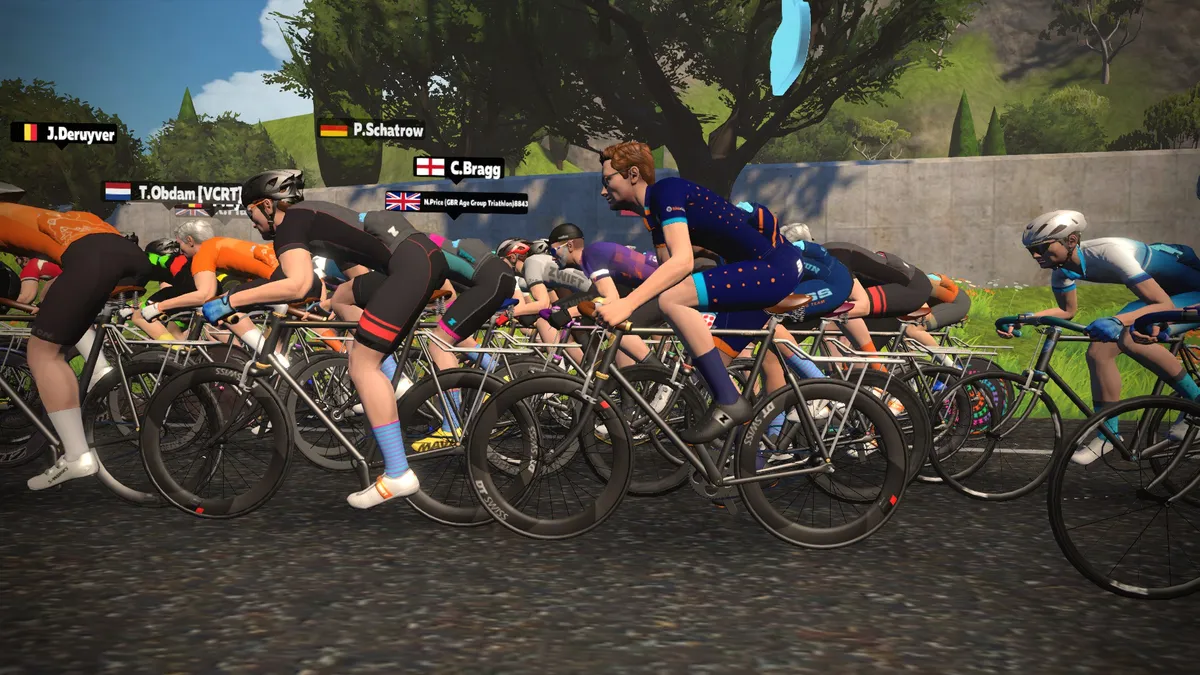
Once set up and ready to go, you can start exploring Zwift’s virtual worlds as you please, but there’s also the option to join a group ride.
When you log in to Zwift, you’ll see a list of upcoming rides and races on the upper-right of the Mac/PC screen. On the Companion app, you can see a more detailed list with descriptions, times and more information. You can also go to zwift.com/events for a full list.
To join, just click the ride. On most group rides, you can self-select the level of intensity, from A to D (we’ve outlined what these categories mean in the racing section below). Group rides are categorised to ensure everyone rides together.
If you are not yet riding, you can receive a reminder. If you are already riding and an event is starting soon, you can join, and when the start time gets close, your avatar will be transported to the start line, where you can warm up on a virtual trainer while waiting to start.
In the start corral, you can see the other riders doing the event and your instant message chats will be seen only by others in that group.
Most events have a ride leader you can follow, and you can read their comments on-screen as you go. For mellower rides, the group leader often communicates to keep the group together.
RoboPacers

If you don't want to join an organised event but still want someone to ride with, you can now choose to ride with a RoboPacer (formerly known as a Pace Partner).
These are bots that ride around Watopia and the Makuri Islands at a predetermined pace.
Riders can join and leave at any time, for a convenient and impromptu group ride. The size of the group each bot has with them depends on how many other Zwifters are choosing to ride with them at any point in time.
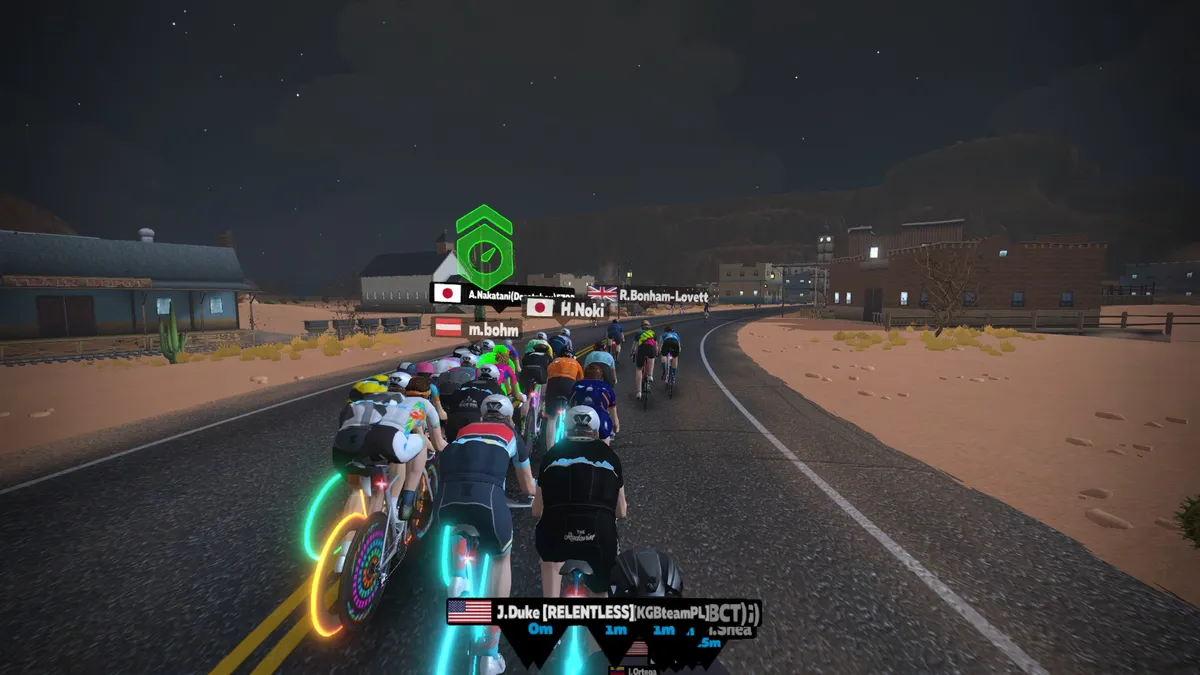
There are currently nine RoboPacers, all 75kg and 175cm tall, but each riding at different power outputs:
- Taylor: 1.1W/kg
- Bernie: 1.5W/kg
- Miguel: 1.8W/kg
- Maria: 2.2W/kg
- Coco: 2.6W/kg
- Yumi: 2.9W/kg
- Jacques: 3.2W/kg
- Genie: 3.7W/kg
- Constance: 4.2W/kg
RoboPacers now also use dynamic pacing, which sees them increase their power output by 10 per cent on climbs, and decrease it by 20 per cent on descents. This helps the group dynamics more accurately reflect how people ride in the real world.
Can I race on Zwift?
Yes, you can race on Zwift. Doing so is as easy as joining any other event or group ride on the calendar – you simply choose a race from the events list, choose which category you want to compete in and sign up.
Categories for racing are based on Functional Threshold Power (FTP), in watts per kilogram (W/kg):
- A = 4.0W/kg and above
- B = 3.2–3.9W/kg
- C = 2.5–3.1W/kg
- D = 2.4W/kg and below
If you don’t know your FTP, you can use one of the FTP tests available on Zwift’s Workouts page – full details can be found in our how to take an FTP test on Zwift guide.
Once you’ve selected a category and signed up for a race, Zwift will automatically take you to the race start when the race is about to begin.
Have your water bottles, an XL fan and towel ready, because if you have to stop mid-race, you’ll get dropped and left behind immediately.
Make sure you give yourself plenty of time to get warmed up too, because Zwift races are notorious for starting fast – some people even pump up the watts just before the start to get a jump on everyone else.
Be aware that drafting also happens, even in virtual racing. Try to use this to your advantage, just like in the real world.
What does W/kg mean?
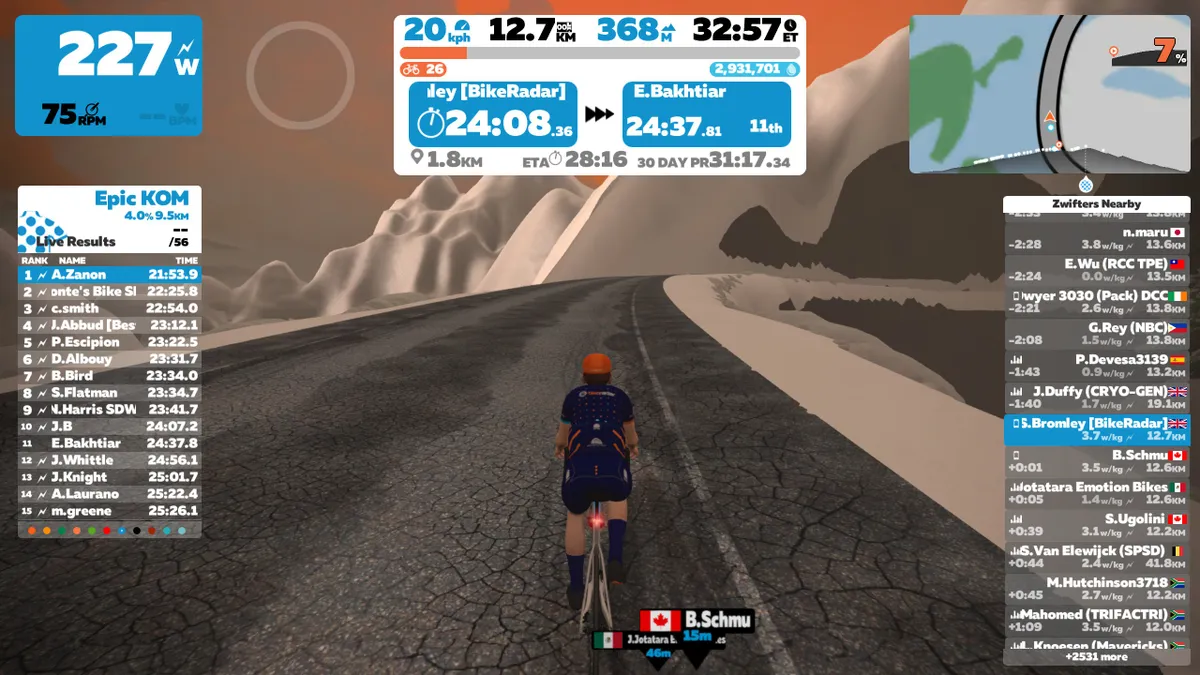
W/kg simply means ‘watts divided by kilograms’. It’s also known as your ‘power-to-weight ratio’, and it’s a key figure in determining performance on a bike in both Zwift and the real world.
On a flat road, the absolute amount of power someone can produce is a key metric. But when the road goes uphill, you also have to overcome the force of gravity, and the greater your total mass (body and bike), the more power is required to accelerate to, or maintain, a certain speed.
With that in mind, the wattage you can produce per kilo of body weight becomes the key metric on any significant hill.
Zwift uses your W/kg at FTP firstly to determine how fast your avatar moves in the virtual world, especially uphill. Beyond that, it also uses W/kg at FTP to set categories and intensity levels for group rides, races, workouts and training plans.
As you might have figured out, it’s pretty easy to cheat the system by simply entering your weight as lower than it really is. But, as the old saying goes, you’d only be cheating yourself…
What are PowerUps?
PowerUps are one example of gamification on Zwift. They give you either an immediate quantity of experience points (XP), or a way to temporarily boost your avatar’s speed.
They’re awarded randomly whenever you pass through a start/finish, KOM/QOM or sprint arch. A bit like on Mario Kart, if you already have an unused PowerUp when you pass through an arch, you won’t get another.
There are currently nine PowerUps in Zwift:
- Large Bonus: Instantly gives you 250 XP points
- Small Bonus: Instantly gives you 10XP points
- Feather Lightweight: Symbolised by a feather, this reduces your weight by 10 per cent for 15 seconds. Best saved for use on a steep climb, where it will make the biggest difference to your speed
- Truck Draft Boost: Symbolised by a van, increases the effect of drafting other riders by 50 per cent for 30 seconds. This is a PowerUp for riding at speed on the flats, where drafting has the biggest effect
- Helmet Aero Boost: Reduces your avatar's aerodynamic drag by 25 per cent for 15 seconds. This is useful when riding solo on the flat or at high speeds
- Breakaway Burrito: Makes you ‘undraftable’ for 10 seconds. Best used when trying to break away from a group, only available in events
- Invisibility: Symbolised by a ghost, this makes you invisible to other riders for 10 seconds. Best used when trying to break away from a group or solo rider – try to establish a gap before you reappear and everyone realises what you’ve done. Only available in events, and will not work within 400 metres of the finish line
- Steamroller: This power-up is limited to off-road events in Watopia's Jungle Circuit and offers a significant reduction to your avatar's rolling resistance for 30 seconds. It essentially makes riding on dirt roads as easy as riding on tarmac
- Anvil: The opposite of the Featherweight PowerUp, the Anvil makes your avatar heavier for 30 seconds. Best used on descents to maximise your speed, though will only work on declines of -1.5% and below
PowerUps can be activated at any time by hitting the spacebar on your computer, or via the Zwift Companion app – just touch the on-screen PowerUp icon. Once activated, timed PowerUps will show a timer for how long your PowerUp has left to run.
If you’re in the middle of a structured workout, or on a TT bike, you can only acquire Small and Large Bonus PowerUps – so you can’t use them to make your training any easier, sadly.
Can I use Zwift for structured workouts?
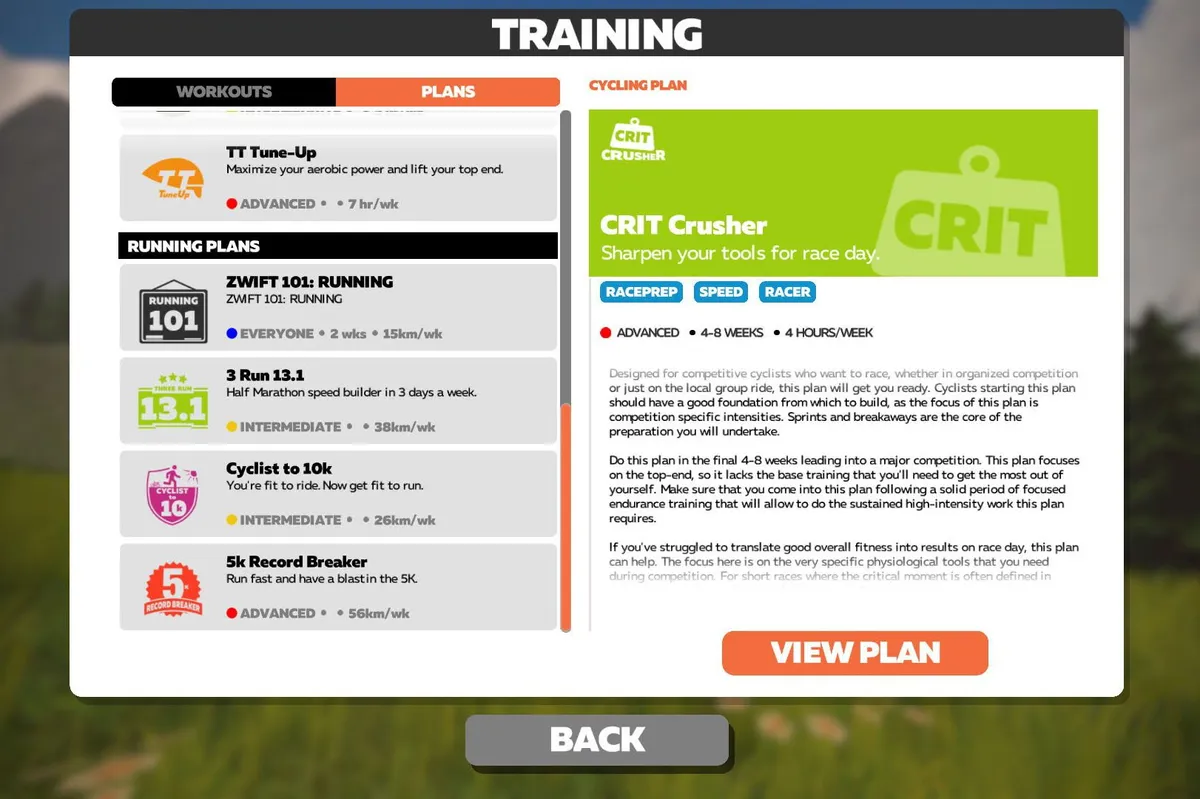
Absolutely – this is one of Zwift’s key features.
Zwift has hundreds of structured workouts (which are essentially interval training sessions) to choose from – or you can build your own – and you can even sign up for long-term training plans.
You can choose a plan to target specific events or weaknesses, such as ‘TT-Tune Up’ – which, as the name suggests, focuses on the aerobic power and top-end fitness required for time trialling.
Or there are broader plans such as ‘FTP Builder’, designed to increase your general fitness and Functional Threshold Power in a short amount of time.
These Zwift training plans have been put together by real coaches and are designed to be flexible, so if life gets hectic, you can easily move sessions around to fit in with everything going on in the real world.
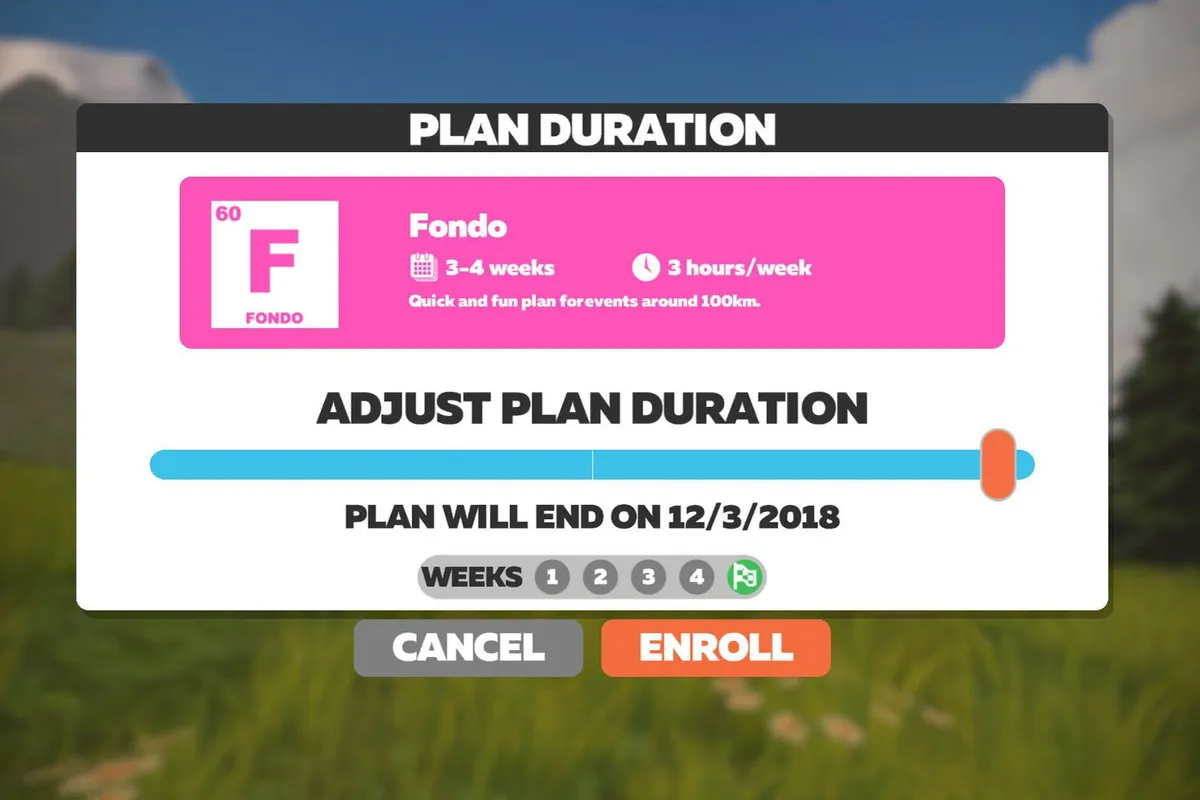
All structured training on Zwift is based around your W/kg at FTP, so you really need some sort of power-measuring device – a smart indoor bike, smart trainer or power meter – to get the most out of this feature.
If you’re on a smart indoor bike, or a smart trainer, there’s an option to allow Zwift to control the resistance in ERG mode.
This will override any changes in course gradient and change the resistance according to the specified wattages in the workout. This is a great way to ensure you’re hitting the prescribed wattage and getting the most out of every training session.
If you don’t have a power-measuring device, Zwift will try to approximate your power output using data from your speed/cadence sensor and information about whatever trainer you’re using. As these numbers are just estimates, though, the training zones and data generated won’t be as accurate as they could be.
How do I do a Zwift workout?
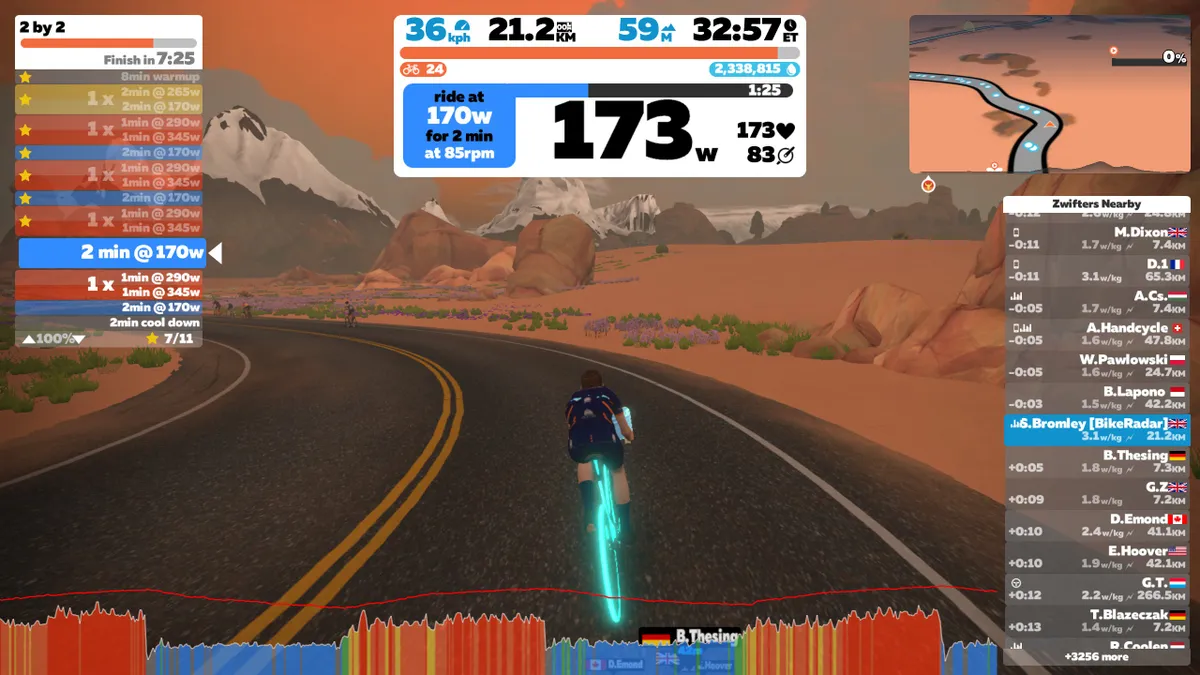
To do a workout on Zwift, log in, then click on ‘Training’ underneath the ‘World Choice’ section in the middle of the window.
This will open up a new window, where you’ll see two tabs – one for single workouts and another for training plans with multiple sessions.
If you’ve already set your FTP, you can simply select a workout and get going.
If you’re new to Zwift, it’s worth doing an FTP test to get an accurate baseline figure for Zwift to base your workouts around.
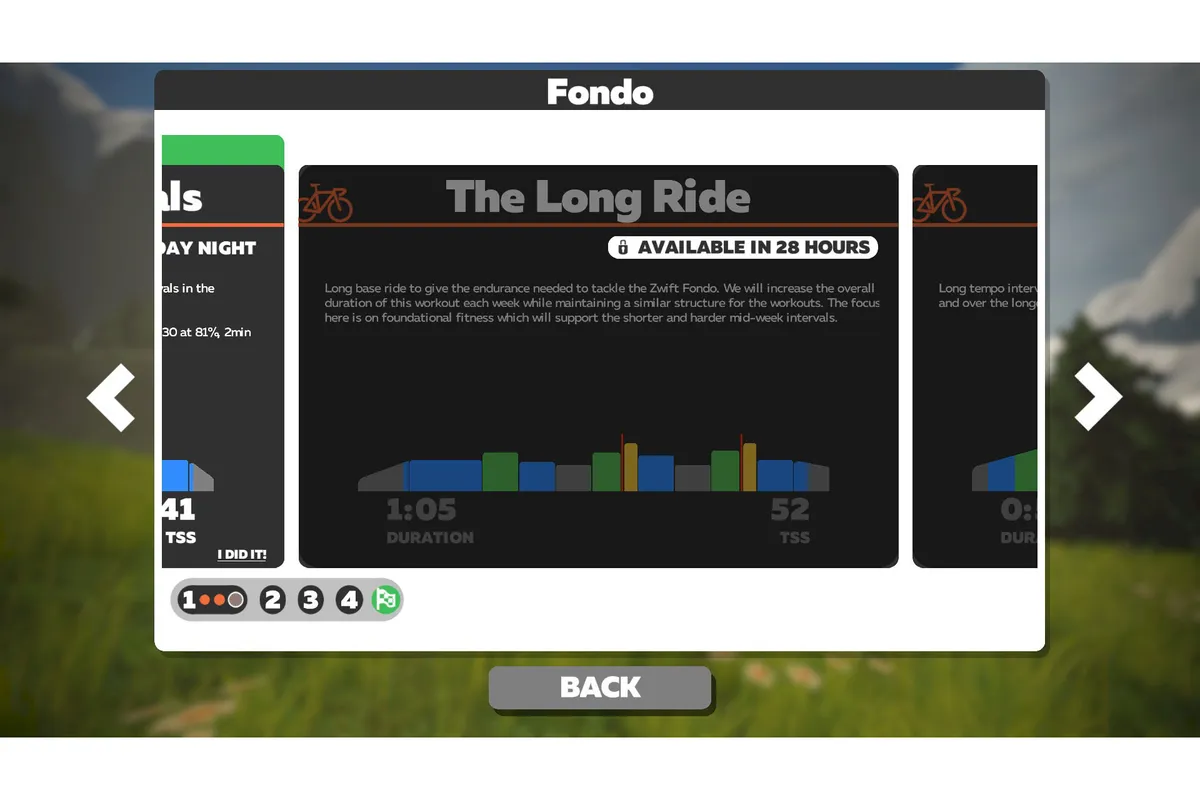
In addition to workouts you do on your own, at any time, there are also scheduled group workouts. Like a group ride in the real world, these start at fixed times (and you have to sign up for them in advance via the events page) and involve multiple participants.
Unlike the group rides and races, though, group workouts keep everyone together in a group. As long as you are pedalling, you stay in the bunch.
As with the individual workouts, your efforts are based on your FTP. However, in group workouts, Zwift tethers everyone together so the end result is like being in an indoor cycling class: you are all following the same workout together, but at different individual efforts according to your fitness.
The group chat function works well here, in that the only messages you see (and send) are to the group.
How do I upload my Zwift rides to Strava?
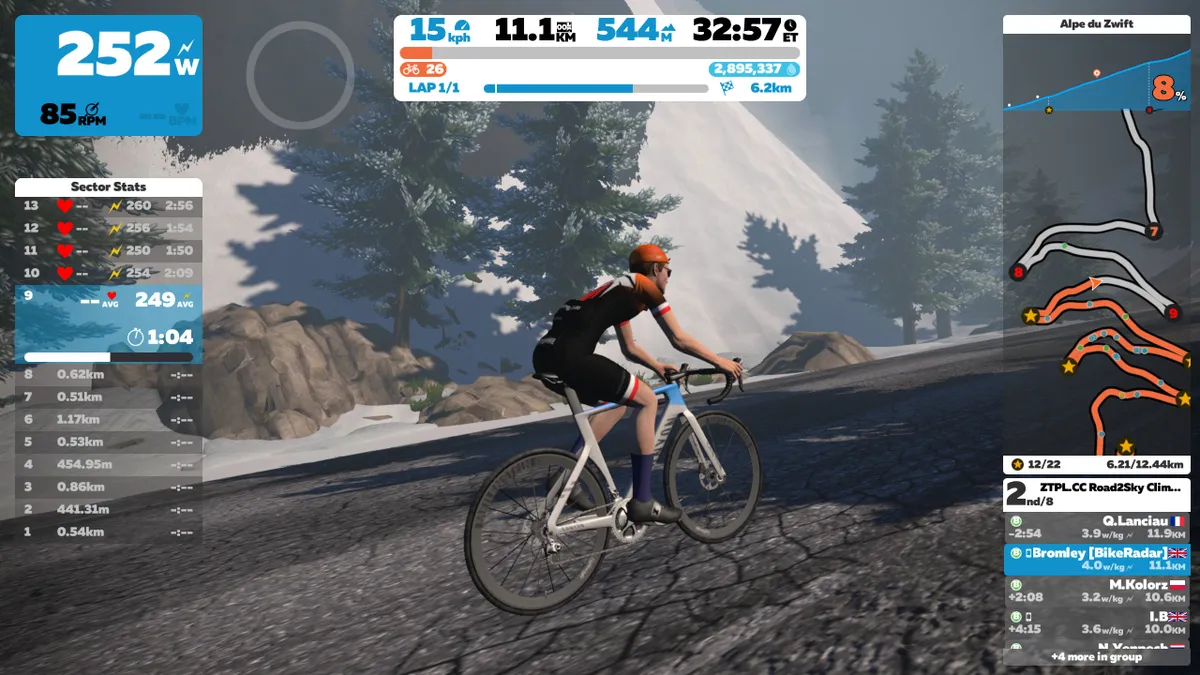
You can link your Zwift account with Strava, and ensure your efforts appear on the KOM/QOM leaderboards.
There are two ways to do it. On the Zwift Companion app (on an iOS or Android device ) or via zwift.com.
On the Zwift Companion app, tap ‘More’ in the bottom right corner, then tap into ‘Settings’. From there, tap ‘Connections’ and you’ll find Strava at the top of the list. Simply tap the + icon and you’ll be asked to enter your login details for Strava.
Once that’s done, your accounts will be synced and your Zwift rides will upload to Strava automatically.
You’ll know you’re connected if the Strava logo appears in colour and the + sign has changed to a tick.
On zwift.com, the process is very similar. Log in to your account, then click on ‘Settings’ in the top-left corner.
In Settings, click on ‘Connections’. Click on ‘Connect’ under the Strava logo and enter your Strava log-in details when prompted.
You’ll then automatically be directed back to Zwift, where the Strava logo should now be in colour, instead of greyed out.
How do I customise my Zwift avatar and bike?

Yes, we’re all individuals! In Zwift, you can customise the appearance of your rider and your bike. Head to the Preferences section of the menu and you can toggle through a number of choices for how your avatar and bike look in the ‘Drop Shop’.
As you ride and complete challenges, you’ll earn XP and in-game currency (known as Drops). As you level up, you’ll unlock more bikes and wheels on which to spend the currency you earn.
Be warned, though, if you want the best bikes, you’ll need to put in a lot of hours on the bike (unless you’re willing to resort to more nefarious means).
Locked bikes and wheels can also be more aerodynamic or lighter (and sometimes both) than the basic kit available when you start. So the kit you unlock will actually make a difference to your avatar’s speed in the virtual world, not just how it looks.
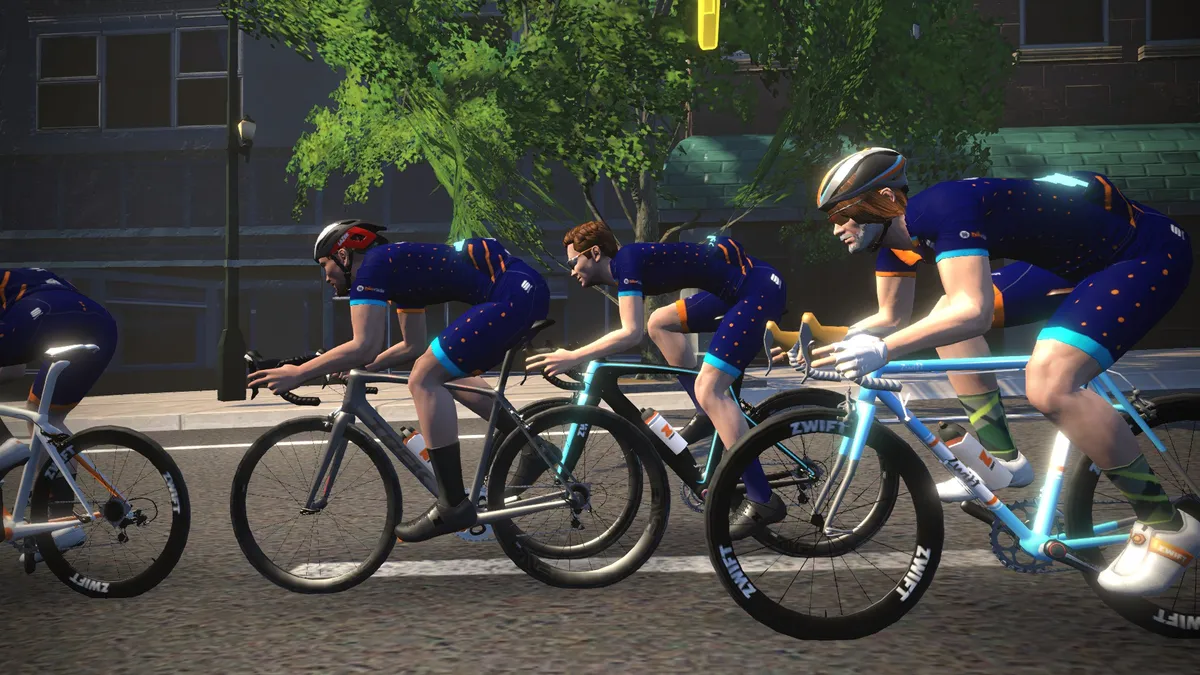
If you want to be the flyest lookin' rider in the bunch, unlock the BikeRadar kit in Zwift – simply press “P” after you sign in and enter the code “BIKERADAR”. The kit will then be available for your avatar via the normal customisation options.
How do I chat in Zwift?
When using a computer, press ‘M’ and then just start typing. Your messages will be seen by riders near you.
When using the Zwift Companion app, you can use the Group Text button to chat with riders in your same group or race. You can also hit the chat box next to an individual rider to send a private message.
The easiest way is probably using the talk-to-text function on an Android or iOS device. To do this, hit the mic icon after you have brought up the message box.
How do I set up a group ride?
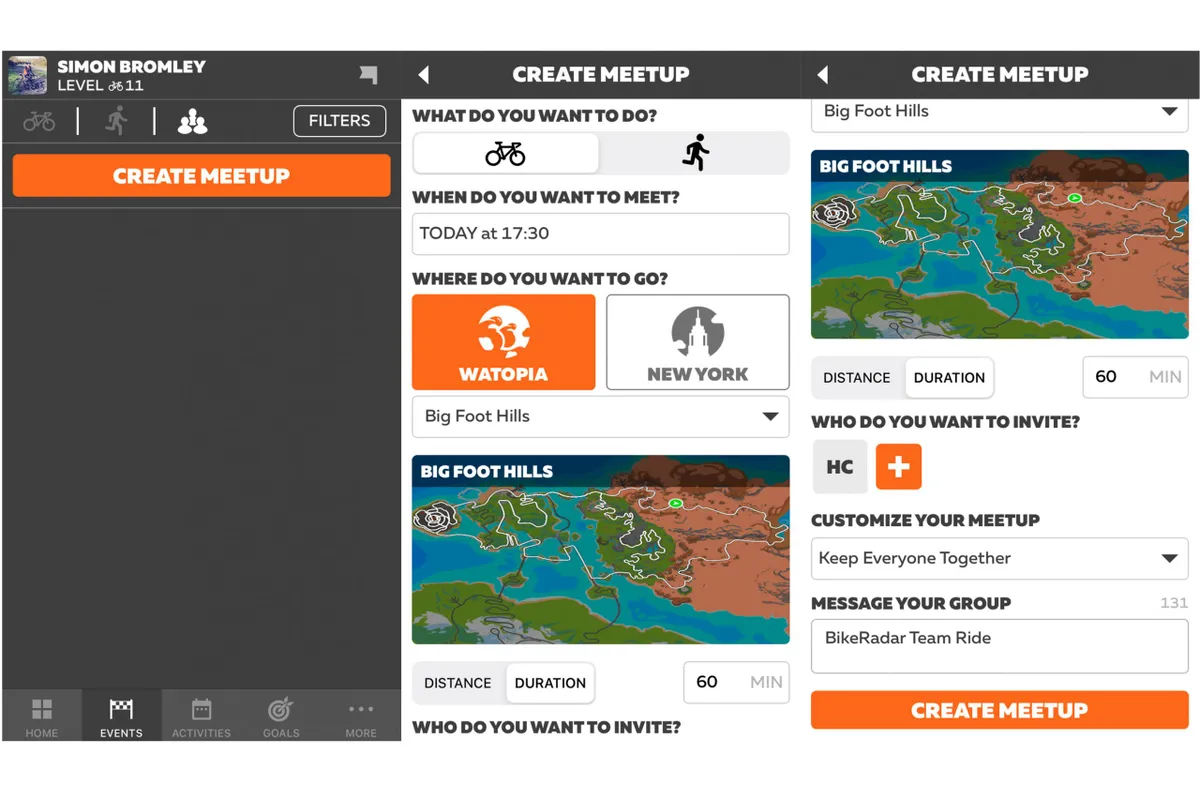
The quickest way to set up a private group ride with your followers is to use the Zwift Meetups feature in the Zwift Companion app. Head to the Events page, tap the Meetups icon at the top of the page then tap 'Create Meetup'.
From there, you'll have a number of options to customise the ride; the date and time you want to ride, where you want to ride, route, distance/duration, whether to automatically keep everyone tethered together or not… and whether you want the Meetup to be a race!
Once you've decided on those details, you just need to invite people from your list of followers (you can only invite Zwifters who follow you to a Meetup ride currently), add some ride details so invitees know what they're being invited to and then tap Create Meetup.
When it's time for your Meetup, just log into Zwift a few minutes beforehand and Zwift will automatically transport you to the start of the ride.
Zwift also recently changed things so that you can still join a ride up to 30 minutes after the Meetup has begun (provided it's not a race), so there's no need to worry if you're running a little late.
Can I report riders for bad behaviour?
On the whole, Zwift is pretty civil, but you might encounter a few problems.
For starters, it is impossible to crash or be crashed by someone. If you feel like someone is acting inappropriately, you can flag them with the Zwift Companion app.
You can also flag other riders for foul language, harassment or suspicious power output. This last category Zwift has set as ‘flier’ – basically meaning if you see someone flying past you at a sustained 8+ watts per kilogram, then something is up.
Zwift has power profiles for world-class performances for various durations. So if a rider gets flagged, and Zwift looks at their file and sees they are indeed producing phenomenal power, then the rider will receive a message along the lines of ‘hey, you should be pro!’, with a recommendation to check their settings and a notification that their ride is invisible to other riders.
That rider will still be able to complete their ride and see other people in the game, but they will just be invisible to others.
Two things can cause supernatural power in Zwift: inaccurately entering weight (and thus altering that w/kg figure) or having a trainer improperly set up.
Steering
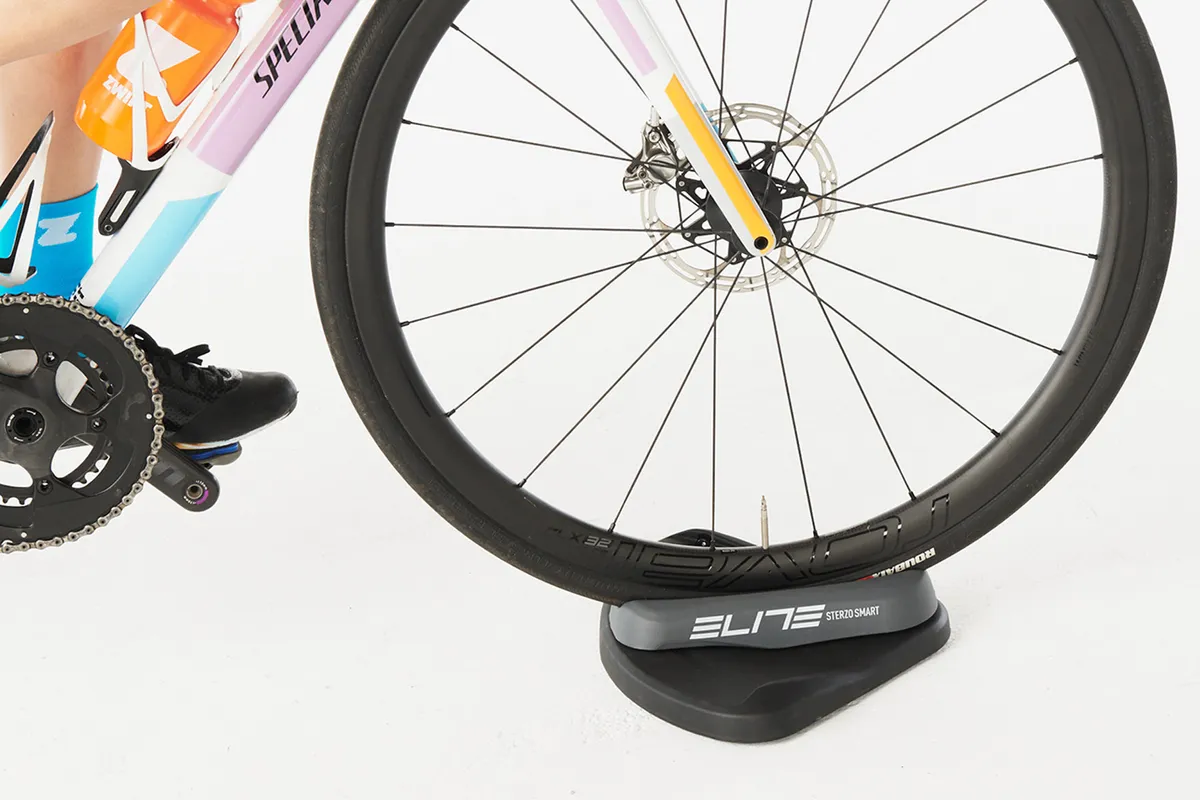
One of the more recent innovations on Zwift is the steering functionality. Originally restricted to a small off-road course in the Titan's Grove area of Watopia, it's now possible to use steering across the entirety of the game.
In order to take advantage of this new feature, you'll need a compatible device. Zwift Ride and the Zwift Frame enable you to steer from their integrated Zwift Play controllers. The separate Zwift Play controllers or the Elite Sterzo Smart steering plate (which costs £84.99 / $103 / €98) are also compatible.
Some smart indoor bikes, such as the Wahoo Kickr Bike and Tacx Neo Bike, also have integrated controls for in-game steering.
With steering enabled, you'll be able to choose your line more deliberately (to take a racing line, for example), or move out of a group to prevent other riders from drafting you.
However, it also means your avatar will no longer be able to ride through others – you'll have to steer around them instead.
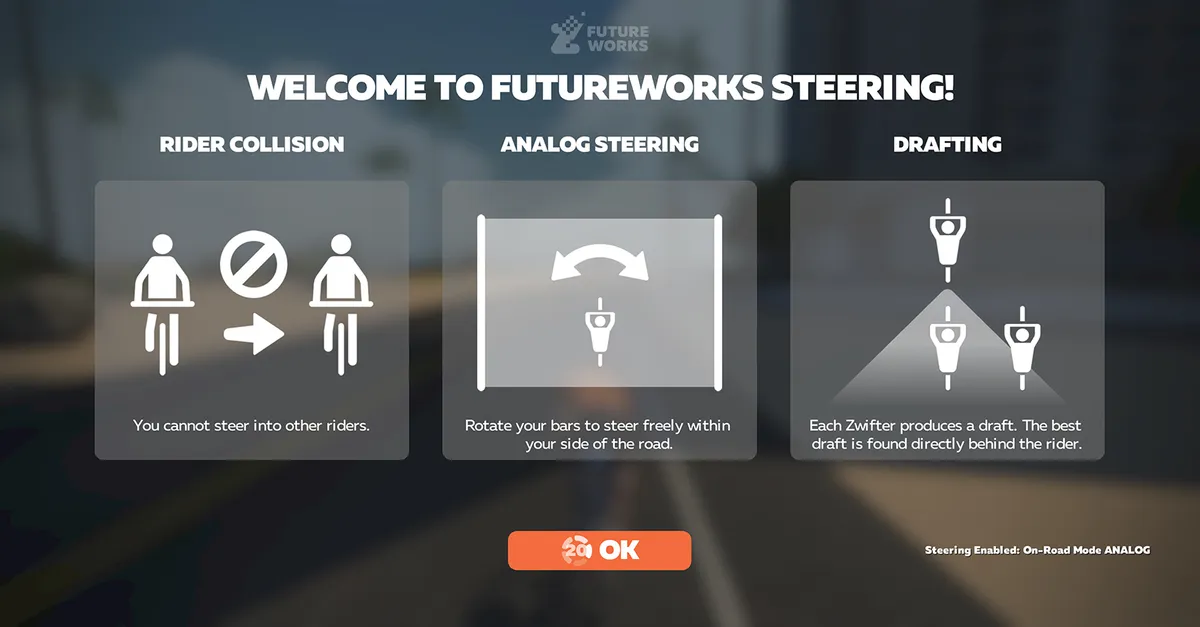
You'll also have to pay close attention to the riders in front because you'll need to steer yourself into the draft in order to get the maximum advantage.
Event organisers can choose to have steering turned on or off, so make sure to double-check this when signing up.


