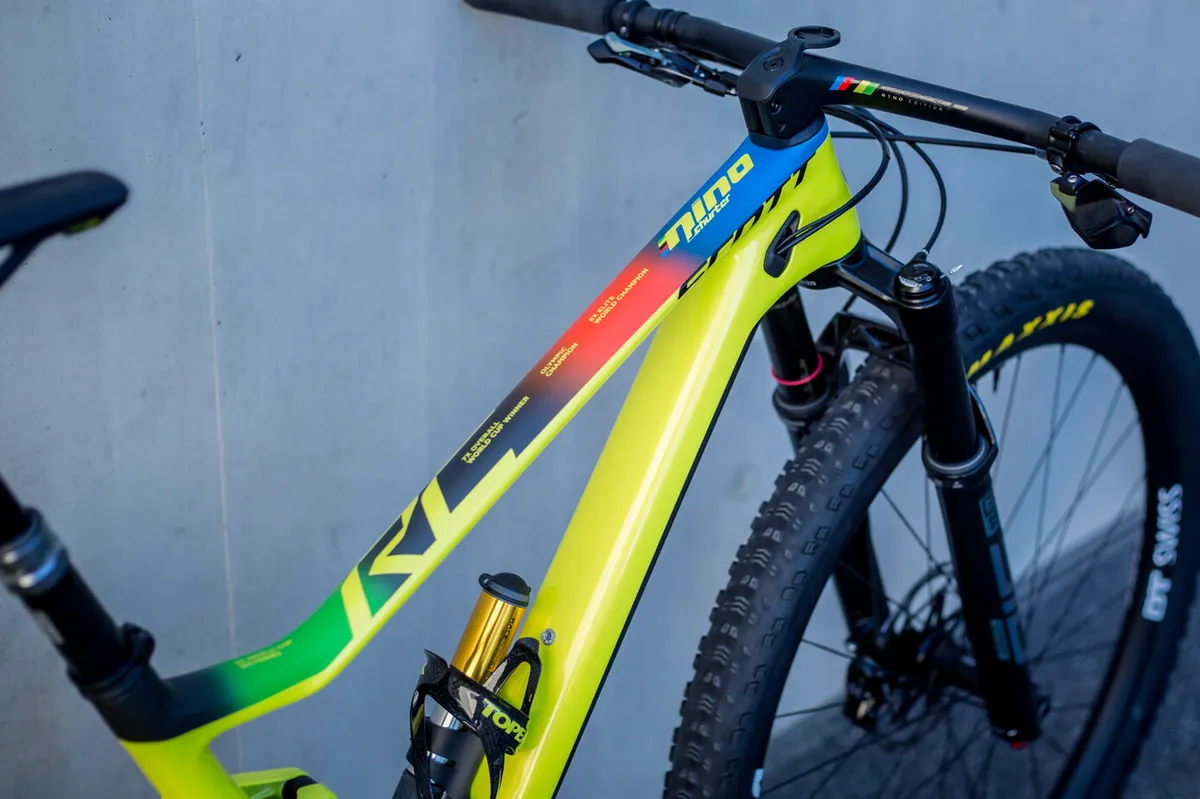
Finding the right size mountain bike is one of the most important decisions you can make.
We recommend you don't buy a bike until you've understood how to get one that's the right size for your height and body shape. Our ultimate guide to bike geometry and handling will help.
The best mountain bike for you, that fits correctly and is set up properly, will be a joy to ride, making it easier to tackle trails faster with more control. But a bike that's too small can be twitchy, nervous and uncomfortable on longer rides, technical descents or when you're just pootling along the flat.
Read on for some advice on what MTB frame size you should be considering, especially if you're in any doubt about it.

We'll also help you understand the changes you can make to your bike's parts to help it perform better for your measurements, personal requirements and preferred discipline. For example, the best mountain bike suspension forks can be adjusted to suit you.
Before we get started, if drop handlebars are your thing, then head to our guide to road bike sizing.
Navigation
- What size mountain bike do I need?
- Important geometry terms and what they mean
- Getting the perfect mountain bike fit
- Problems caused by the wrong size mountain bike
- How to get the perfect mountain bike fit
- Components that affect comfort and control
- Tyre and suspension setup and pressures
What size mountain bike do I need?
| Bike size | Frame size | Rider height |
|---|---|---|
| Extra-small | 13-14in | 152-162cm (5ft – 5ft 4in) |
| Small | 14-16in | 162-170cm (5ft 4in – 5ft 7in) |
| Medium | 16-18in | 170-178cm (5ft 7in – 5ft 10in) |
| Large | 18-20in | 178-185cm (5ft 10in – 6ft 1in) |
| Extra-large | 20-22in | 185cm plus (6ft 1in plus) |
We'd always recommend looking at manufacturers' own size charts, which will usually list a suggested height range for each bike frame size they produce, but here are some general guidelines.
Ask any experienced rider about bike fit and they’ll tell you that all bikes feel and ride differently, even if their numbers look almost the same on paper.
Manufacturers’ listed mountain bike frame sizes can be confusing. How to measure a bike frame is not set in stone. The traditional method is to list the seat tube length, but even that varies because some are measured to the top of the seat tube and some to the middle of where the top tube joins the seat tube.
Many manufacturers simply list their bikes as S, M and L, perhaps with XS or XL at either end.
And, more recently, bike manufacturers have begun listing their bikes' sizes based on reach figures rather than seat tube and top tube lengths.
This means they've been able to grow the bike's reach figure, wheelbase and top tube length while trying to keep seat tube lengths and stack heights shorter and lower.
Smaller seat tube lengths mean shorter people can fit on bikes with a longer reach figure because they can adjust the seat height lower, opening up the potential to ride a larger bike.
It's still important to consider seat tube and top tube length when buying a bike. The seat tube length will dictate the lowest saddle height that can be set and the top tube length will roughly dictate how stretched out a rider will feel.
So, where do you find out what size frame you need? Like so many other things on a mountain bike, there is no one perfect solution because, within sensible limits, you can adjust your saddle, stem and handlebar to help make a slightly imperfect fit feel fine.
Getting the perfect mountain bike fit

Getting a bike to fit you perfectly is something you need to work at. We know riders who’ve ridden for years on what they thought was their perfect bike, with perfect reach, perfect saddle height, perfect handlebar shape, a perfectly set-up fork and the best mountain bike tyres, perfectly inflated, until they discovered it wasn't.
They discover that a basic change, perhaps even a few basic changes, to that setup seems to make them ride better.
It'll often be something as simple as a different handlebar sweep, different tyre pressures or more or less suspension-fork sag. It’s often minor details of bike setup that change the way you ride and feel about your bike.
When we sit on a bike, we make contact in three places: our hands on the bars, our feet on the pedals and our backside on the saddle.
It’s the relative position of these three areas that governs how the bike fits and several variables influence their exact location: top tube length, seat angle, distance from bottom bracket to saddle, crank length, bar height and width, stem length and saddle angle all play a part.

Tweak your ride setup from time to time, then give yourself a few rides to decide whether you like it or not. There are some things that feel wrong when you first change them, but right after a few rides.
In the following sections, we’ll lay down the basic guidelines of bike fit, together with variations to consider and the reasoning behind them.
Don’t think of a bike fit and setup as something that’s carved in stone, though. Use our guidelines as a starting point, then go out and experiment.
Seat tube length and standover

When a bike is listed as ‘X’ inches, what does that mean?
In most cases, it’s the distance from the bottom bracket axle to the top of the seat tube, but it can be to the middle of the top tube or to various other places – there isn’t a universal standard.
Even if there were, it would be no indicator that you could straddle the top tube and clear it because top tube shape and bottom bracket height vary substantially.
This all relates to ‘standover height’: an important aspect of any bike fit, since it governs the clearance of your crotch!
The seat tube should leave you with an acceptable standover gap – the distance between the top tube and your crotch – and usable standover clearance.
To get this, stand back as far as you can while over the bike and ensure there's a minimum of an inch of room from the top tube to your crotch area.
If you adhere to this advice then your frame should provide you with a large range of adjustment at the seatpost, which is important for finding your optimum mountain bike seat height.
While this holds true for beginner and cross-country bikes, depending on the shape of the frame the rules change slightly, for example if it has a low-slung top tube or if you're looking to buy a downhill or enduro bike – which have different geometry entirely.
It's therefore important to not use seat tube length and standover height as the only measure of a bike's fit. It also highlights how crucial sitting on different sizes of your prospective purchase is.
Saddle height and crank length

The majority of mountain bikes have 170mm or 175mm cranks, which do the job perfectly well for most riders. But if you have short legs, you may find the cranks are too long to turn without your knee bending excessively at the top of the stroke, resulting in the wrong muscles being used.
Similarly, if you’re long-legged you may benefit from a longer crank so you can make the most of your lofty dimensions.
For general trail riding, aim to set saddle height on your bike for maximum power and efficiency. Too high and your hips will rock from side to side, wasting energy; too low and your muscles won’t deliver power effectively.

Adjust the saddle height so when your heels are on the pedals at the bottom of the pedal stroke, your leg is fully extended – this means when you move your feet to the right position, your knee won’t lock out.
If you need more clearance, drop your saddle an inch or two.
Top tube length and reach
Another important consideration is the top tube length. Together with seat height, stem length and handlebar position, top tube length dictates the comfort and efficiency of your body on the bike.
To confuse matters further, the aspect of top tube length that matters is not the top tube itself, which often slopes, but the reach number.
Although top tube length will give a good indication of how a bike will feel when you're seated, the reach figure is most relevant for when you're standing up and is particularly pertinent to descending, but also helps contribute to the feel of a bike's size.
A cross-country rider may prefer a long, stretched-out position, but a beginner who has never taken a bike off-road may want to be more upright for extra comfort, with less weight on their hands and wrists.
Your reach is often a compromise between comfort, control and pedalling efficiency.
Find what works best for you, but avoid being too hunched or too stretched out, since this can cause discomfort and back problems.
Seat angle and effective top tube length

The cranks (or bottom bracket) are never situated directly below the saddle, and for good reason. If they were, you’d be placing excessive weight on your arms to support your upper body when you lean forward.
Thus the seat tube lies at an angle, which determines how far behind the bottom bracket the saddle will be and how you’re balanced when seated.
Too much can be counterproductive, but luckily the range of angles is usually quite narrow, so this measurement isn’t normally that important.
If we take two bikes with the same ETT length but different seat tube angles, the slacker-angled machine will have a bottom bracket that’s further forward in relation to your saddle and vice versa.
The upshot of this is you can have two bikes with the same reach that handle differently, due to how they distribute your weight.

One of the biggest mistakes made by beginners is to slide the saddle too far back. While it may be psychologically reassuring to sit well back from the ‘attacking terrain’ position, too little weight on the front of the bike can make the steering feel vague and stop your suspension fork from compressing efficiently.
Sit further forward and you’ll get maximum use of the fork, full use of the front tyre tread and the bike will handle better.
This is all assuming that the reach is correct for you. As a general rule of thumb, if you drop a plumb line from the centre of the saddle it should cross the chainstays almost exactly halfway between the bottom bracket axle and the rear wheel axle.
Foot position and cleats

The best mountain bike pedals can be flat or clipless. With flat or platform pedals, the ball of the foot usually drops into a comfortable position above the pedal axle.
However, clipless pedals can be more problematic to get right, so it's essential to know how to set up clipless pedal cleats. A good place to start is to find the ball of your foot and place the cleat directly underneath.
Once you’ve found this spot, adjust back and forth – minor changes can affect which muscles are utilised and how effectively you pedal.
See what works best for you. Lateral positioning is a personal preference: a narrower stance can improve efficiency, but be careful that your shoes don’t hit the cranks during the pedal revolution.
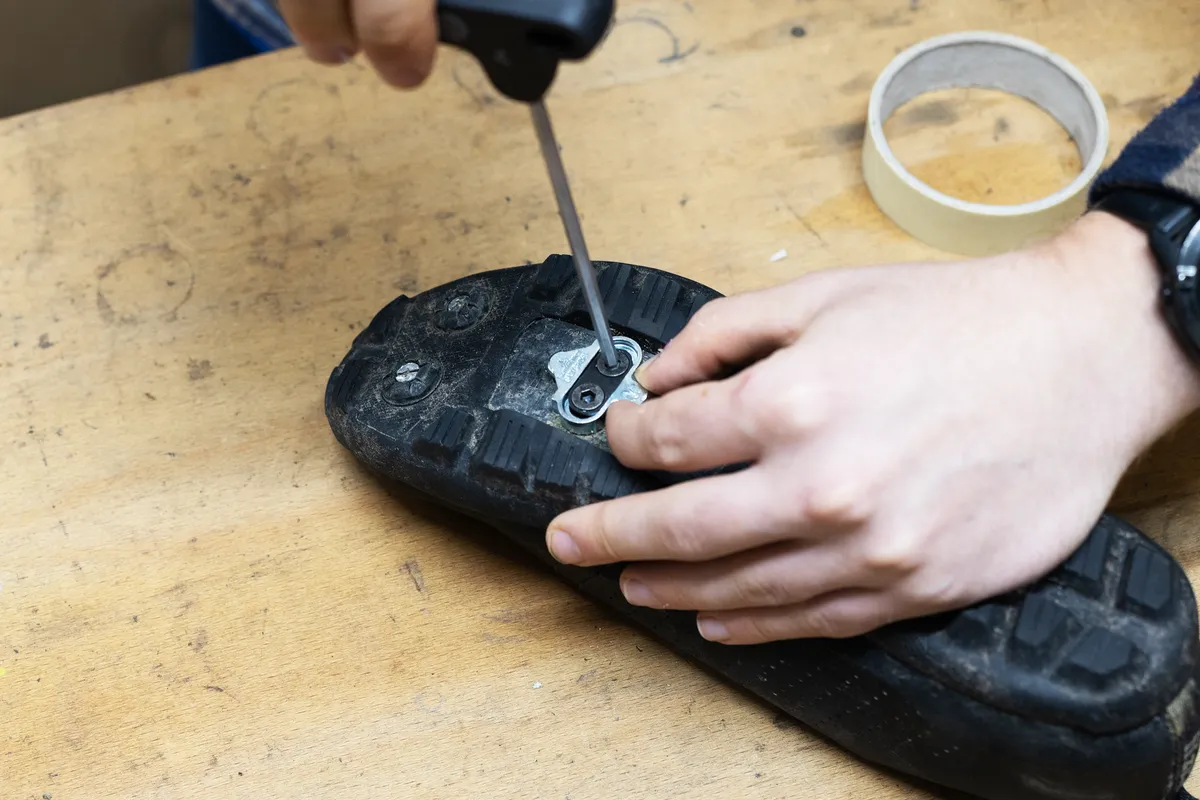
The angle of the cleats should match the natural angle of your feet, which you can see easily if you use flat pedals.
Many of the latest clipless pedals have built-in float, which helps your foot achieve a natural angle and is a good option if you’re unsure what’s right for you.
Experiment with the final setup; once you have this sorted, the pedal stroke will feel fluid with no twisting of the ankles, knees or hips.
This can take a few rides, but is worth persevering with – when you hit that sweet spot, draw a line around the cleats for reference when they need replacing.
Problems caused by the wrong size mountain bike

If you do end up on the wrong-sized mountain bike, whether that's too small or too large, you could end up not enjoying yourself as much or, as a worst-case scenario, getting injured.
Aches and pains can be caused by aspects of bike setup, but also by other things, so don’t take this list as gospel; it’s a rough guide.
See your doctor if something is really hurting, especially if it continues to be painful after riding and it’s not solved by the adjustments mentioned here.
Be aware that a lot of your aches and pains on a bike are simply caused by insufficient muscle support. In other words, you may just need to ride more and do some core muscle training to work things out.
Here are some common ailments and their causes:
- Knees: Knee pain when riding can be caused by your saddle being too high or too low, or your shoe cleats being poorly adjusted. Some riders find that a pedal/cleat system with more free float gets rid of knee pain.
- Back: Back pain during/after riding will often be related to poor core muscle support, so there may not be a quick and easy setup fix. But try changing the position of your handlebars and/or your reach from the saddle to the bars. We know a lot of riders who’ve solved lower-back pain simply by putting the stem up or down by half an inch, or getting a handlebar with more backsweep. Back pain can be indicative that your bike's frame is the wrong size.
- Shoulders/arms/neck: We're putting these three together because it’s often similar aspects of setup that cause aches and pains in these areas, namely too much stress being placed on these bits of your body. This may be caused by being sat too far forward on the bike, but it can also be down to sitting too far back, making you curl your shoulders and preventing you holding the bar properly. Experiment with stem height and saddle-to-bar reach. Try different bar shapes: a lot of riders find that more backsweep or upsweep on a bar will make them feel far more comfortable. Also try anatomically shaped grips, which support your hands better. If your shoulders, arms or neck are hurting, they could be telling you that your bike is either too big or too small.
- Hips: A lot of hip problems among cyclists are caused by the saddle being either too high, too low, tipped too far back or forward, or not offering the right sort of padded support.
When your bike is the correct size:
- Arms: Good bike position results in relaxed shoulders and slightly bent elbows.
- Saddle: Correct saddle position is essential for balance, control and pedalling efficiency.
- Knees: Having very slightly bent knees at the bottom of each pedal stroke is perfect.
- Frame: Getting the correct frame size is essential, but it’s only a starting point for perfect bike setup.
- Shifters and brake levers: Don’t just leave them in one position. Experiment with setting them further in on the bars or tilting them.
Although everyone is different – some folks may have longer legs and a shorter torso, while others may have long arms and short legs – starting with the correct-sized frame allows you to further tune the position using stem, bar, seatpost and saddle tweaks.
How to set up your mountain bike for the perfect fit

While making sure the frame is the right size for your type of riding, there are many other ways to customise the fit of your mountain bike.
It's important to set the saddle height and position correctly to provide a comfortable and efficient pedalling platform on the trail.
Making sure your handlebas is at the right height will affect how your bike rides and will alter the weight distribution.
Smaller things to consider are moving your brakes and gears into a position that makes them easy to operate.
Get an expert opinion from a bike fitter or reputable bike shop
Even if you feel overwhelmed after reading all of this information, fear not. Any reputable bike shop will be able to help you with finding the right size mountain bike for your needs.
Some shops even offer a professional bike-fitting session to really help you nail down what size bike you need and how you can modify your current bike to fit you better.
Don't be afraid to head to your local bike shop to find out more.