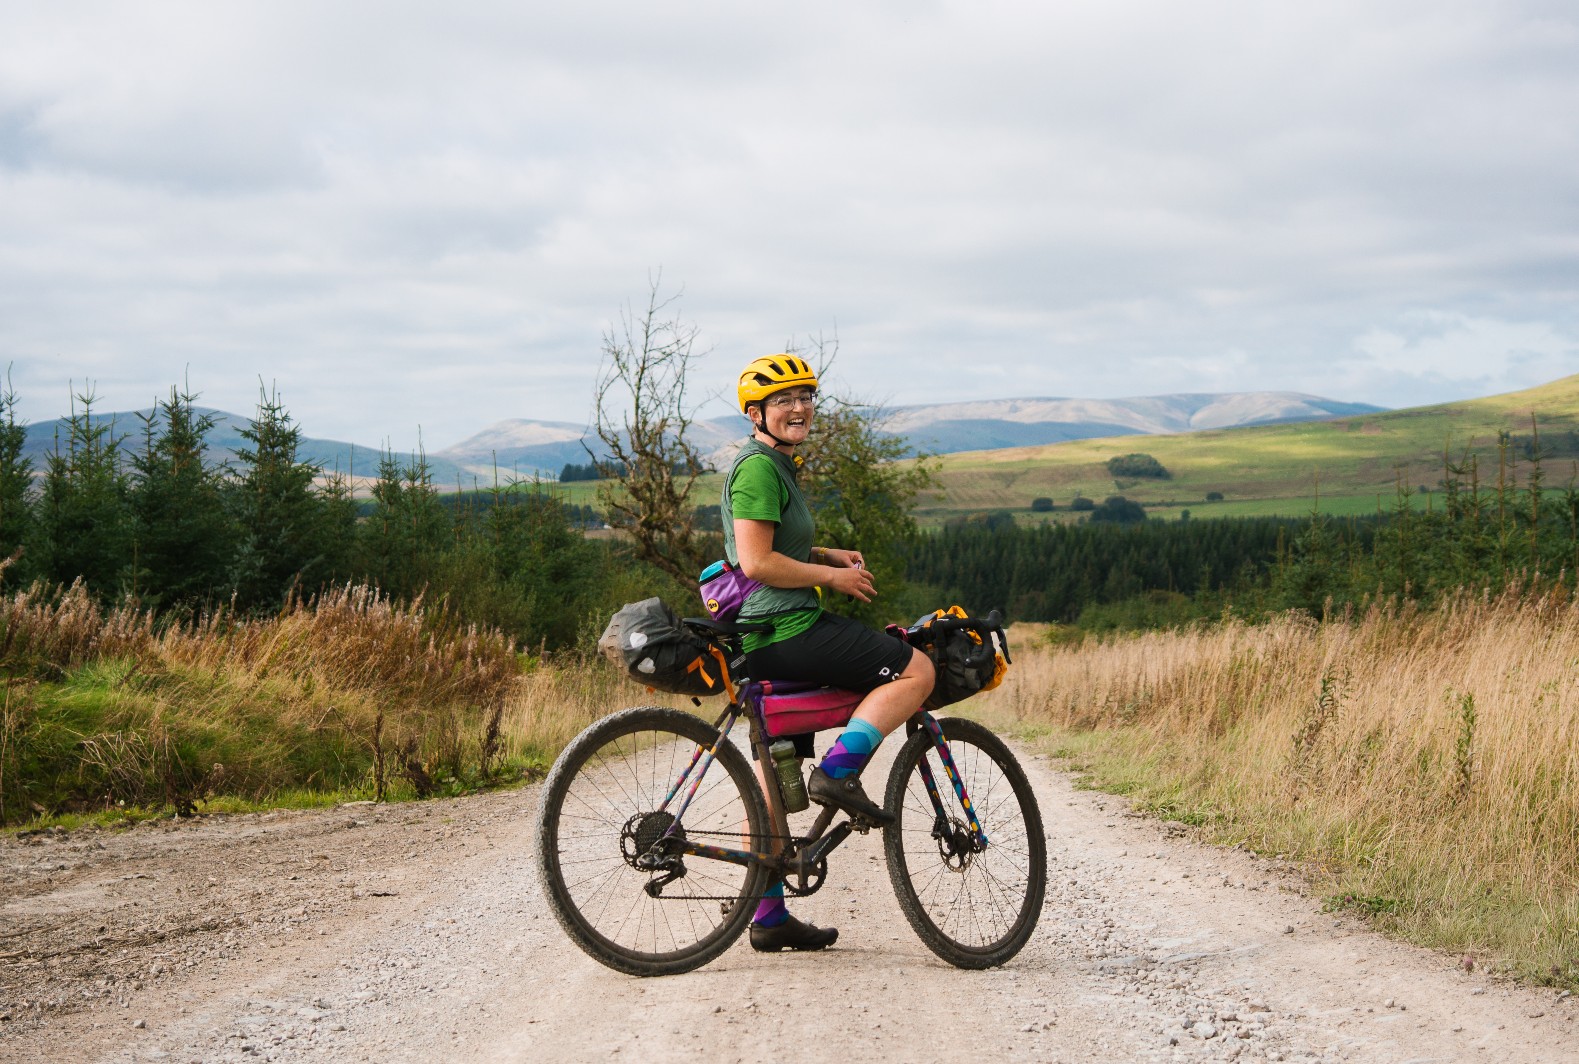
A simple, local overnighter or months on the road: bikepacking enables you to explore further and get back to basics.
You may be surprised by how little you need to get started. Even if all else fails, at least the experience will make you appreciate the comfort of your own bed again.
But what exactly is bikepacking, what do you need to take and how should you plan your trip? Let's dive in.
What is bikepacking?
Bikepacking, in simple terms, is an overnight or multi-day adventure on your bike.
The emphasis is on self-sufficiency and packing light. Bikepacking adventures often take you well away from civilisation, frequently on a gravel or mountain bike, although as we’ll come on to, you can go bikepacking on any bike.
Bikepacking typically involves packing your kit into bags that can be attached to any bike frame without requiring a rack. These are used to load up everything you need to bring with you: overnight gear, food, clothing and spares.
Bikepacking vs cycle touring
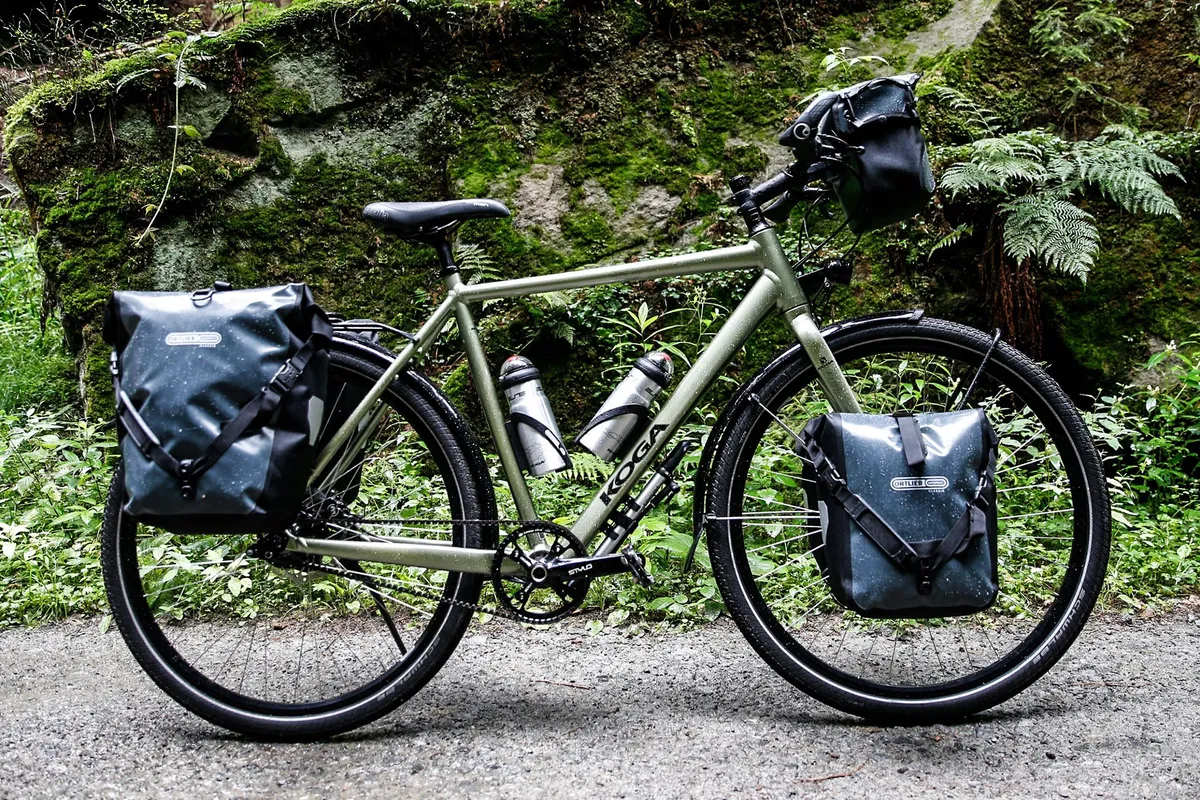
The classic way to head out for multi-day adventures on your bike used to be on a cycle touring trip and it’s still practised today, even if bikepacking has become its trendier cousin.
Predominantly an on-road experience, cycle touring involves loading up your bike with pannier bags, which sit on a rack at the rear of the bike. These are sometimes joined by another set of bags attached to a rack on the forks.
There’s a specific category of touring bikes designed for cycle touring, usually made from steel for durability, with generous gearing for fully loaded climbing, mudguard eyelets and lights (sometimes a dynamo light).
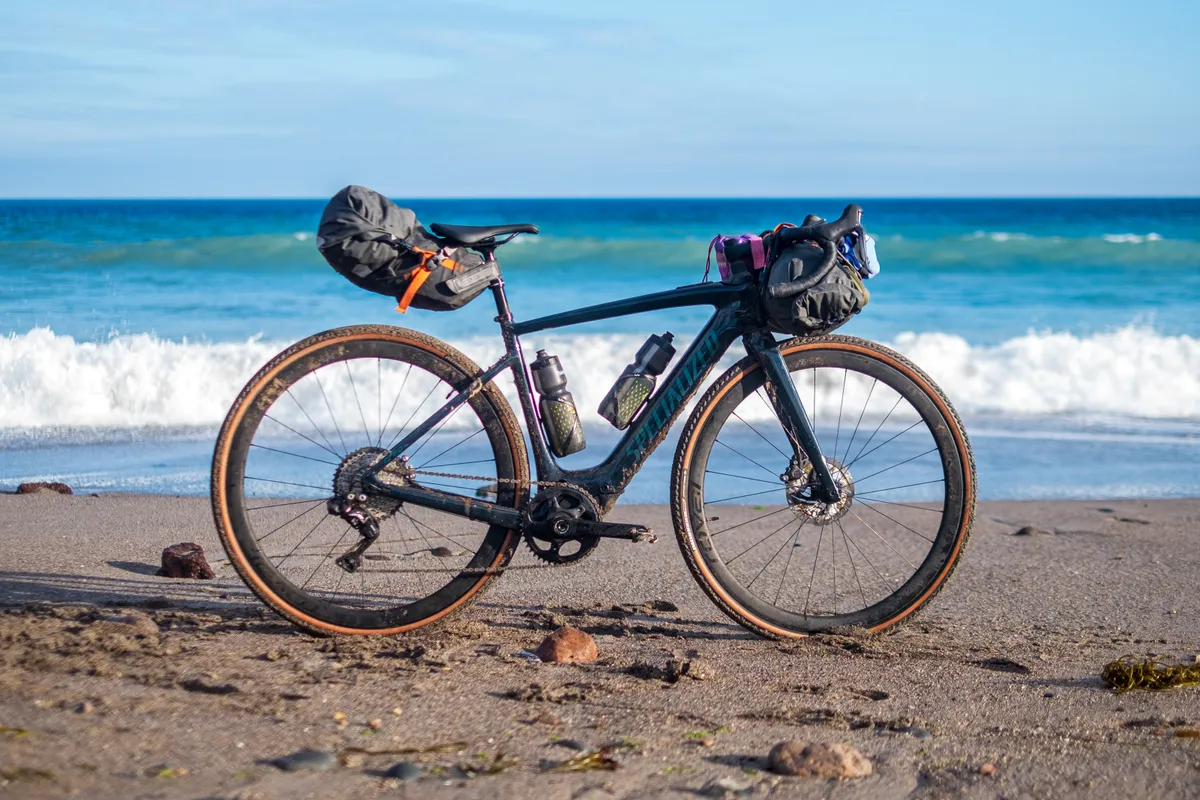
In contrast, bikepacking uses bags designed to lash to your bike, which might be a mountain bike or a gravel bike, opening up off-road adventures rather than having to stick to tarmac – although you can also bikepack on a standard road bike.
Often, bikepackers will be aiming to travel as light as possible: think bivvy bag and wild camping in place of the tourer’s tent on a campsite or ‘credit card touring’ between B&Bs (although there’s nothing to stop you from carrying a tent and using a campsite, or staying in B&Bs, while bikepacking).
What to take on a bikepacking trip
What to take on a bikepacking trip depends on where you're riding (how far you'll be from civilisation), for how long (an overnighter or round-the-world trip) and your personal inclination to rough it (can you take the bare minimum or do you need a few luxuries?).
Compiling the ultimate bikepacking kit list often comes with experience, but if you're preparing for an overnighter – perhaps your introduction to bikepacking – here are the essentials.
1. Your bike
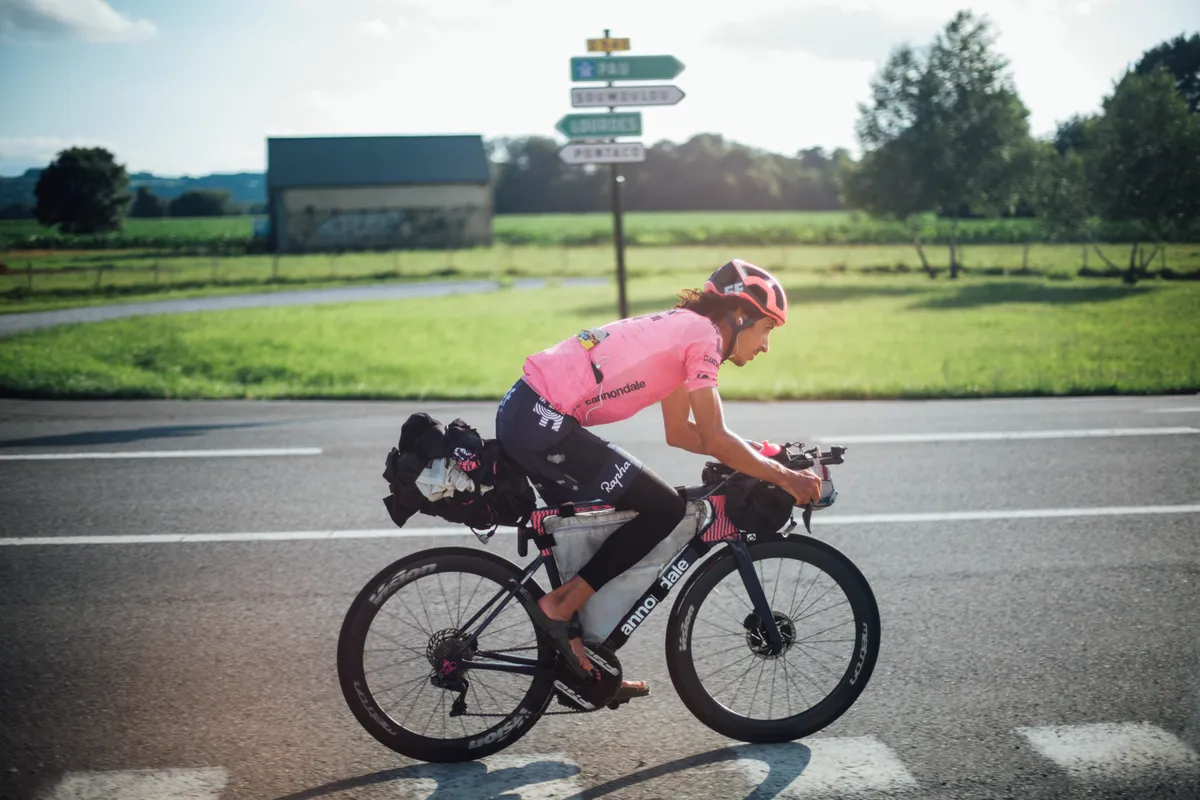
It’s true what they say: any bike is a bikepacking bike. In fact, that's one of the joys of bikepacking.
Don’t wait until you can fork out for the ultimate long-distance touring bike – simply plan a route based on the type of terrain your current bike can best handle, whether that’s sticking to road, easy gravel trails or singletrack.
Because some bikepacking routes take you to more remote places, it’s a good idea to make sure you’re as self-sufficient as you can be, not only when it comes to looking after yourself, but your bike too.
As with any ride, make sure you pack spares and tools to fix common mechanicals, such as flat tyres or chain issues:
- Inner tube(s)
- Puncture repair kit or tubeless plugs
- Pump and/or CO2 inflator
- Tyre levers
- Multi-tool with chain tool
- Chain quick link
The further you're riding, or the further you'll be from civilisation, the more you'll need to take with you, to ensure you're self-sufficient in the event of more serious mechanicals. This may include a spare derailleur hanger, brake pads or gear cable.
It's also worth stashing a handful of spare bolts in case a bottle cage or any luggage rattles loose. The same applies for cleat bolts if you expect to do lots of hike-a-biking.
If you’re not confident in your bike mechanic skills, why not invite a friend who can help you?
You'll also need a GPS bike computer or map for navigation. Remember, if you're using a bike computer, you'll need the means to charge it, too.
A lightweight bike lock is also a sensible addition, to secure your bike at a campsite or if popping into a shop.
2. Bikepacking bags, panniers or a rucksack
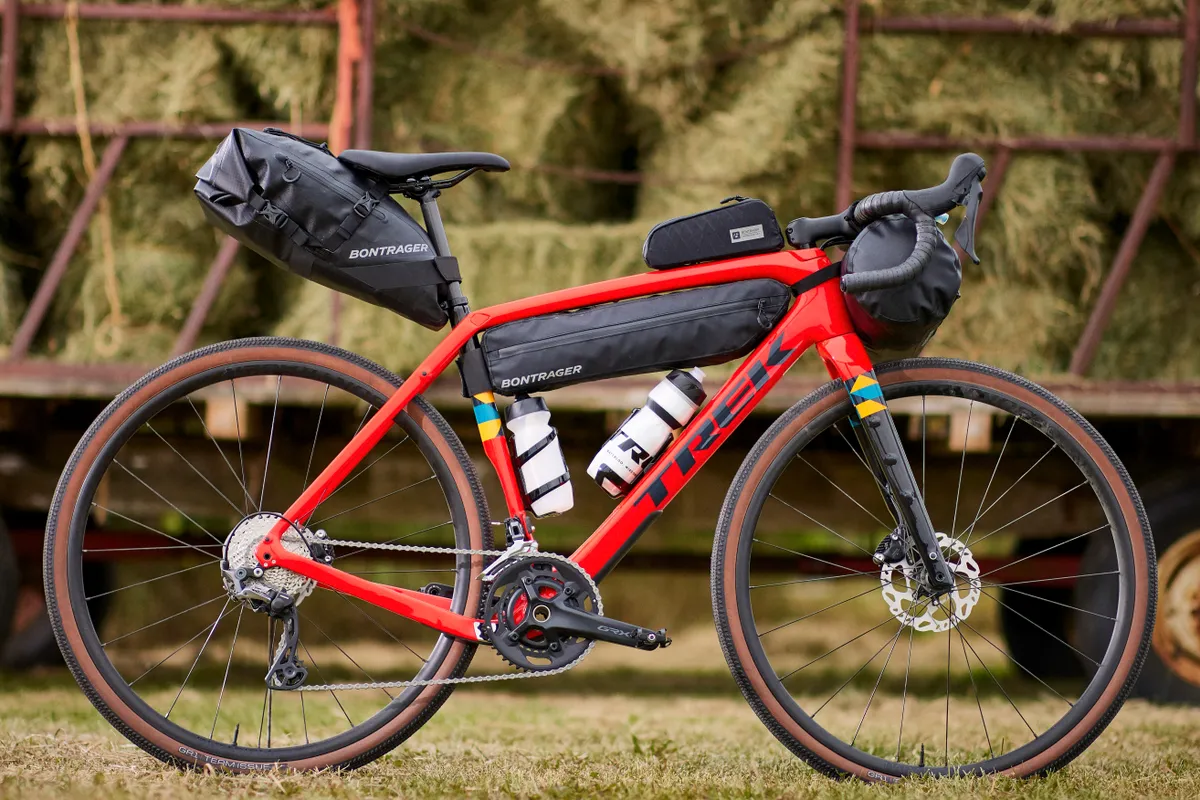
You'll need some luggage to carry what you need for your bikepacking trip.
Although rucksacks will suffice for shorter trips, bikepacking bags mounted to your bike will provide more storage and mean you don't have to carry any weight on your body.
Bikepacking bags can be used with practically any bike because they don't require specific mounting points on your frame. They are most commonly mounted to the seatpost or saddle rails, the front of the handlebar and inside the main triangle.
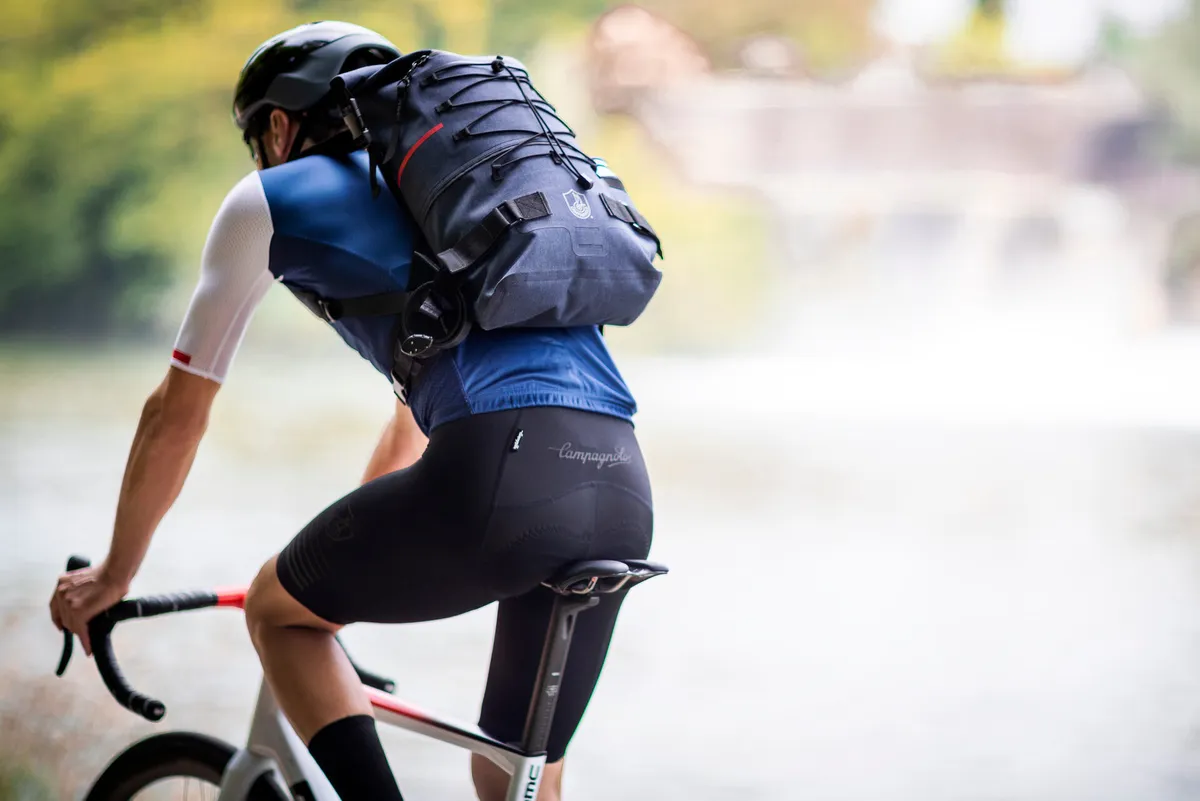
Bikepacking bags range greatly in price from entry-level options to premium waterproof, robust and custom designs. You don't need to invest in the best to get started, nor splash out on a full matching set. Combine a handlebar bag with a saddle bag or frame bag and you will likely have enough capacity for your bikepacking essentials.
If you’re on a budget, a waterproof drybag lashed to the handlebar using bungee cords can work well.
If you have a pannier rack and bags for your bike, you can use those to go bikepacking. Most racks require your frame to have eyelets for mounting.
Some brands offer lightweight racks that don't require specific eyelets, instead using a quick-release mechanism to attach to your frame.
Many of the best gravel bikes have additional mounting points on the fork, the top of the top tube and on the underside of the down tube, to affix extra storage.
3. Sleeping kit
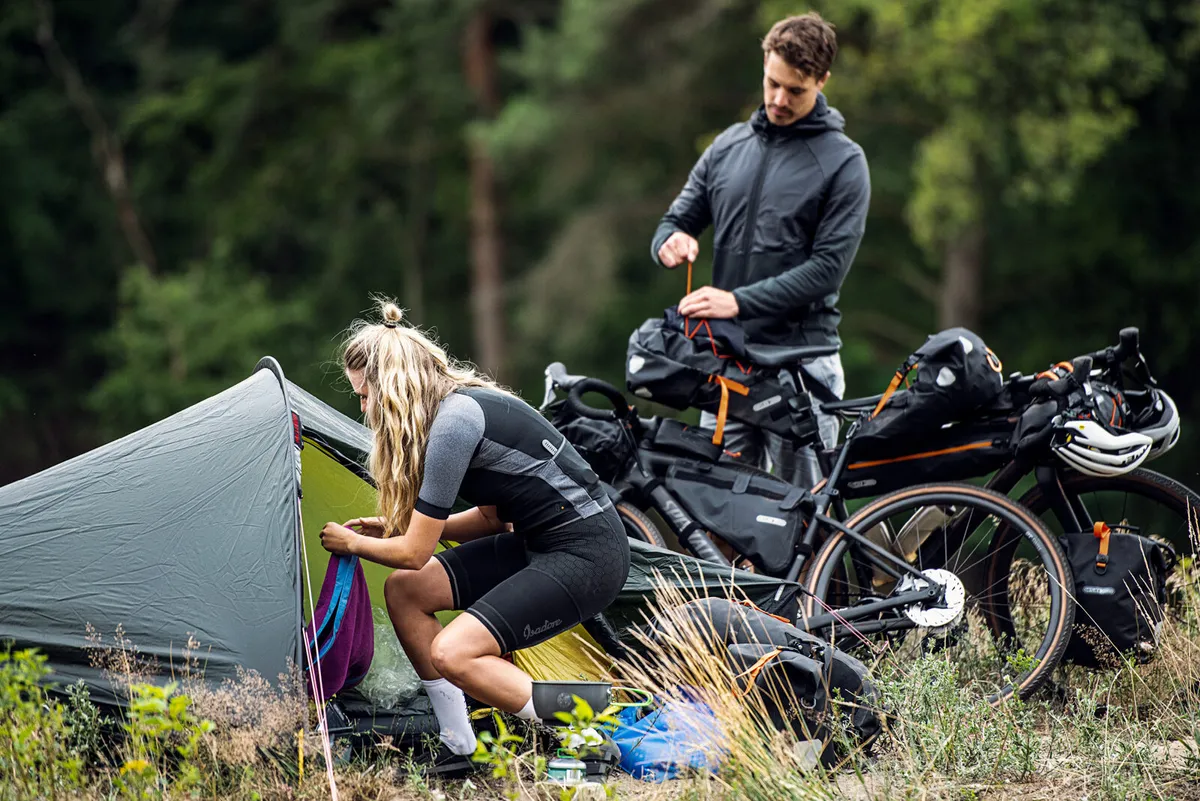
How and where will you stay overnight on your trip?
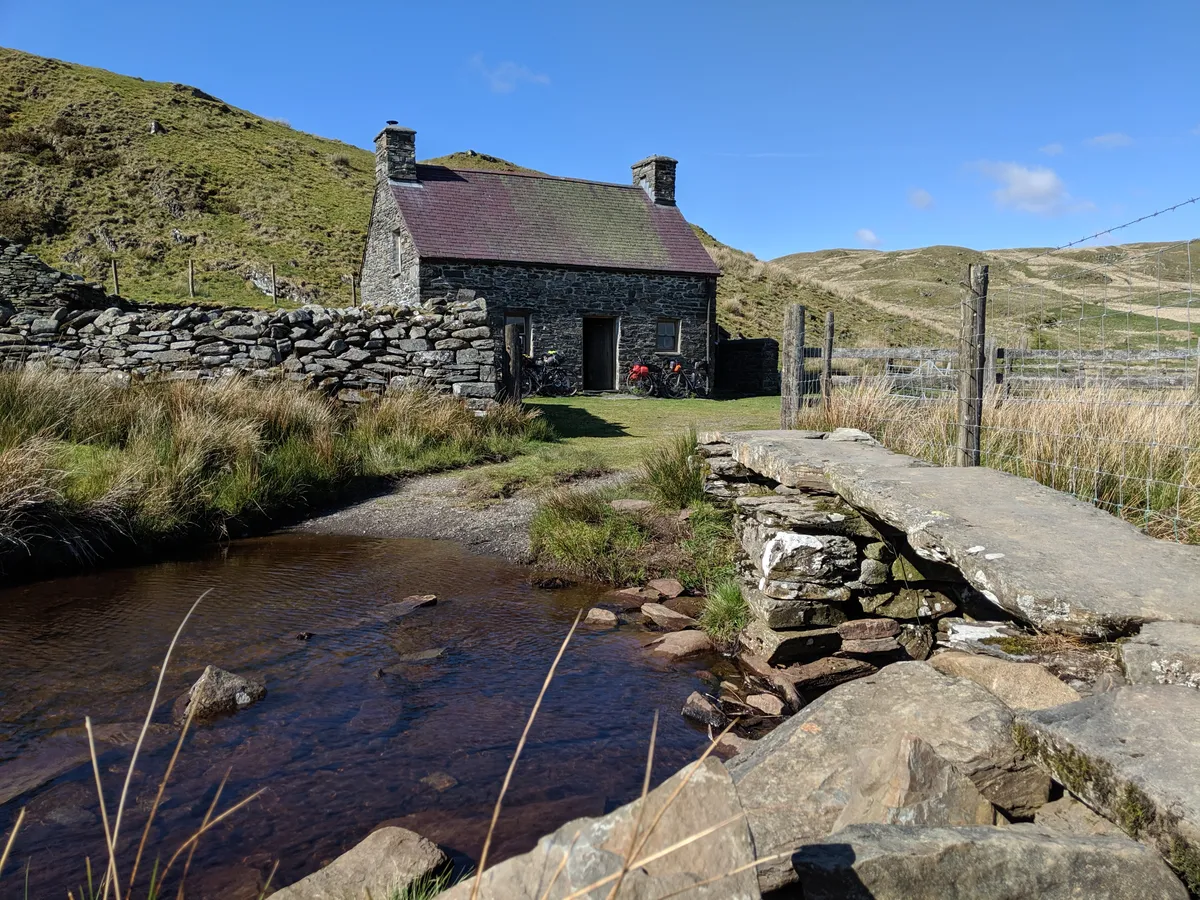
Will you camp in a tent, hang out in a hammock or go minimalist with a bivvy setup? Of course, there’s also nothing wrong with staying in a guesthouse, B&B, hostel, hotel or bothy.
In fact, sometimes it’s essential after a few days to wash your kit and recharge your batteries – not to mention enjoy a good night’s rest in a proper bed. If you're starting out bikepacking, booking into a B&B or campsite gives you some security in knowing where you'll sleep at the end of a long day in the saddle.
The optimal bikepacking sleep system is light, durable and packs down small, but as you can imagine, this comes at a cost.
If you're camping, you'll need:
- Tent, bivvy bag or tarp
- Sleeping bag
- Sleeping mat
When it comes to packing your sleeping kit in your bike bags, it’s a good idea to put it in the least easily accessible bag (typically a handlebar roll), because you’ll only need it once you’re finished for the day. Placing light but bulky items here also has less of an effect on steering.
As before, if you're venturing off the beaten track, your kit list will expand significantly beyond these bare essentials, with cooking equipment and so on.
Bivvy vs tent
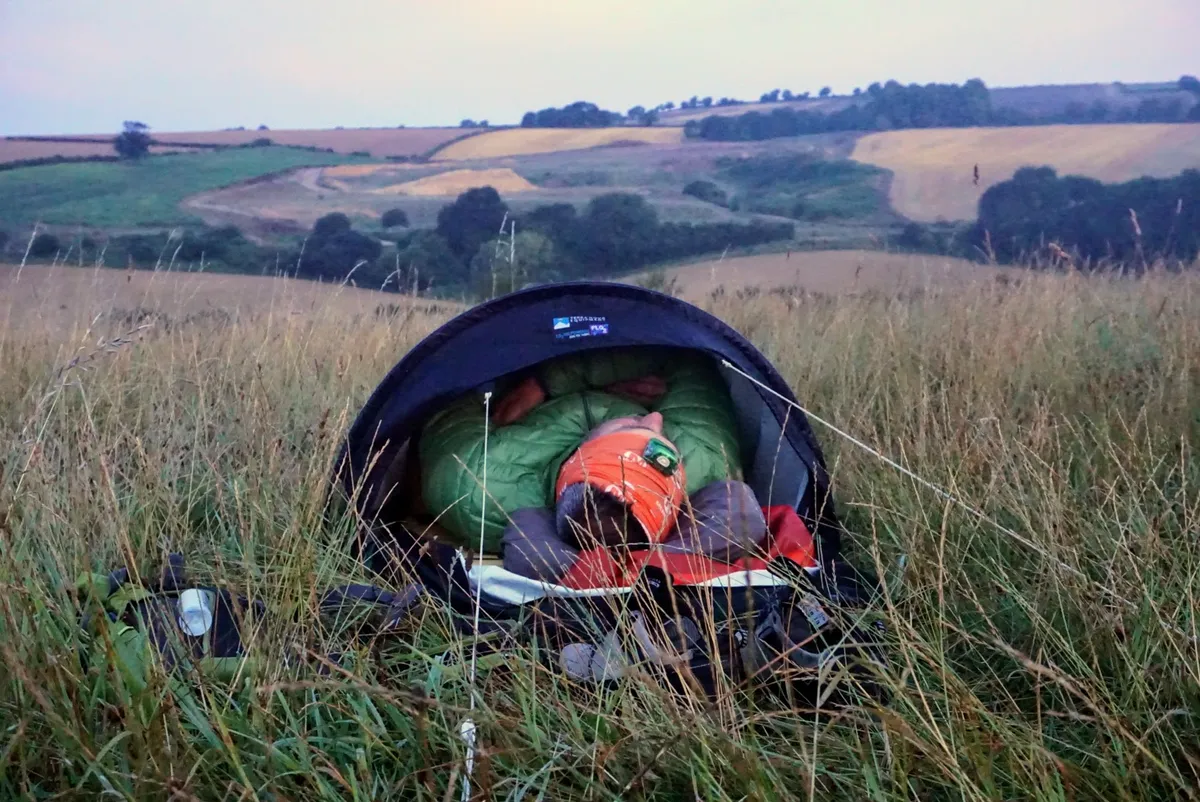
Assuming you are sleeping wild (and not checking into a B&B or hotel), there are two main options for sleeping on a bikepacking trip: a bivvy bag or a lightweight tent.
A bivvy bag is a waterproof, single-person, tube-shaped shelter. Above all else, bivvy bags offer simplicity: they are quick to set up, lightweight, inconspicuous and pack down small.
The main drawbacks are the limited space and potential exposure to the elements and insects.
The simplest designs, like the popular Alpkit Hunka, are a waterproof bag with a drawstring hood, while some bivvies, like the Outdoor Research Stargazer, are more structured.
These bivvies feature a raised head-end section, allowing full closure away from your face, and a bit more protection from the elements. Additional rainproofing can be gained by combining a bivvy with a tarpaulin fixed above the sleeping area to create a canopy.
Lightweight bikepacking tents may be preferable for longer trips, or where sleep quality matters and good weather isn’t guaranteed.
They’re heavier and take up more space, but give good protection from insects and the elements. The extra space can also be great for getting ready in wet conditions and preparing food.
4. Basic toiletries and electronics
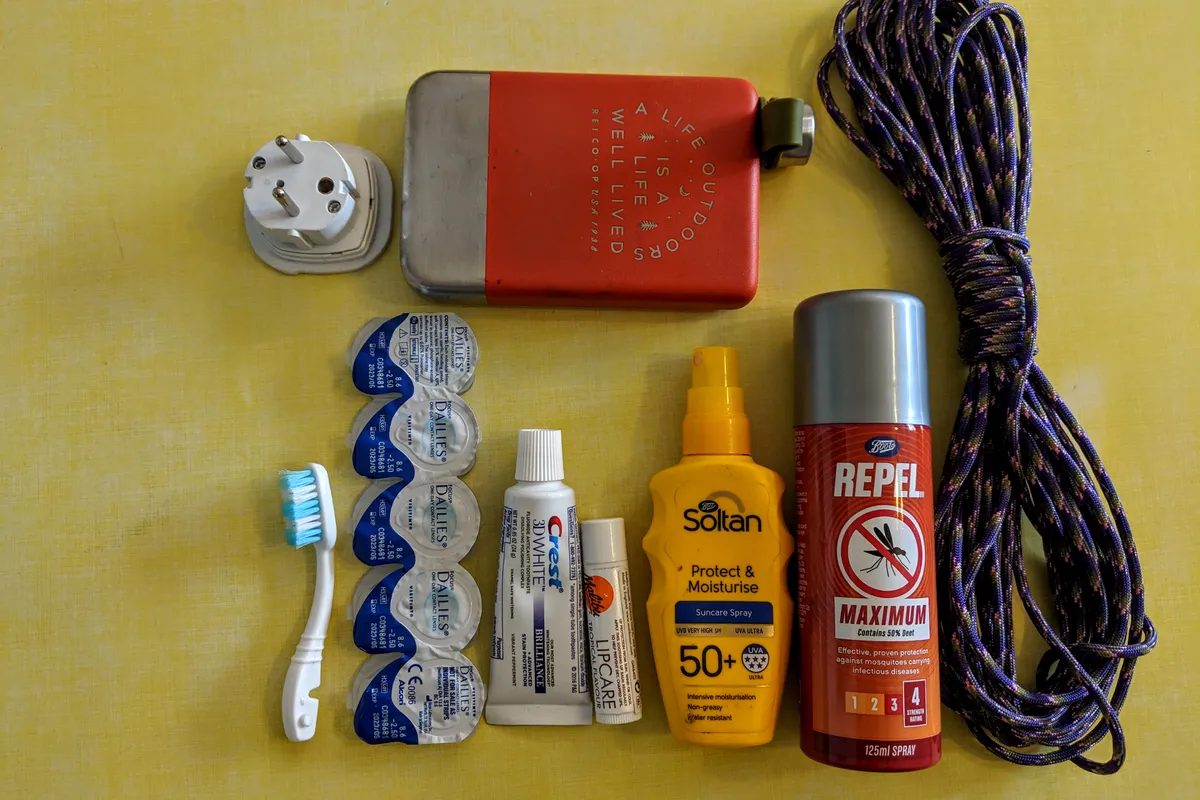
Never underestimate the importance of basic hygiene – even on a bikepacking trip. A travel-size tube of toothpaste and small toothbrush will help keep your teeth happy after the inevitable sugary energy snacks.
Sunscreen and insect repellent are small but important additions to your kit list that you shouldn’t overlook, as well as lip balm (SPF options come in handy) for sunnier, windier conditions.
It’s important to keep yourself clean and dry 'down there' to avoid skin irritation or saddle sores. Take off your shorts as soon as you finish riding and switch into clean, casual clothing, then use a clean pair of shorts the next day or clean and dry the original pair if you can.
Without access to electricity overnight, take a fully charged battery pack with you, so you can recharge items such as your phone, GPS device and lights.
It’s always a good idea to let someone know where you’re heading and when you anticipate being back, especially if you’re riding solo. Some of the best cycling apps offer tracking functionality so your loved ones can check if you’re safe.
5. Warm layers and waterproofs
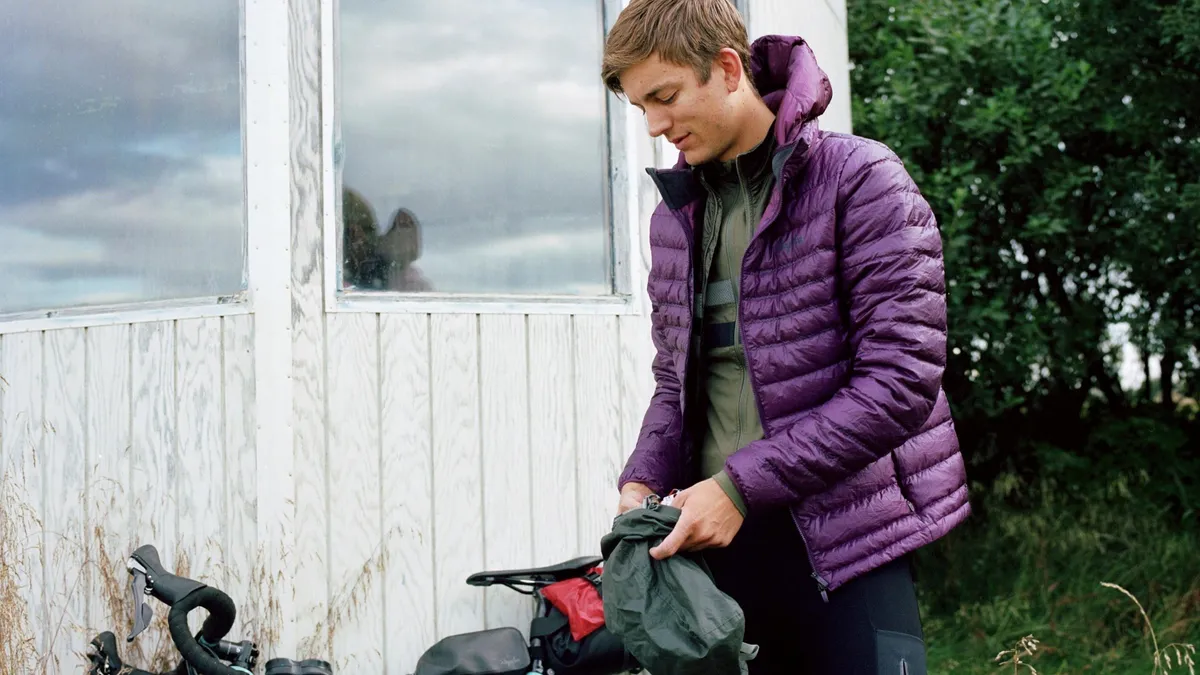
While bikepacking is typically focused on travelling light, make sure you have the right cycling kit for the conditions you're likely to encounter.
Beyond your basic cycling kit and casual clothing, warm layers and waterproofs are important considerations for most bikepacking trips.
In many parts of the world, temperatures tend to head south as the night falls, so taking some extra, warm layers is always a good idea. A down or insulated jacket is a really good idea – it's a lightweight option that offers plenty of warmth, and you can also sleep in it if it’s really chilly.
Make sure you change out of any sweaty or damp kit as soon as you get to your overnight spot to avoid getting cold, and layer up with warm, dry kit to stay warm as you prepare your sleeping setup and dinner.
Finally, only a fool would go bikepacking without a waterproof cycling jacket. No matter what the weather forecast says, take one with you, just in case.
If you're on a multi-day ride, consider where you'll be able to wash your kit. This will help keep your kit clean – important for personal hygiene – and also reduce the amount you need to take with you.
6. Cooking equipment
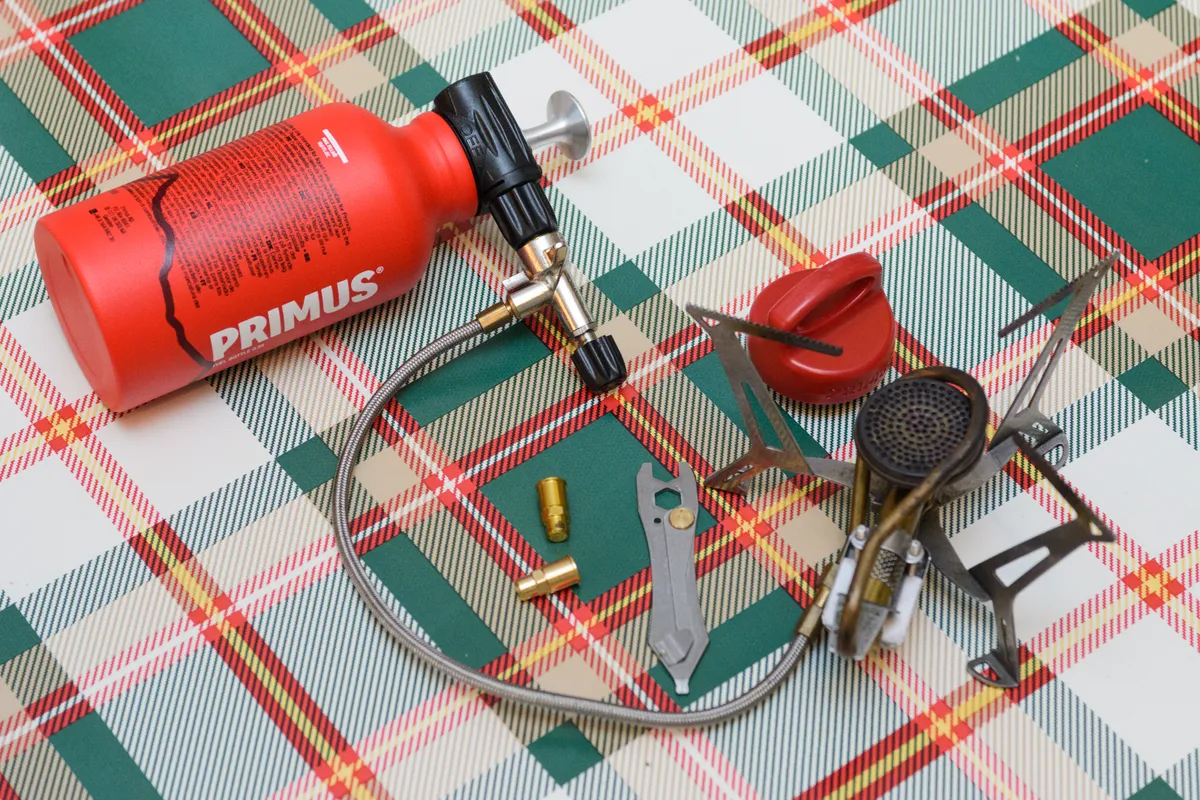
Unless you’re eating in a pub before heading to your camp spot or opting for a cold meal, you’ll need to pack a stove for your trip.
The easiest bikepacking meals require only boiled water: dried noodles, pasta, porridge or dehydrated food.
Like sleeping kit, the best bikepacking stoves are compact and lightweight, but do come at a price. If you’re heading out with friends, consider sharing one stove between a few of you and either cooking together or taking it in turns.
Bikepacking kit list
What you need for your trip will depend on the scope of your ride, however here are some of the essentials required for many bikepacking trips.
| Clothing | Tools | Camping | Toiletries | Cooking gear | Accessories |
|---|---|---|---|---|---|
| Spare cycling kit | Spare inner tube(s) | Sleeping mat | Toothpaste | Stove | Lightweight lock |
| Waterproof jacket | Puncutre repair kit or tubeless plugs | Sleeping bag | Toothbrush | Gas canisters | Water bottles |
| Thermal jacket | Pump or CO2 inflator | Bivvy bag, tent, tarp or hammock | Sunscreen | Lighter | Front and rear lights |
| Casual clothing | Tyre levers | Insect repellent | Pen knife | Mobile phone | |
| Multi-tool | Lip balm | Mug, spork, foldable plate or bowl | Wallet and cash | ||
| Quick link | Contact lenses | Food | Phone charger | ||
| Bag for rubbish | Bike computer charger | ||||
| Water purification tabs or filter | Power pack | ||||
| First aid kit |
How to pack for bikepacking
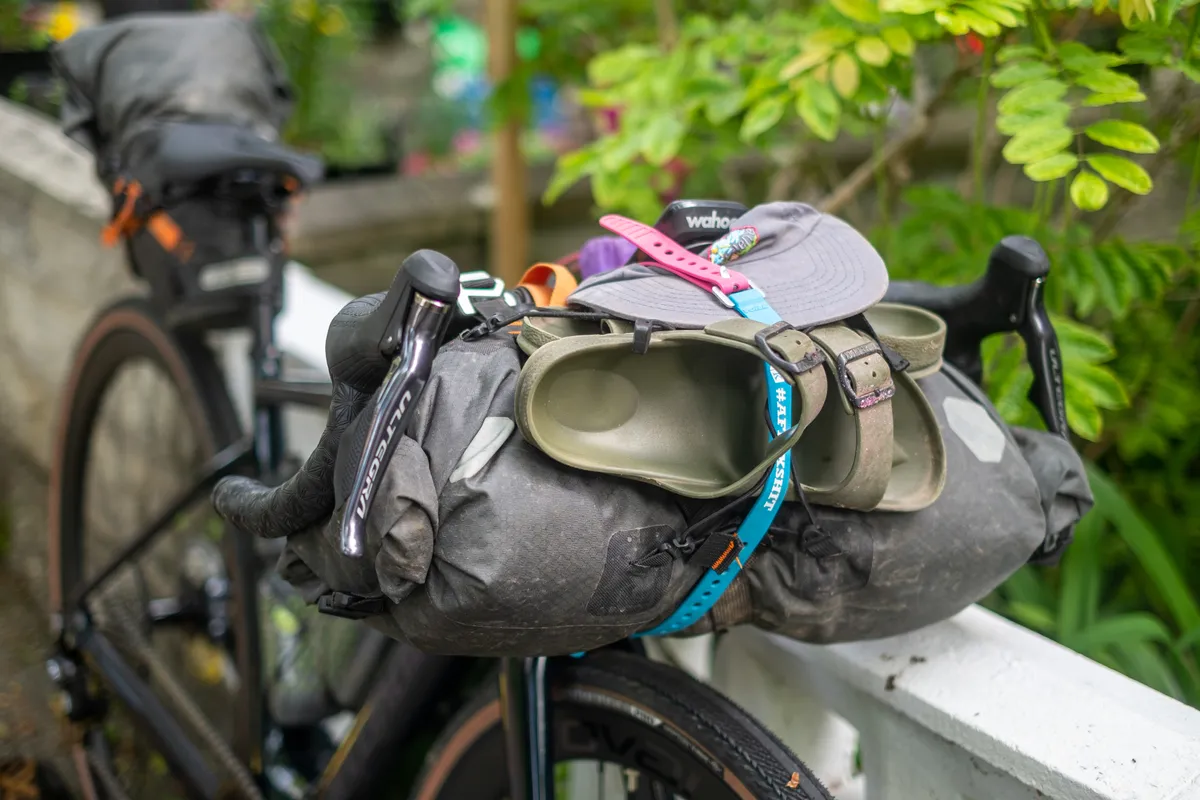
When you’re loading up your backpacking bags, try to keep the weight low and central.
Heavy kit placed high on the bike or disproportionately over the rear wheel will affect your balance – this is particularly important if you’re heading off-road. It also makes any out-of-saddle efforts harder.
With the largest bikepacking bag typically being a saddle pack, that’s easier said than done, but consider where you may be able to place heavier items. For example, if your bike has additional bottle cage mounts underneath the down tube, you can use these for a tool keg.
A separate tool pack will mean your tools are close at hand if you have to fix a mechanical. You don't want to be rummaging in the depths of your luggage for a tyre lever.
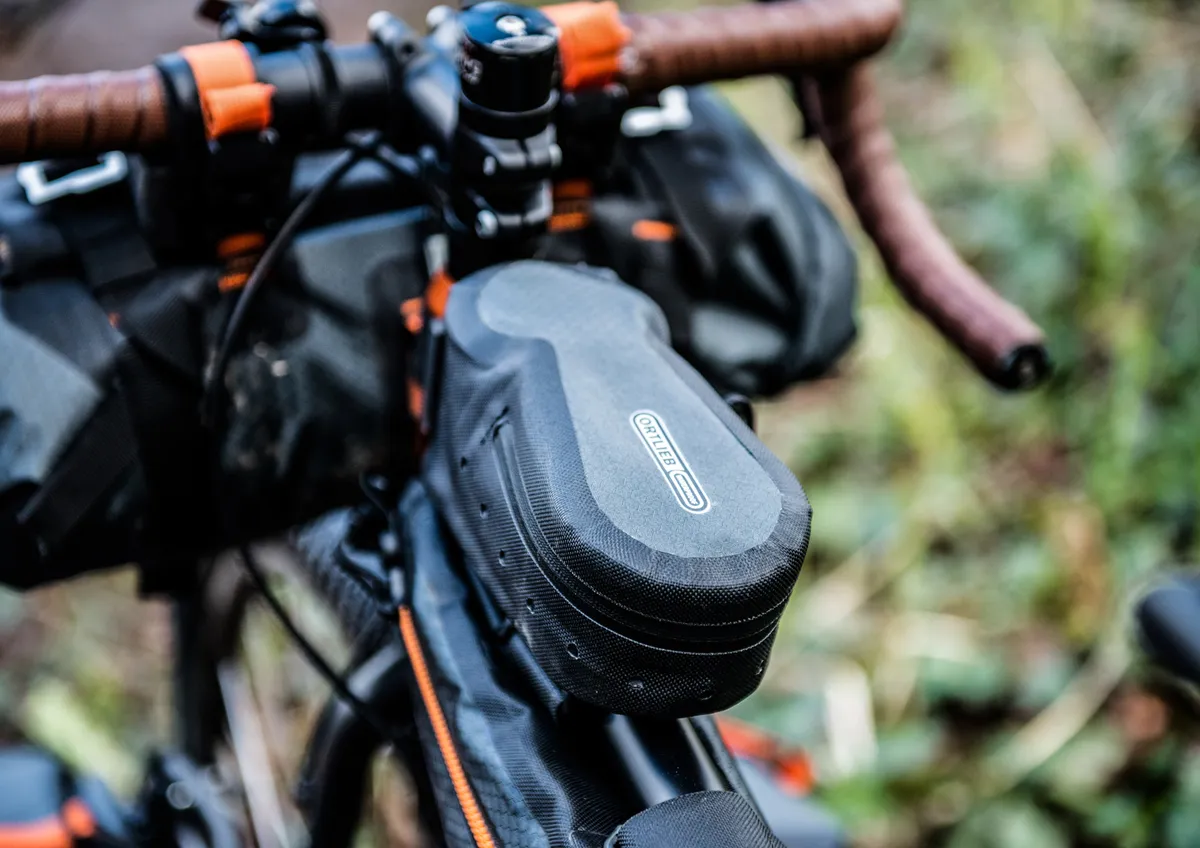
Items of protective clothing such as waterproofs should also be close at hand for when you need them, as should things such as sunscreen and snacks, so keep them at the top of bags or pack them in a frame bag.
A bento bag, strapped or mounted to the top of the top tube, or canister bag on the handlebar, can also help keep ride essentials at hand.
Kit that you’ll only need occasionally, or at the end of the day, can be packed further down in your bags, for when you’ve got more time to pull everything out and reorder it.
Make sure items such as a down jacket, spare clothing and sleeping kit, especially a sleeping bag, are somewhere waterproof. It’s worth having a waterproof dry bag to be doubly sure they’ll stay dry, rather than relying just on the bike bag’s waterproofing.
Where to go bikepacking
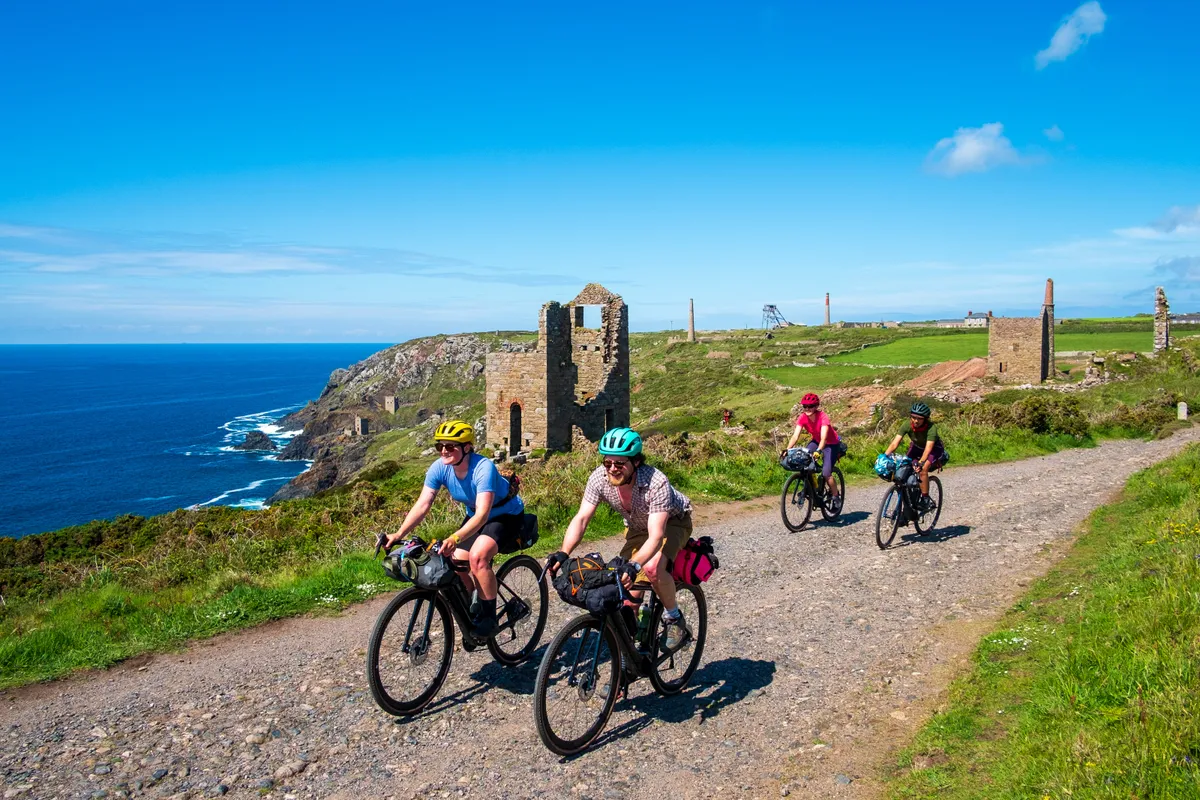
You can go bikepacking pretty much anywhere you like, provided you can legally ride there, with your bike likely to be the limiting factor.
If you’re on a road bike, stick to tarmac (or very light off-road trails, if you have wider tyres), but even if you’re on a gravel bike you might not want to go anywhere too extreme. Consider what’s manageable for your gearing and tyres. Remember, your bike will weigh considerably more and may not handle as well as it would when unloaded.
A mountain bike will open up a wider range of terrain but, once again, remember the bike’s off-road capability – and your ability to manoeuvre the bike – may be affected by the extra weight placed on it.
Your average speed is likely to be lower than when riding unloaded, so don’t be too ambitious with your route planning.
Established bikepacking routes

One way to avoid overextending yourself is to follow all or part of an established route and see how others have tackled it. There’s a growing number of established routes in the UK, such as the South Downs Way, West Kernow Way and King Alfred’s Way in the south, and the Way Of The Roses across northern England.
In Scotland, rights of access are much better than in England, so you can more easily wild camp on routes such as the Caledonia Way or the North Coast 500.
Further afield, routes such as the Tuscany Trail and the Traversée du Massif Vosgien take you well off the beaten track, while the USA has classics such as the Black Canyon Trail in Arizona or, if you’re feeling ambitious, the 3,000-mile off-road Great Divide Mountain Bike Route.
It is now common for people to complete pilgrimage routes as bikepacking adventures.
How to plan a bikepacking trip
With your bike sorted and ready to go, here’s how you should plan your trip to get the most out of your venture into the wild.
1. Plan your route
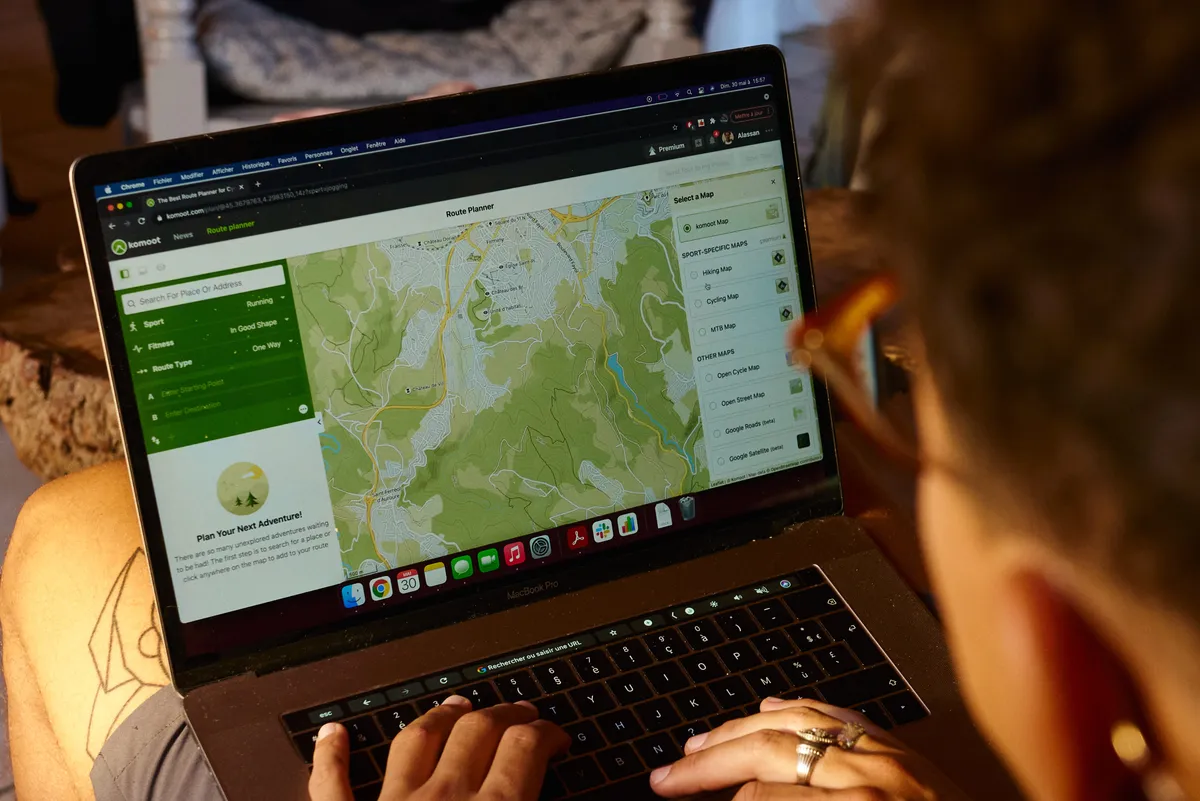
There are a huge number of established bikepacking routes across the world, which you could tap into for your first bikepacking ride. Or you could plot your own route closer to home.
Komoot is one of our favourite apps for planning bikepacking routes. You can use the planner to build a multi-day course, seek inspiration from user-generated highlights or browse Komoot's 'collections', which contain pre-established routes.
Don’t feel you have to try anything too extreme on your first go – you can still learn a lot by travelling relatively short distances and taking on the challenges of carrying gear, setting up camp and cooking for yourself for the first time.
Check your planned route is suitable for your bike and the current weather conditions. For example, avoid river crossings after heavy rainfall and high ground if there’s any chance of thunderstorms.
If you’re not passing through many towns or villages, take plenty of snacks and water. Alternatively, plan your resupply points in advance: you won’t want to go hungry.
2. Take a sleeping kit dry run
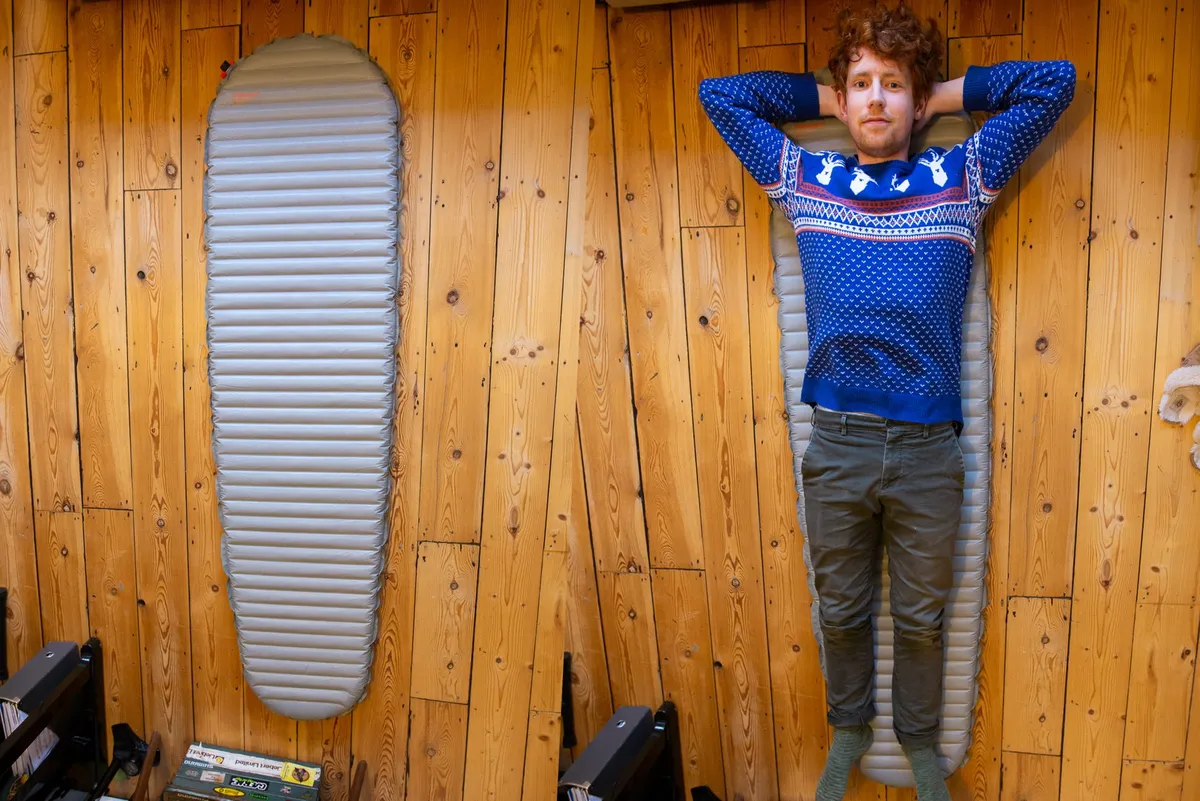
It’s a smart idea to do a dry run of your kit setup at home before your trip, to make sure you understand how to use it.
New bikepacking tent? Pitch it in the living room or garden for practice, and you can double-check you have all the pegs and poles.
If you think you might encounter some rainfall overnight, a tarp can help keep the worst of the rain off your bivvy or hammock. Practise stringing up a tarp in your garden or local park to make sure you have everything you need and are familiar with how it works before you have to try setting it up in a downpour.
It’s worth checking local laws about wild camping if that’s something you intend to do, or alternatively book into a campsite or other place to stay. If you plan on staying in a bothy, always make sure you have a back-up plan, because when you arrive you could find it’s shut or full.
3. Pack light (ish)
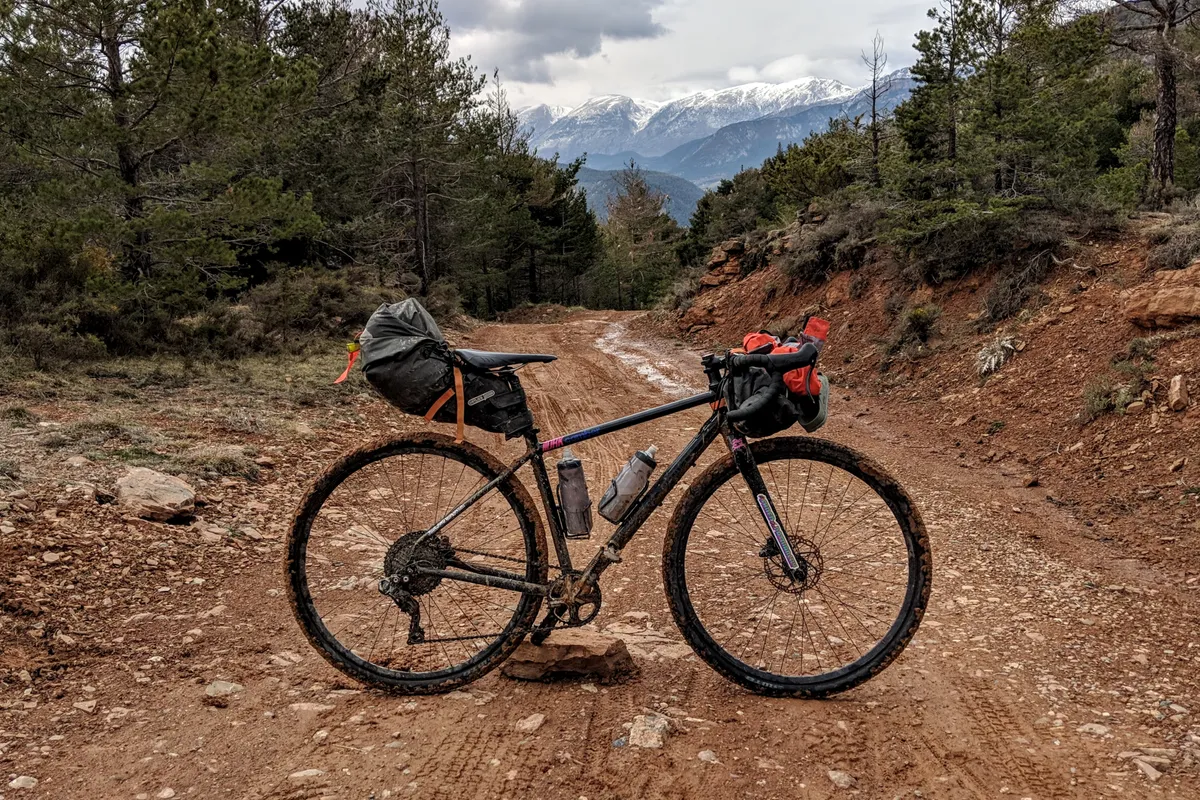
As you haul your laden bike up a rocky, steep hill, you’ll realise just why packing light is important. However, that comes with a massive caveat: you shouldn’t pack so light that you omit key pieces of kit that could save you in an emergency, or if the weather turns on you.
It’s always a good idea to carry a survival blanket, small first aid kit (and know how to use it effectively) and enough warm and waterproof layers, as well as spares and tools.
As you gain experience bikepacking, you’ll learn what kit works for you and what isn’t necessary.
Yes, you’ll probably be surprised by just how little you do need to get by, but it’s important to remember that heading out into remote areas puts more onus on you to be self-sufficient and safe.
Pack light, but not too light.
4. Learn from the experience
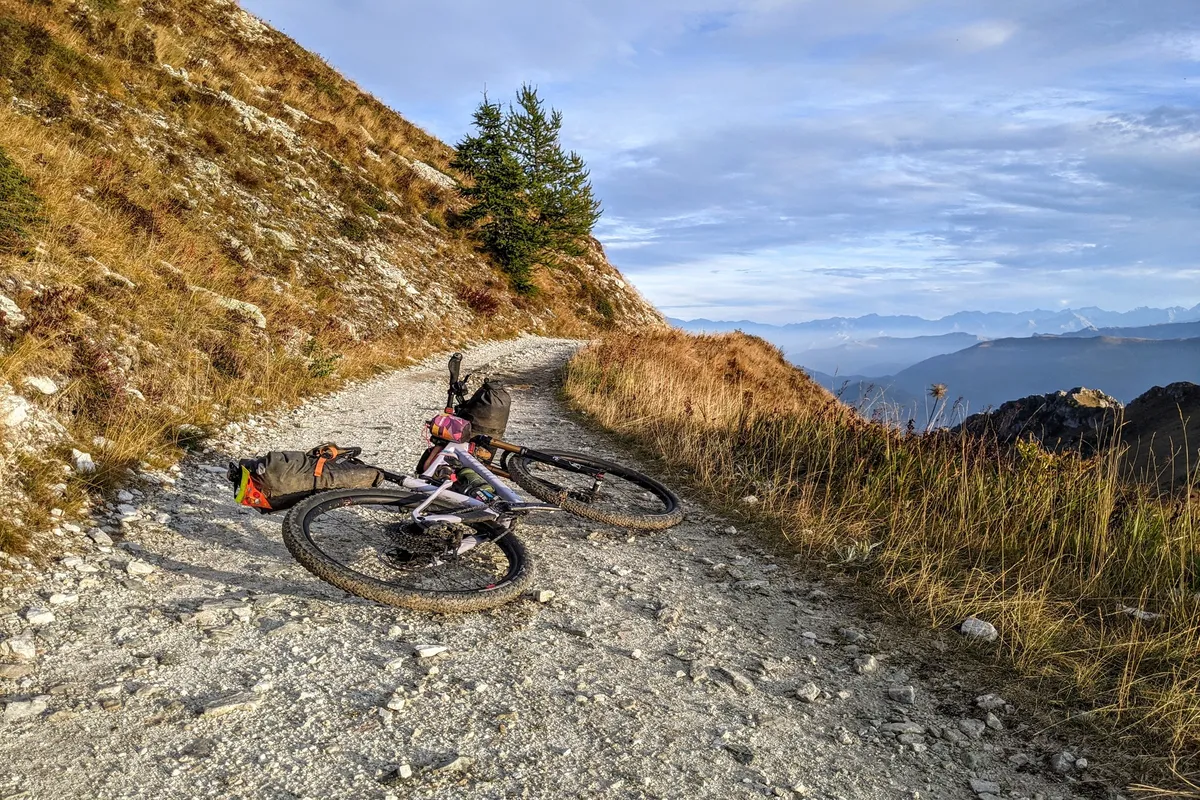
Once you've got your first bikepacking trip under your belt, reflect on your experiences.
What worked and what didn’t? Which items were really useful and which didn’t you touch? What gear did your friends use and did it work for them? Which parts of the route were enjoyable and what would you change for next time? How did that sleeping arrangement work for you?
Just like any sport or skill, practice helps you learn what works best and when.
5. Enjoy it!
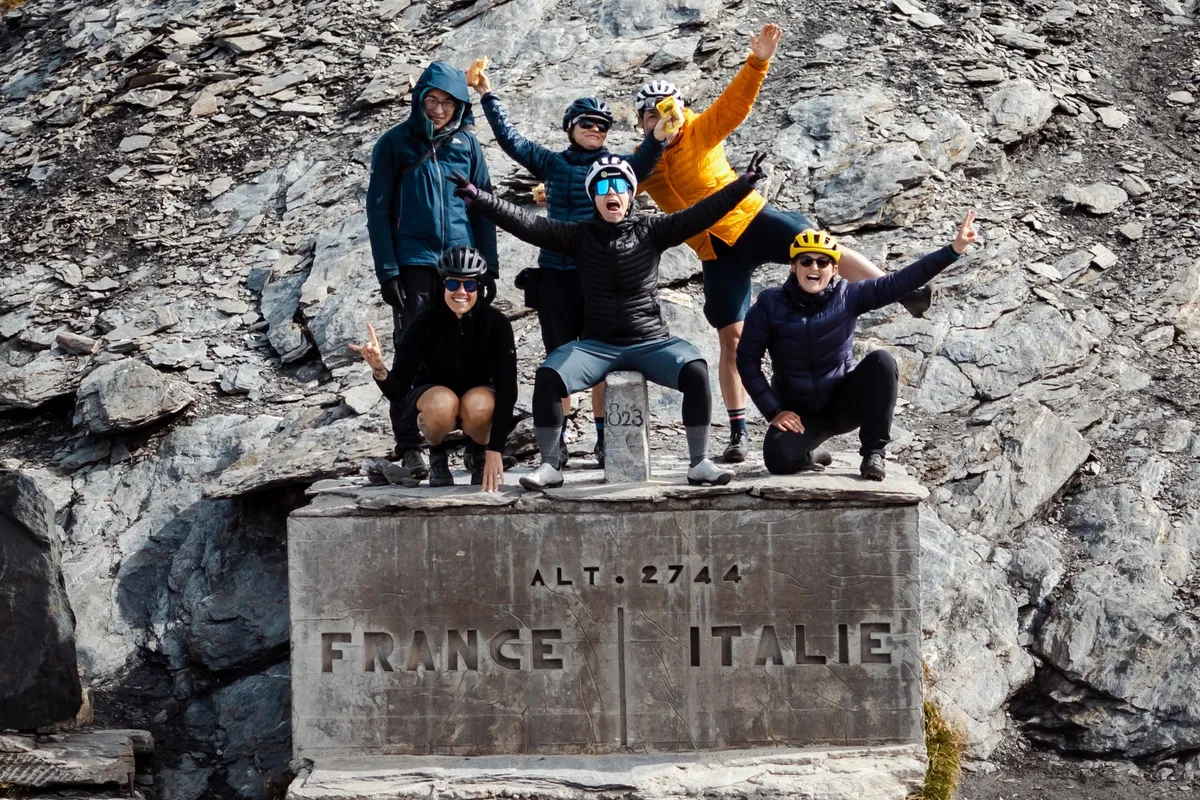
Heading out into the wild can be daunting, challenging and tough. Embrace everything the elements throw at you, the views and the nature around you.
Consider inviting some more experienced pals along, who can show you the ropes, and be there for moral support if things get tough.
Stop to take pictures to remember your trip, draw sketches, savour local delicacies and watch the stars from the comfort of your sleeping bag.
Above all, bikepacking is supposed to be fun. Take your time, savour the experience and enjoy yourself!
Five top tips for your first bikepacking trip
- If you’re using a saddle pack, pack carefully. Putting heavy items near the bottom of the bag and towards the seatpost will help keep the bag secure and prevent it from wiggling.
- Give everything a home. Having a routine for where each piece of kit lives can prevent frustration when trying to find a lost item and searching all of your bags – especially in the dark.
- Pack light, especially if you’re heading for the hills. Don’t skimp on the essentials, but remember that you’ll need to carry everything you’ve packed so it may be worth leaving that hot water bottle at home.
- Change out of your cycling shorts for sleeping — your bum will thank you.
- Take a friend – bikepacking adventures are best shared!
Which bikepacking bike should I use?
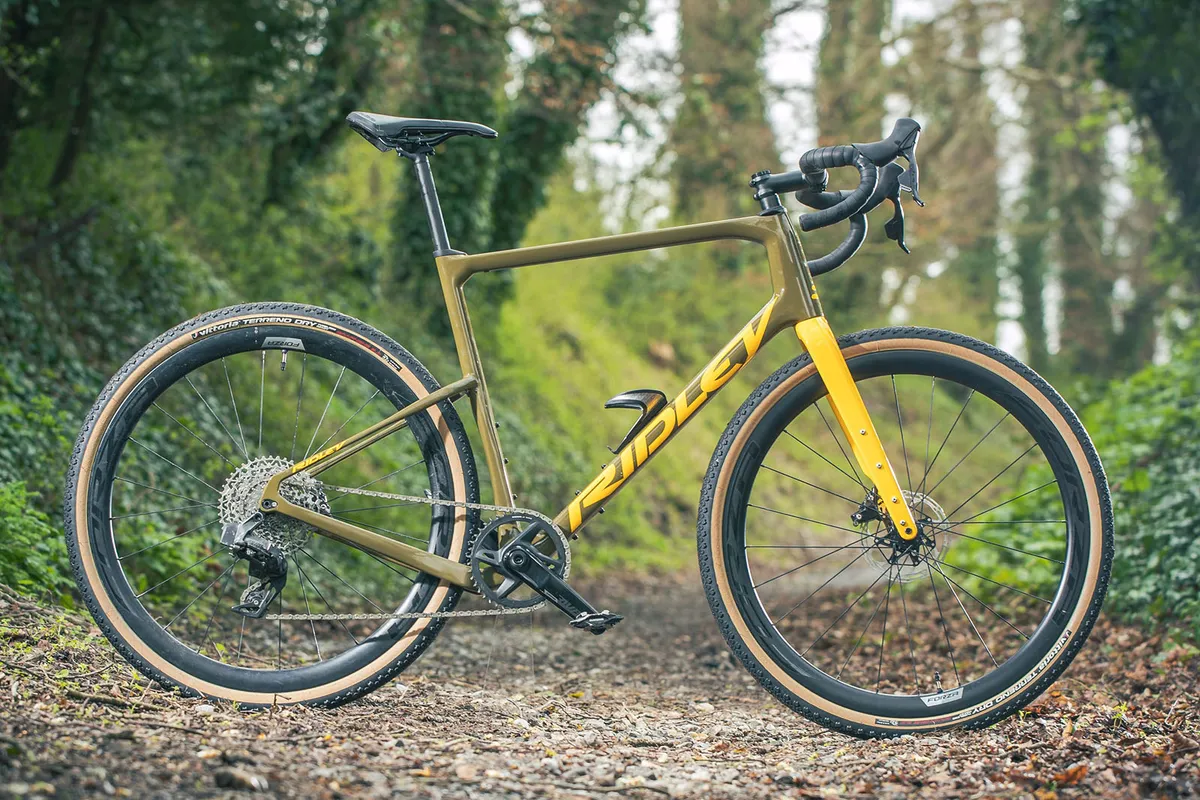
The great news is you can go bikepacking with almost any bike, by tailoring your route to what you’re riding. Or indeed, tailoring your bike to bikepacking.
For off-road bikepacking, you’ll need something suitable. Gravel bikes or cyclocross bikes are good options.
If your bike handling or bike choice doesn't meet the terrain's technical demands, you can always carry your bike (known as 'hike-a-bike').
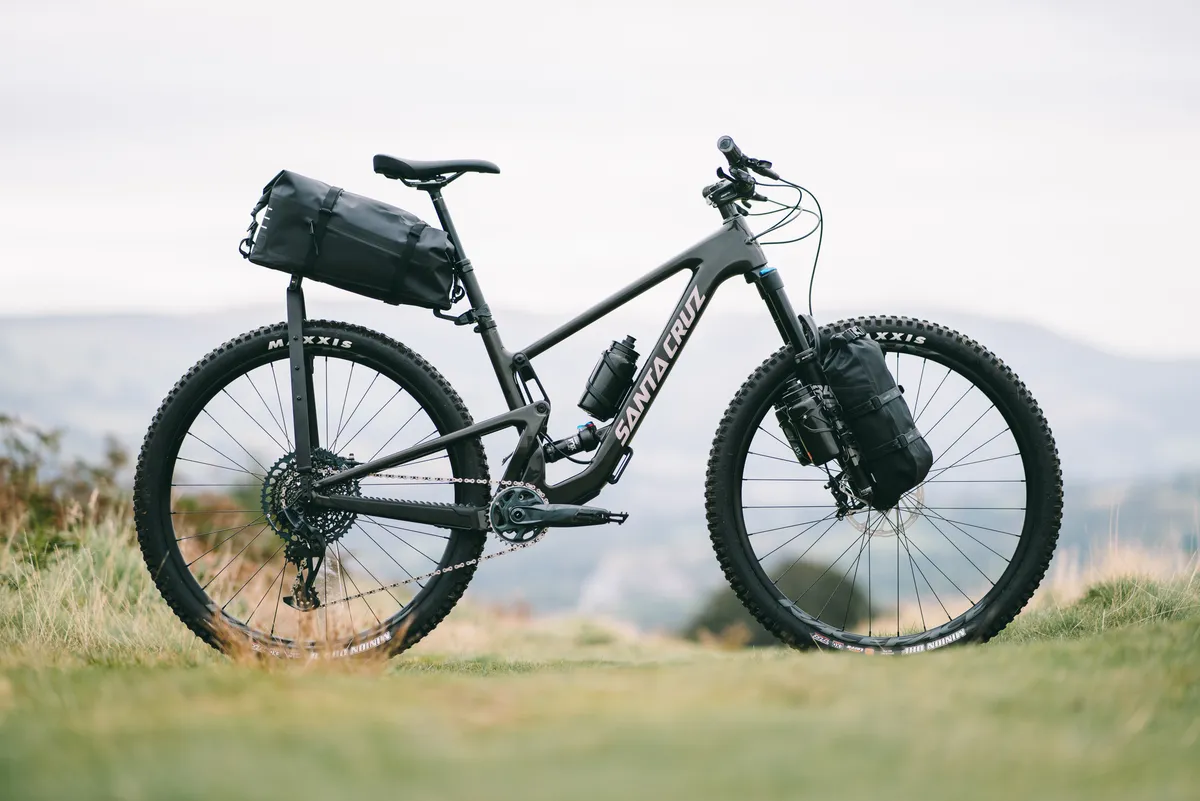
However, if you’re planning a technical route, you’ll likely want a mountain bike. Nailing your mountain bike bikepacking setup may take a bit more thought than with other types of bike, primarily because of suspension settings and limited room to mount bags.
Adventure or extreme gravel bikes with comfortable geometry, robust frames and possibly gravel bike suspension – most likely a gravel suspension fork – are best for off-road bikepacking races.
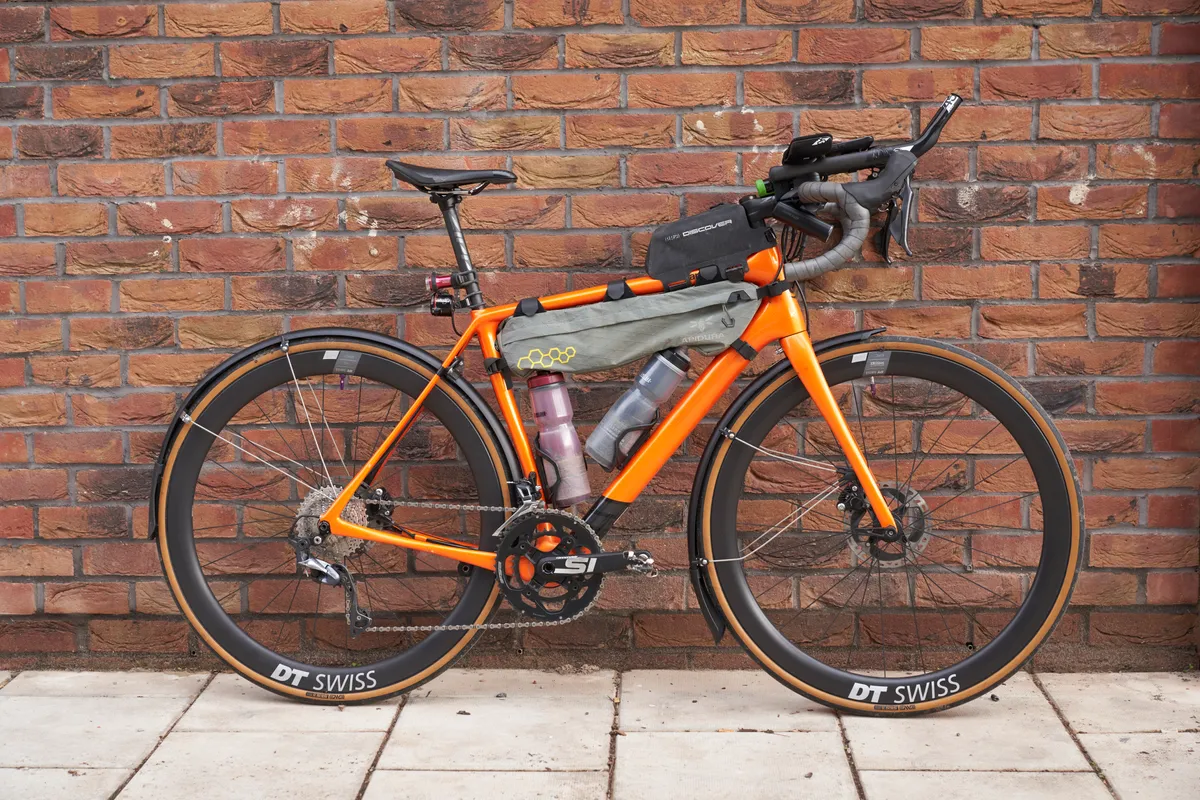
Road bikes can be bikepacking bikes too, and many people take to bikepacking on the road or on cycle paths. Exploring new areas on quiet lanes can give that same sense of adventure, freedom and connection to nature that comes from self-sufficient travel and sleeping out.
Gravel bikes are an increasingly popular option for bikepacking. They provide a happy medium between road speed and off-road capability. You can cover distances quickly when required, but also venture off the beaten track on bridleways, trails and dirt roads.
A bikepacking setup can add about 10 to 20kg to your bike and the extra weight will make climbs and loose terrain harder work. Ensuring your bike has a suitably low bottom gear is a good idea.
undefinedundefinedundefinedundefined