If you’re new to cycling, there is tons of bike-specific terminology to understand if you want to get to grips with how your machine works and what each bike component does. Some are pretty obvious and self-explanatory, whereas other bike parts are a bit more tricky.
Bike components such as bottom brackets and freehubs have a lot of complexity hidden away – and bike brands seem to love to come up with new and slightly different ways of doing things. Even pedals come in a bewildering number of variants.
Confused? Here's your jargon buster on all the key bike components – and an explanation of what they do.
Want more information? We've got full explainers covering the key parts of a bike, so hit the links to get the lowdown on the seemingly infinite number of standards and compatibility questions.
Frame
Let's start with the frame itself – the heart of any bike.
Bikes have been made from a variety of different frame materials over the years. Today, they're most commonly made of either aluminium alloy or carbon fibre, although steel, titanium and magnesium alloy are also options.
Bike frames are typically a double-diamond design, with a front triangle composed of the seat tube, down tube, top tube and head tube, and a rear triangle composed of the seat tube, chainstays and seatstays. We'll come on to each of these parts of a frame.
Full-suspension mountain bikes have a floating linkage between the front and rear triangles, with a rear-suspension system to allow controlled movement between the two.
Hardtail mountain bikes rely on a suspension fork for their bounce, combined with a rigid rear end.
Bike frame tube names explained
Down tube
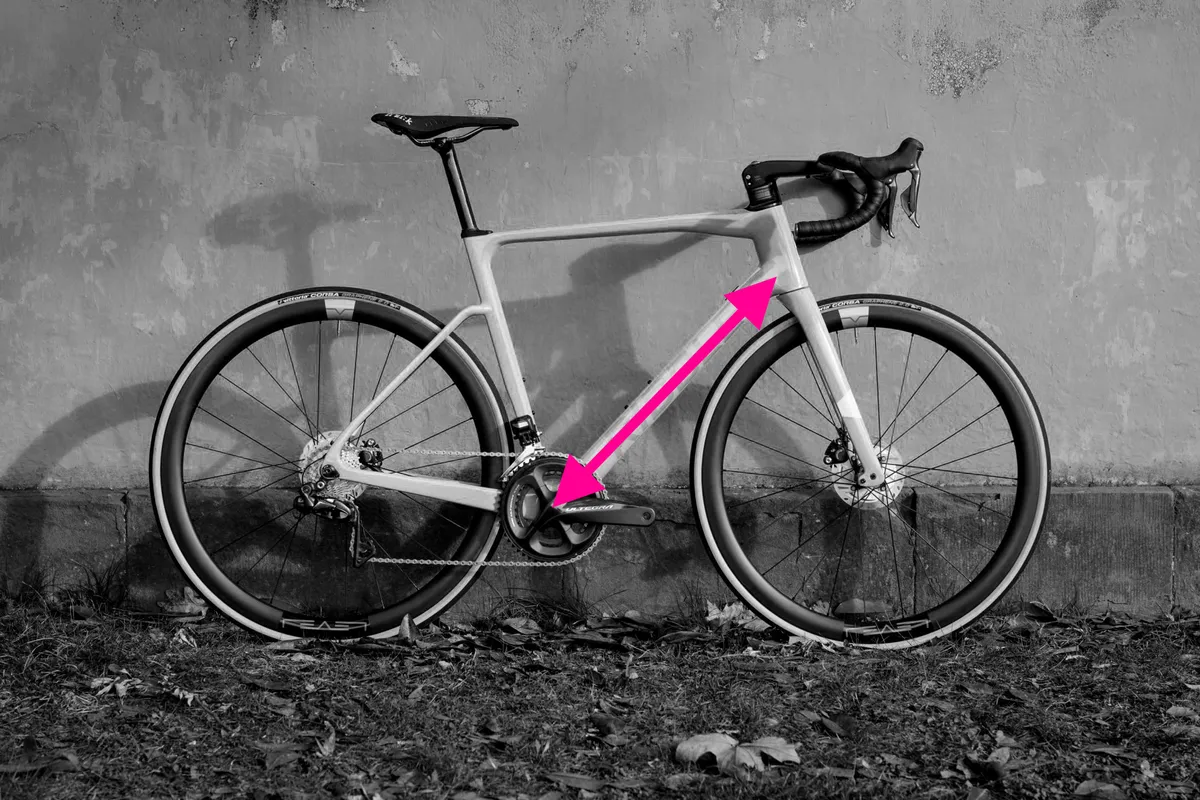
The down tube is the part of the bike frame that slopes down from the head tube at the front of the bike to the bottom bracket, which houses the crankset. It’s the backbone of the bike’s strength.
Top tube
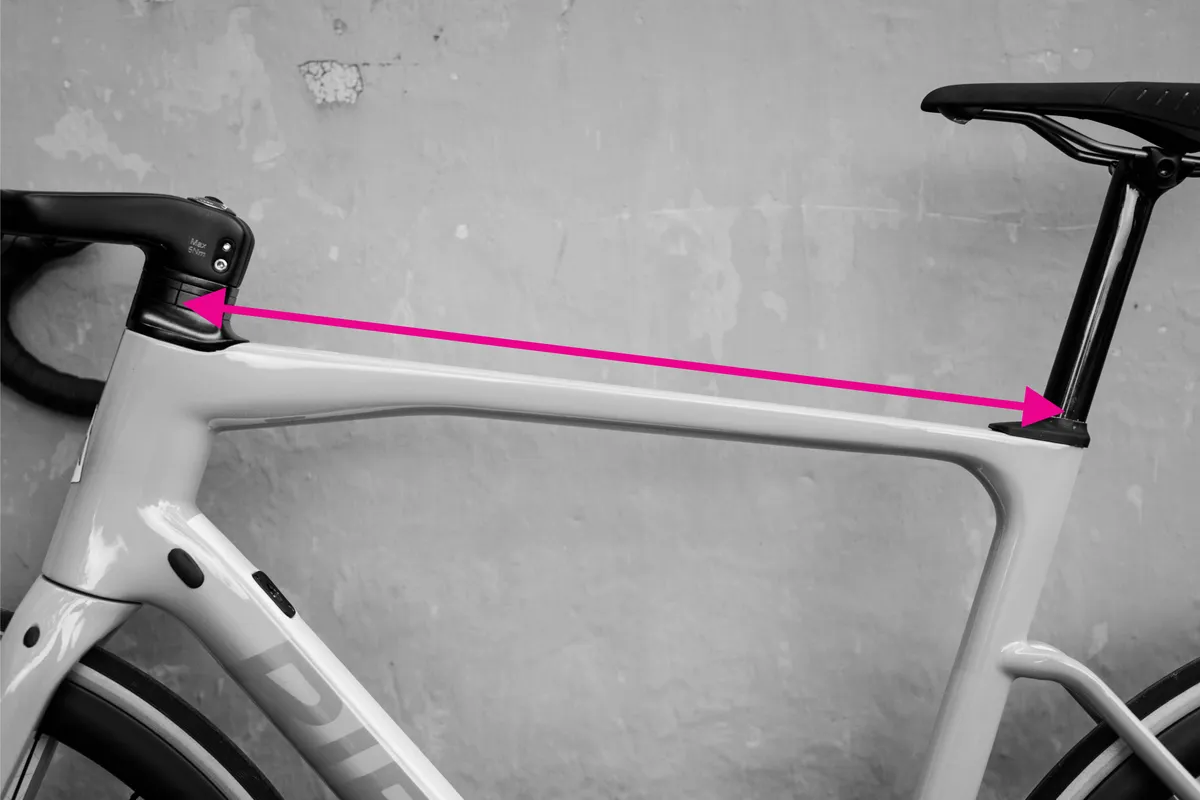
As its name suggests, the top tube runs along the top of the bike frame’s front triangle, from the top of the head tube to the top of the seat tube. Originally horizontal, it’s now more common for it to have a slope from front to back, particularly on mountain bikes.
On road bikes, the slope results in a frame designated as 'compact' or 'semi-compact', depending how much of a slope there is.
Seat tube
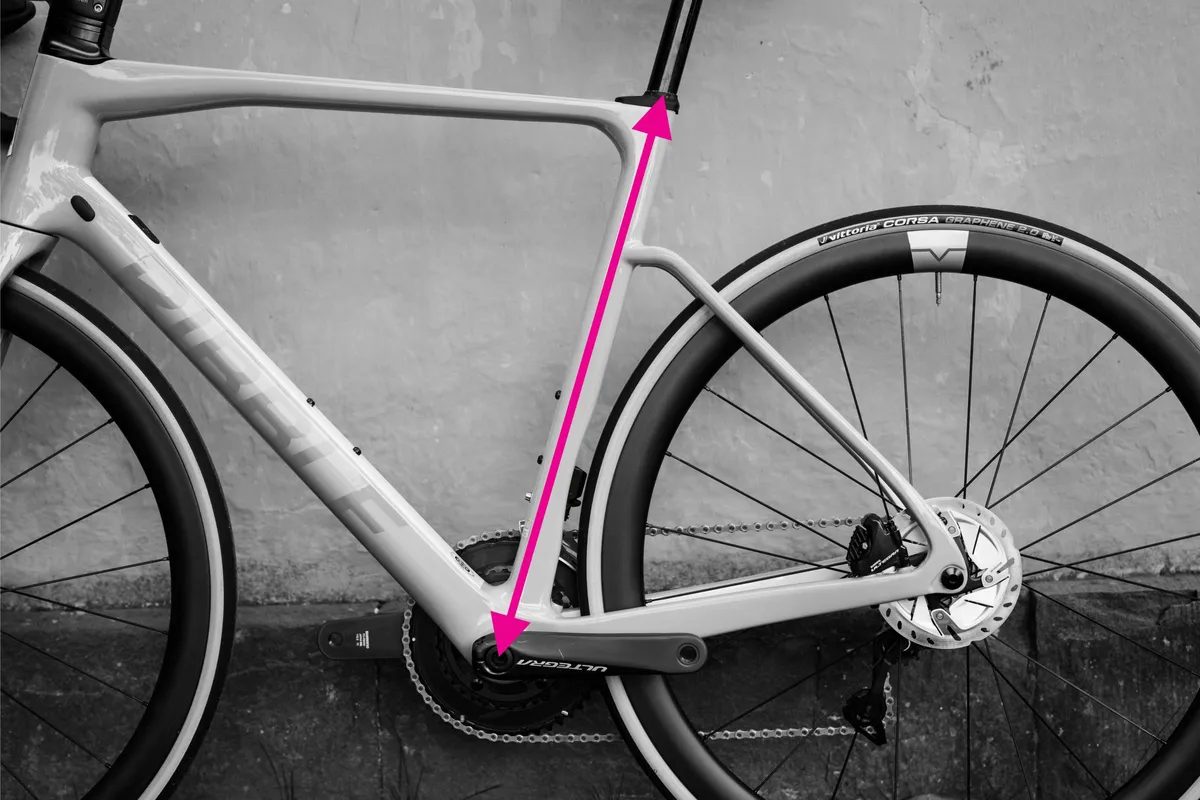
The seat tube runs from the bottom bracket up to the seatpost, at the rear of the bike’s front triangle. It may be straight or have a kink in it and some have a cut-out section at the rear to fit around the back wheel, allowing the chainstays to be kept shorter.
Head tube
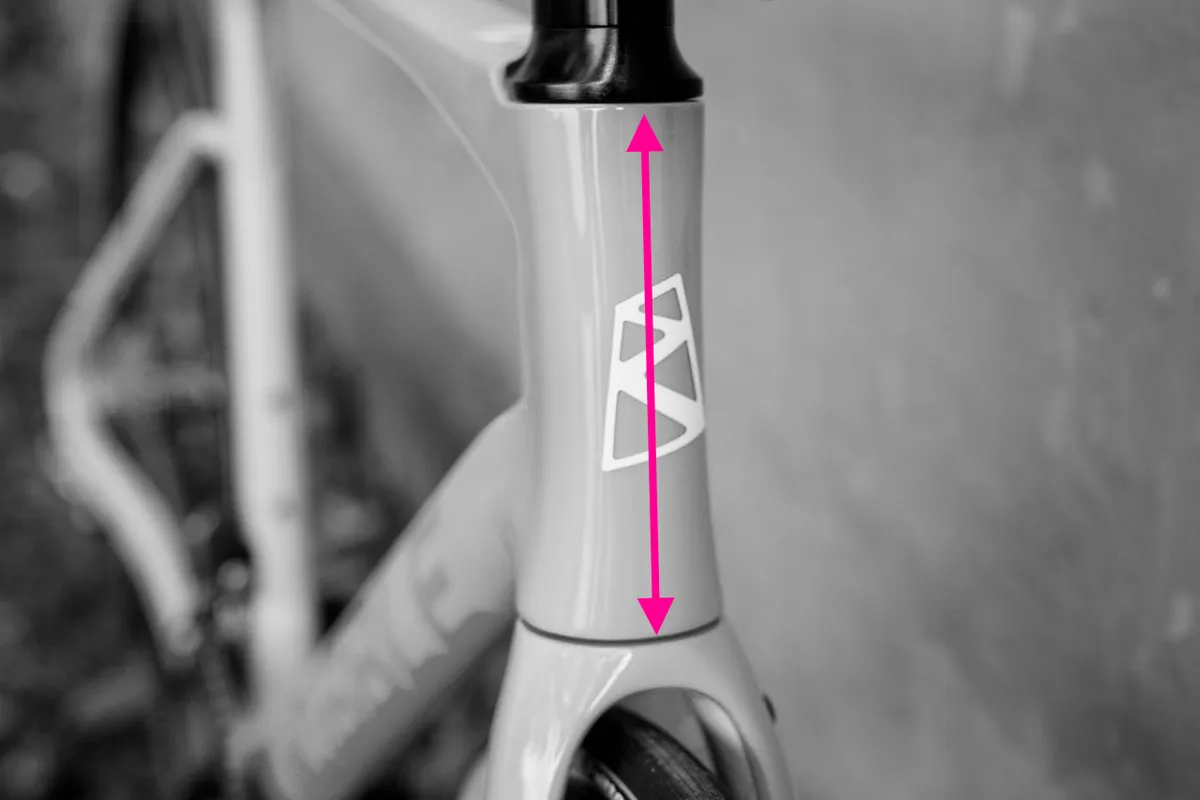
The head tube is the short tube at the font of the frame, which supports the headset bearings that keep the fork in place.
Seatstays
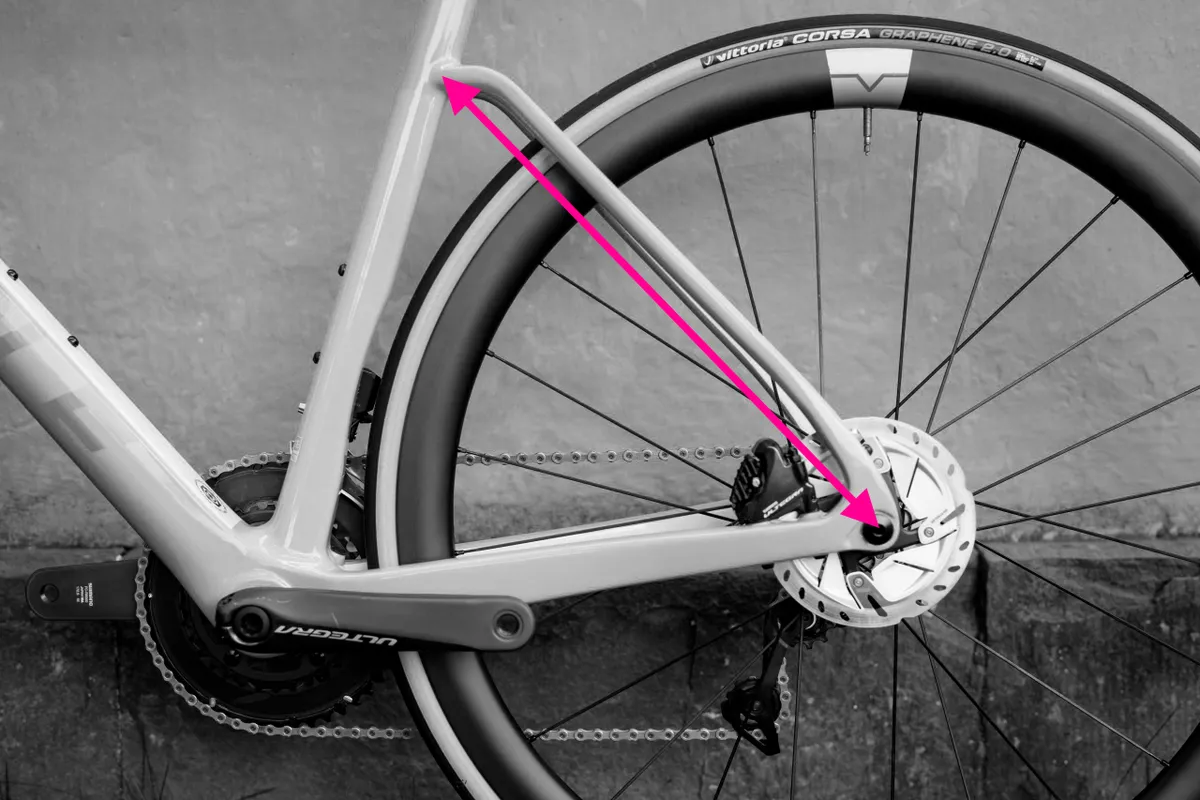
The two seatstays connect to the seat tube at one end and the chainstays at the other, to support the rear wheel. They’re typically skinny, to help add comfort at the rear of the bike. If a bike has rim brakes, there’s often a bridge between the two seatstays to support the rear brake caliper.
Chainstays
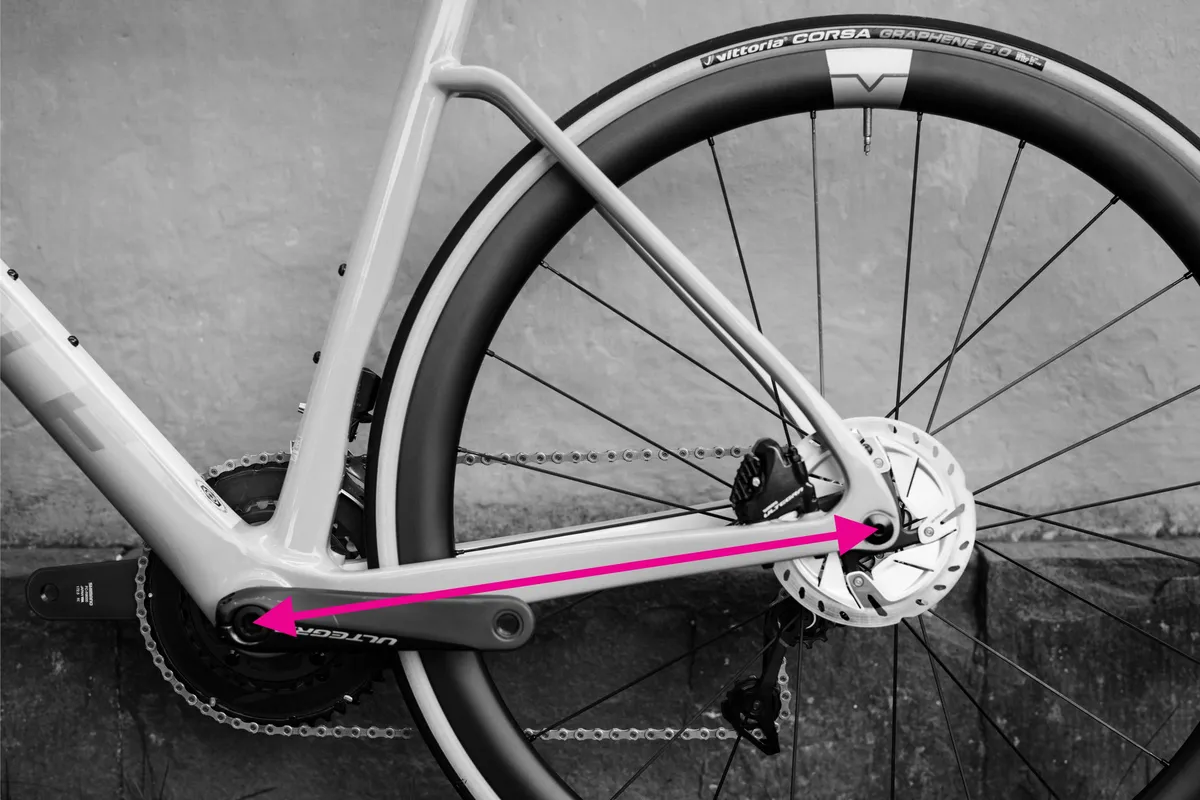
The two chainstays run from the frame’s bottom bracket to the rear of the bike, where they meet up with the seatstays and support the rear wheel. On the driveside, the chainstay also supports the rear-derailleur mechanism.
Fork
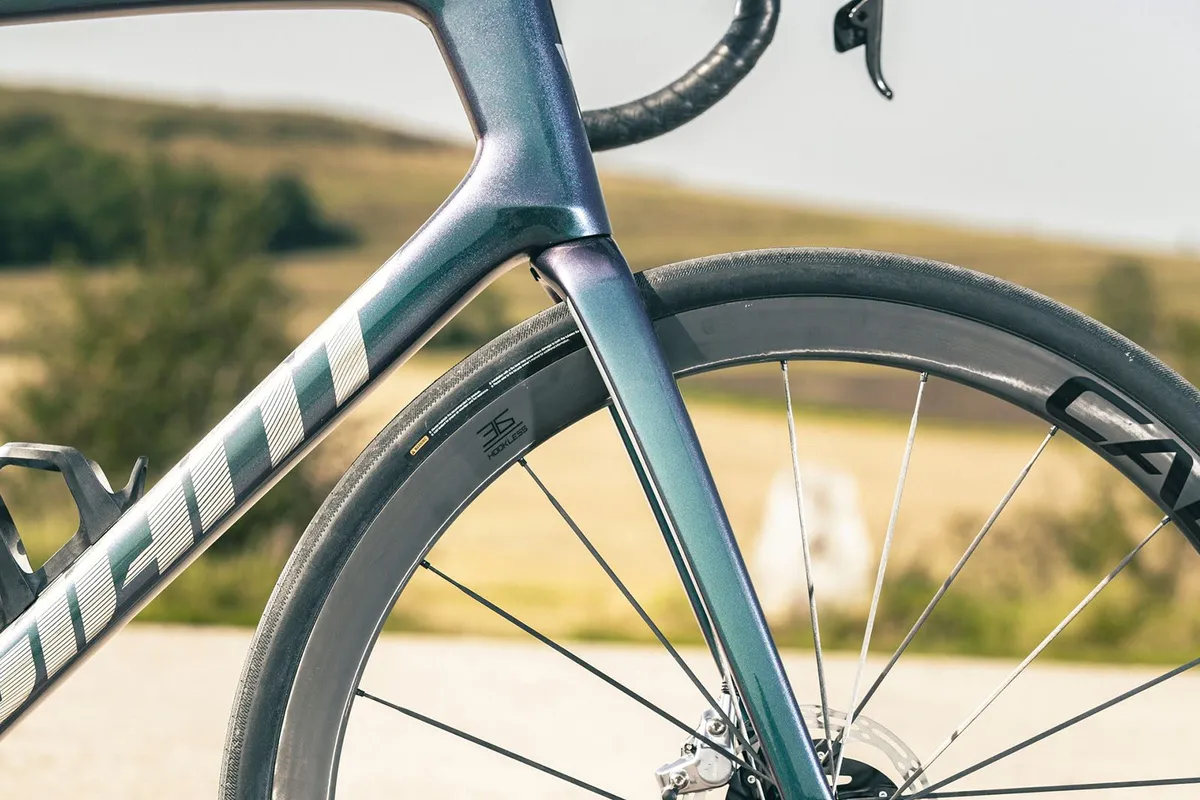
Your bike’s fork consists of (usually) two legs to support your front wheel and a steerer tube that passes through the bike frame’s head tube and turns on bearings to enable you to steer.
Road and gravel bike forks are typically made of carbon fibre, but may have an alloy steerer tube, although you can also find all-alloy or steel forks, usually on cheaper bikes.
Most road and gravel cyclists will use the fork that comes with their bike or frameset, without giving it a second thought. However, tyre clearance and mounting points – for mudguards or luggage – are things to consider when it comes to the versatility of your bike.
Suspension forks
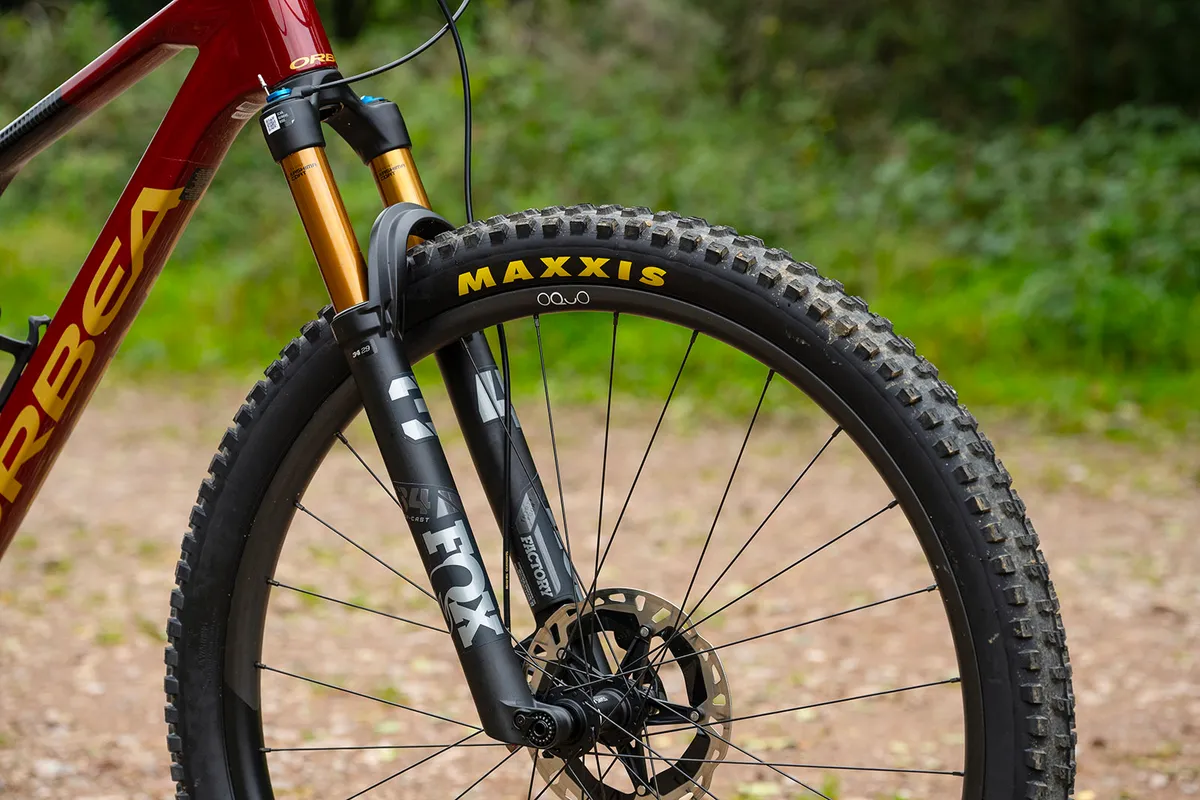
While suspension forks are most commonly found on mountain bikes,but are increasingly found on gravel bikes and city bikes.
The majority use a telescopic suspension system, but there are exceptions such as Trust Performance's Message and Lauf's leaf spring design.
Telescopic forks have stanchions that slide into the lower portion of the fork, allowing for bumps to be absorbed.
Air and coil springs are used in the lowers, depending on the fork to provide cushioning. A hydraulic system running on pressurised oil will allow you to adjust compression and rebound speeds.
The discipline you ride will usually determine the amount of suspension travel you need, with cross-country mountain bikes offering less travel than downhill mountain bikes, due to the tamer terrain encountered.
Gravel suspension forks and city bike forks tend to have a lot less than this, usually between 30mm to 60mm to take the harshness out of unpaved or poorly kept roads.
Suspension shocks
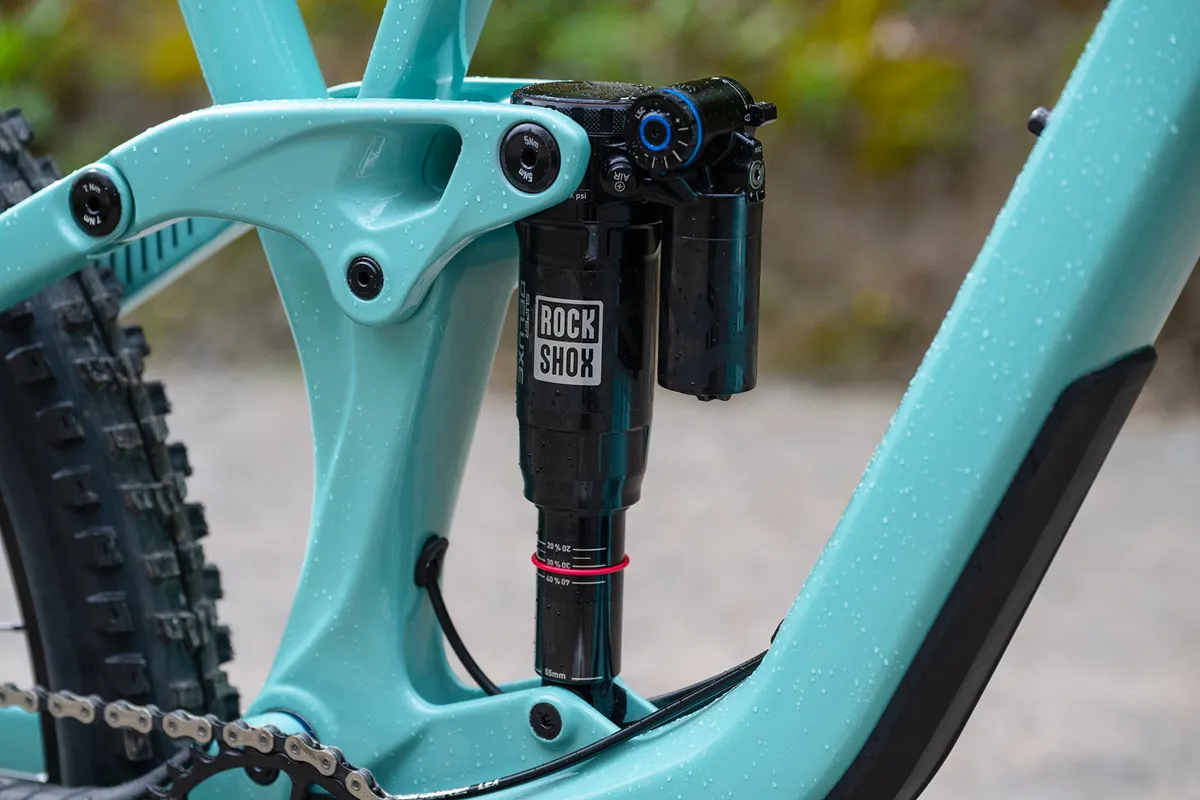
A crucial part of a full-suspension mountain bike is the rear shock, which supports the rear linkage and allows it to articulate in a controlled manner.
There are two types of rear shock, coil and air, with the latter being more popular due to its ease of setup and range of adjustment.
Coil shocks offer better sensitivity than air shocks, with fewer seals allowing for a smoother transition in the suspension travel.
A hydraulic system in the shock called a damper opens and closes channels of pressurised oil to control rebound and compression speed.
Frameset
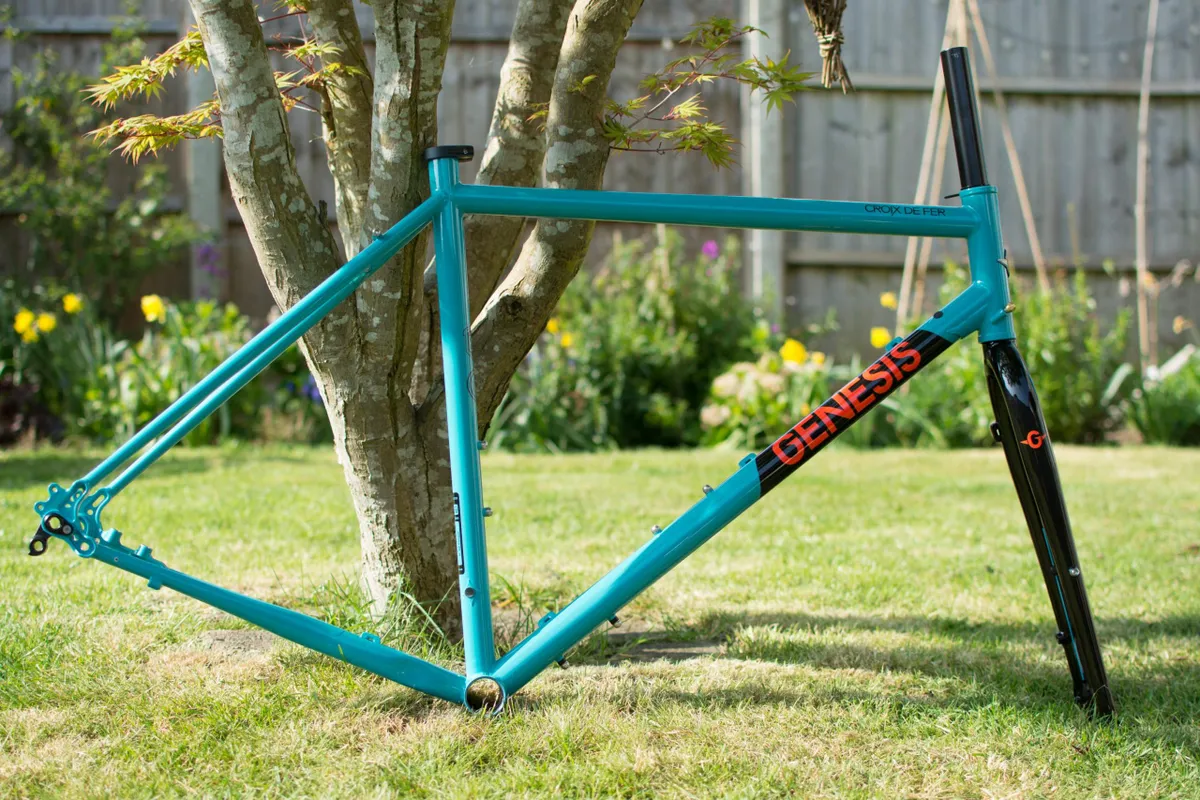
Frameset is used to describe the frame and fork together.
If you're building your own bike, you will, in many cases, buy a frameset from a manufacturer, but frames and forks are also available separately.
Wheelset
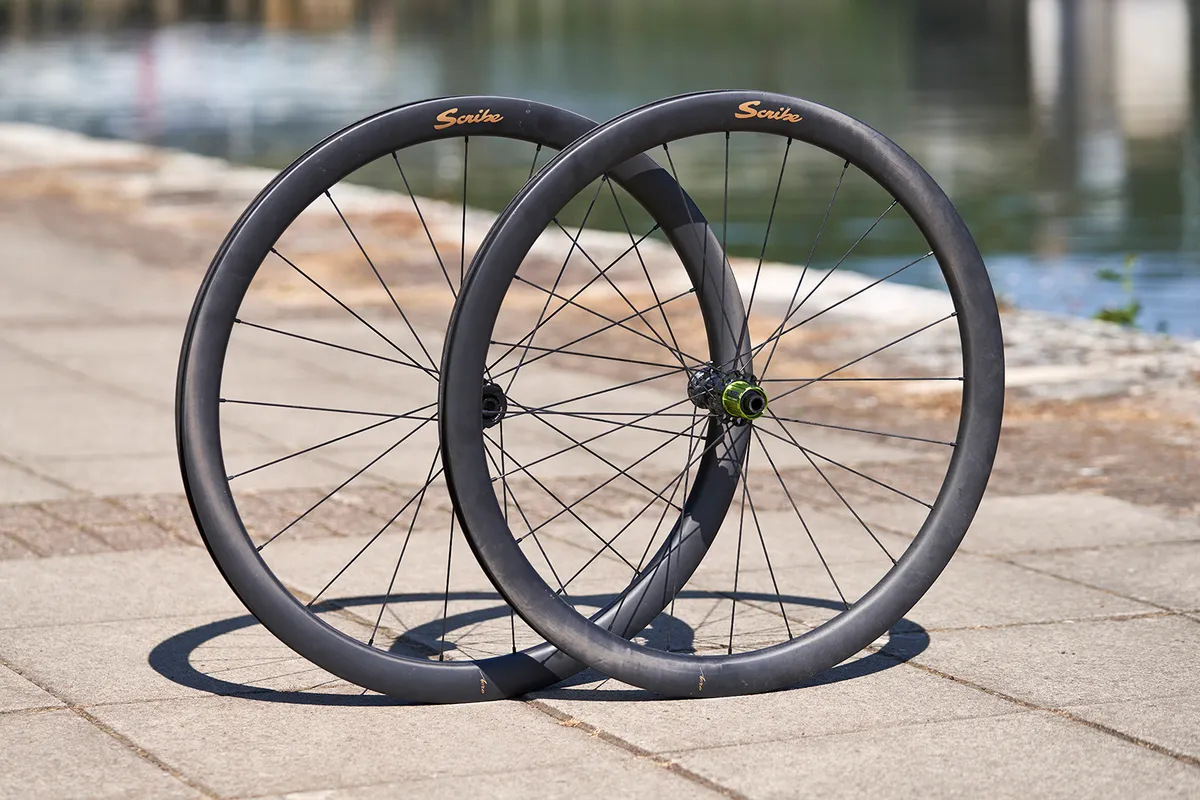
Your wheelset is the pair of wheels on which your bike rolls; both the front and the back wheels.
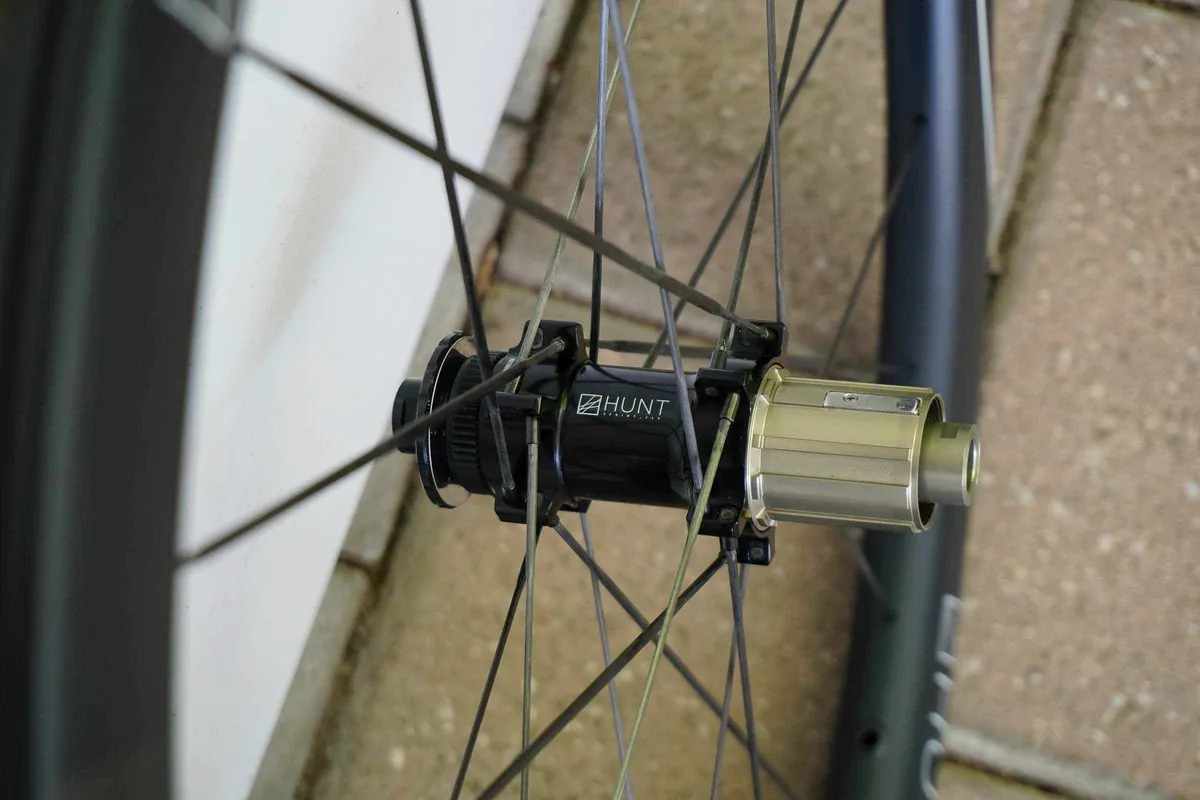
The wheelset comprises all the bits that go to make up the wheel: hubs, spokes and rims, with the freehub that enables you to freewheel on your bike.
The wheelset doesn’t include everything else that you need to attach to your wheels to make them useful, though: tyres (although some brands such as Mavic sell their wheels complete with tyres), inner tubes, cassette and disc brake rotors.
In the case of quick-release wheels, the wheelset includes the axle and usually the quick-release skewer that attaches it to the bike. With thru-axle wheels, the axles are considered part of the bike. If you buy a thru-axle wheelset, it won’t come with them.
Many mountain bikes now run a mullet, or mixed wheelset which sees a smaller 27.5in wheel at the rear to add agility and a 29in wheel on the front to clear large obstacles.
Bike designers usually give this option by including a flip chip in the linkage that corrects the bike's geometry for the differing wheel size.
Bike wheel parts explained
Rims
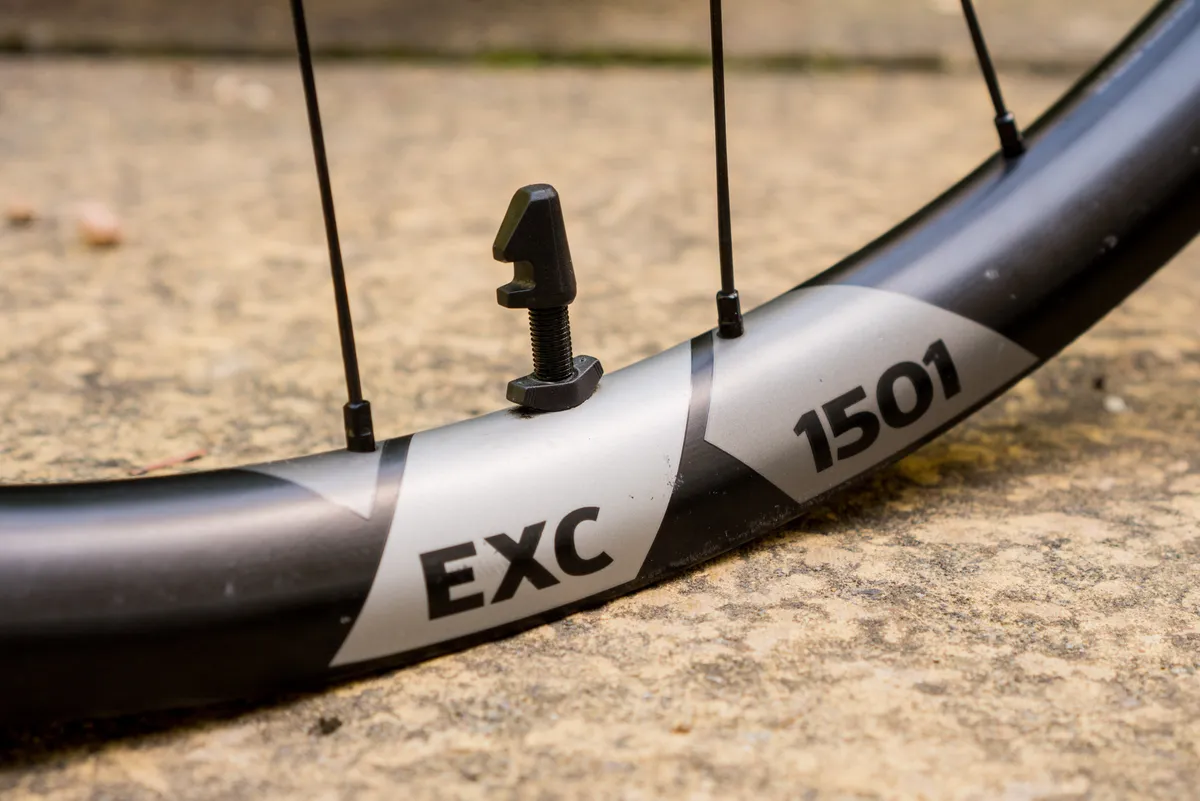
The rim is the circular part that gives the wheel its circumference.
The rim holds the tyre in place and will be designed for use with clincher tyres (with an inner tube), tubeless tyres or tubular tyres.
Hookless rims are increasingly common on wheelsets made specifically for tubeless tyres.
Rims are typically either made from aluminium or, on more expensive wheels, carbon fibre.
Wheels for use on bikes with rim brakes – typically cheap road bikes or hybrid bikes – will have a braking track incorporated into the rim.
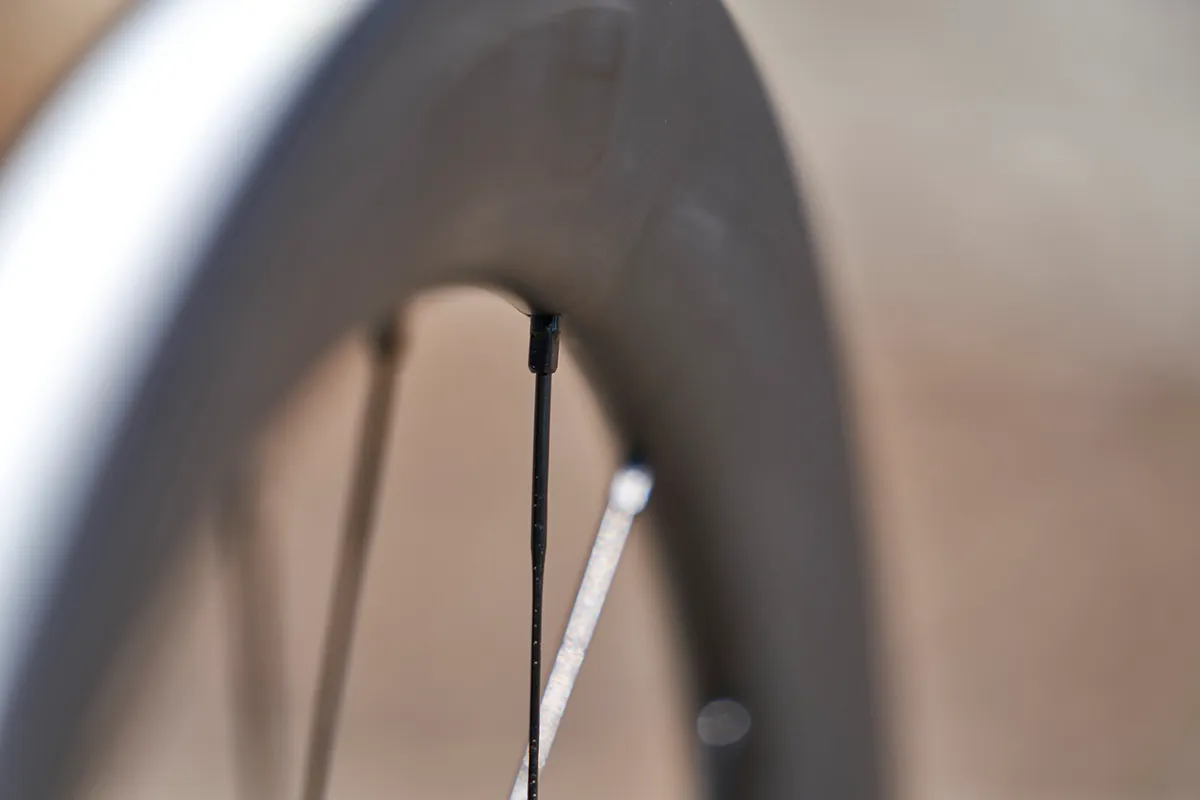
The rims are connected to the hub by spokes, which in turn are attached to the rims by spoke nipples.
Spokes
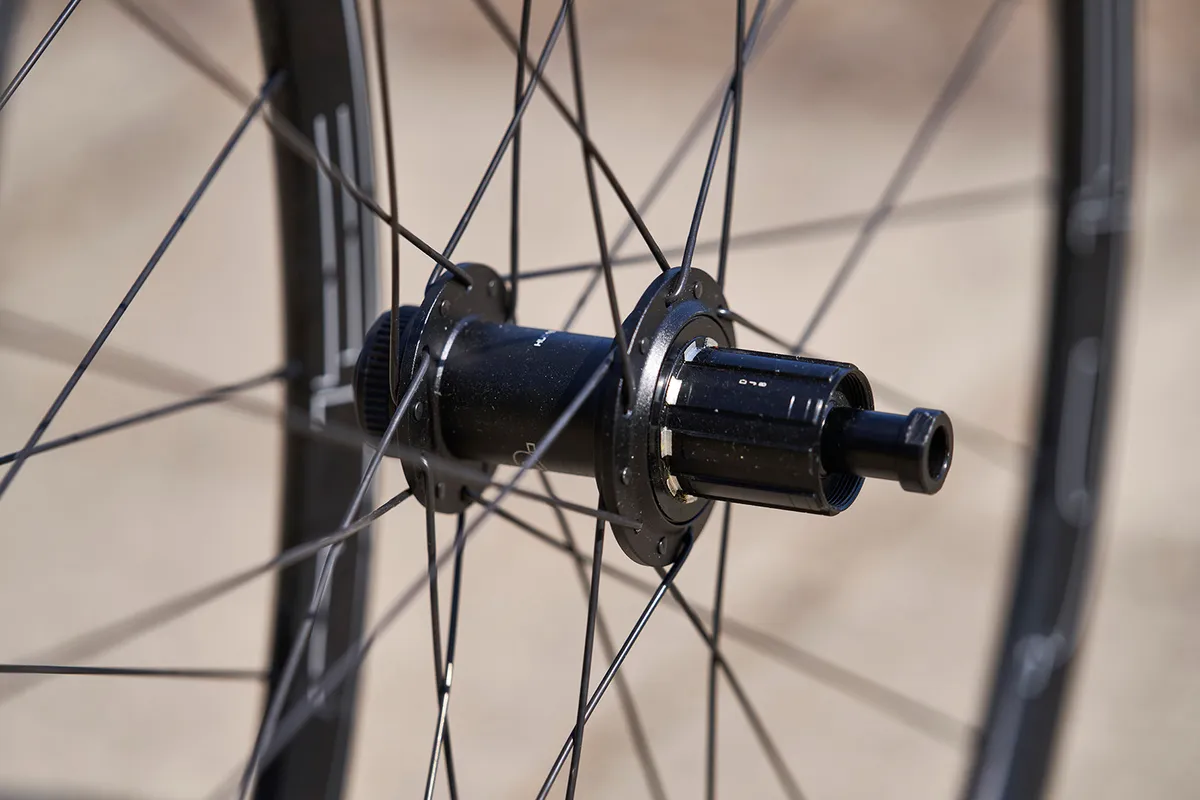
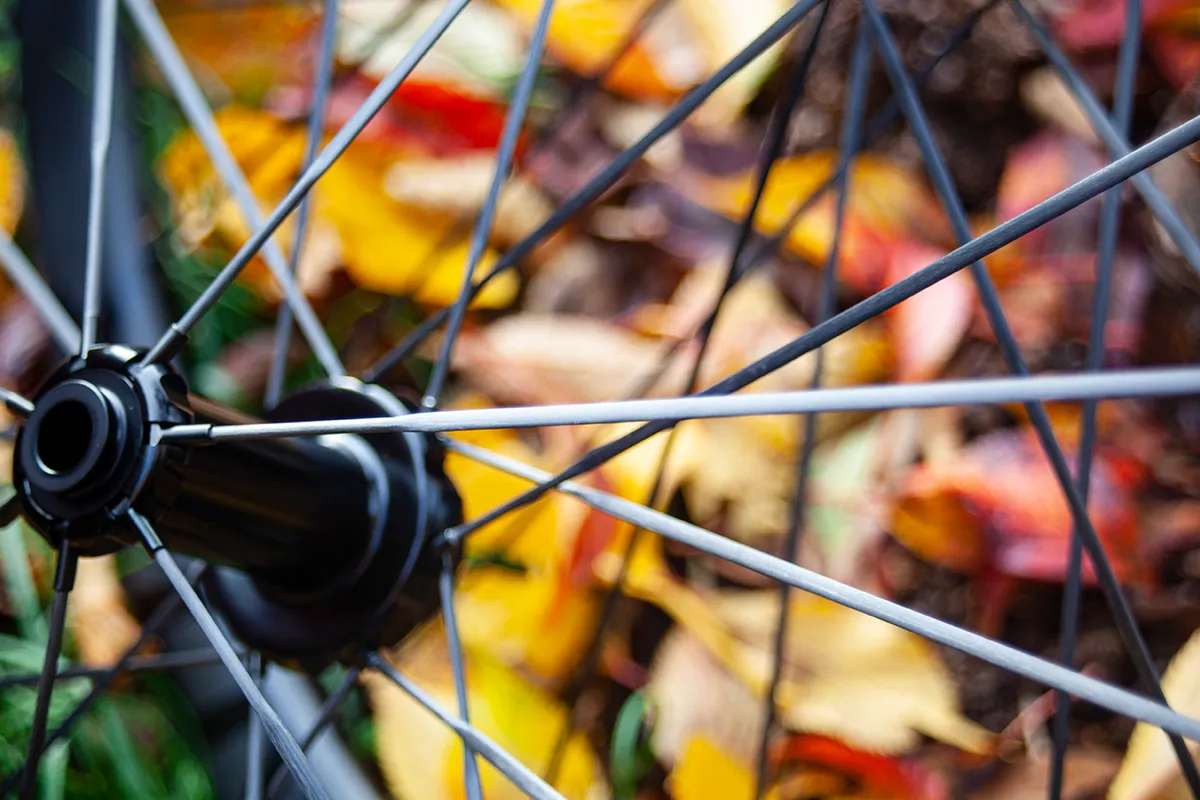
The spokes attach the hub to a wheel's rim.
The number of spokes used varies between wheelsets and is often different between the front and rear wheels.
Spokes are usually made of steel, although some high-end wheels use carbon spokes to save weight. It’s common for spokes to be 'butted', where they’re narrower in their middle section than at their ends.
Most spokes are either straight-pull, with a hub-end flange that’s in line with the spoke blade, or J-bend, where there’s a 90-degree curve at the hub end, and the design has to match how your hubs are drilled.
They’re screwed into the rim with nipples, which may be aluminium alloy or brass.
Hub
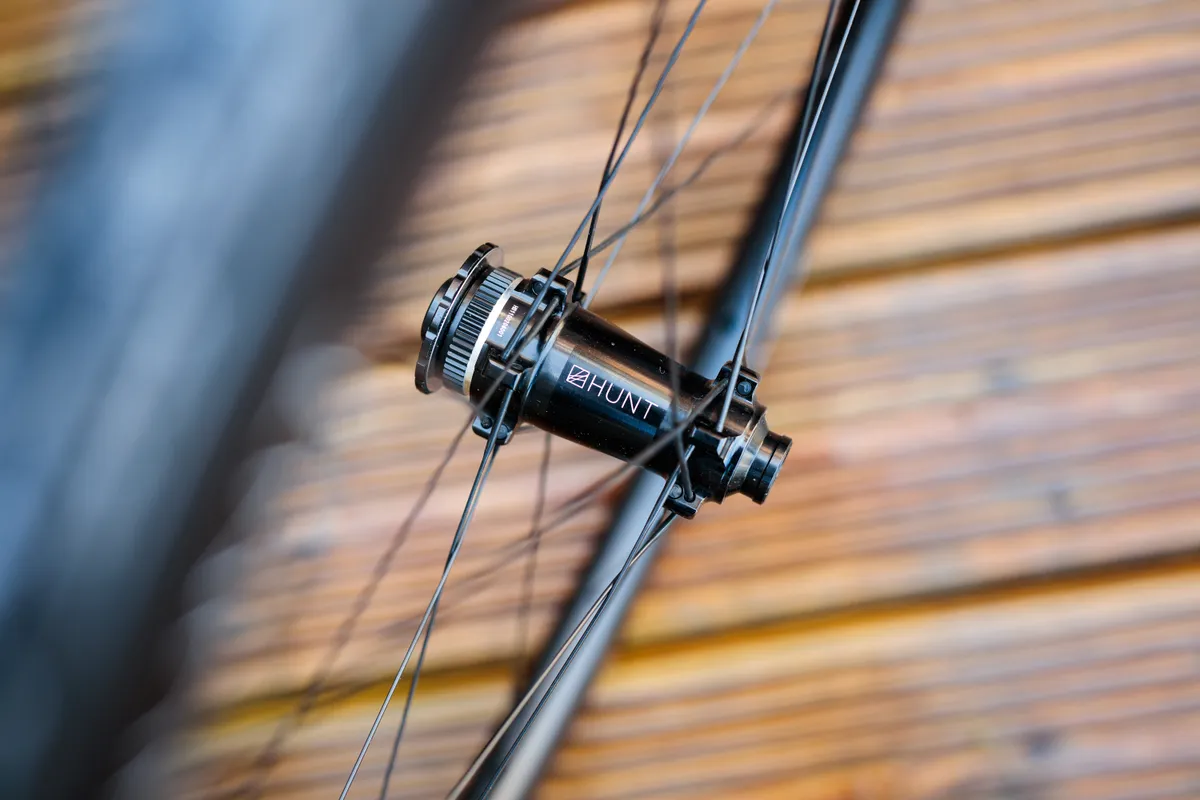
The hub sits at the centre of a wheel, with a shell that turns on an axle, and bearings between the two to lower the friction. The hub shell will include flanges that hold the spokes, and which then lace the hub to the wheel’s rim.
If you’ve got a disc brake bike, the hub shell will also include an attachment point for the brake rotor. This can either be six bolt holes around its circumference or a serrated Centerlock ring, both on its left-hand side.
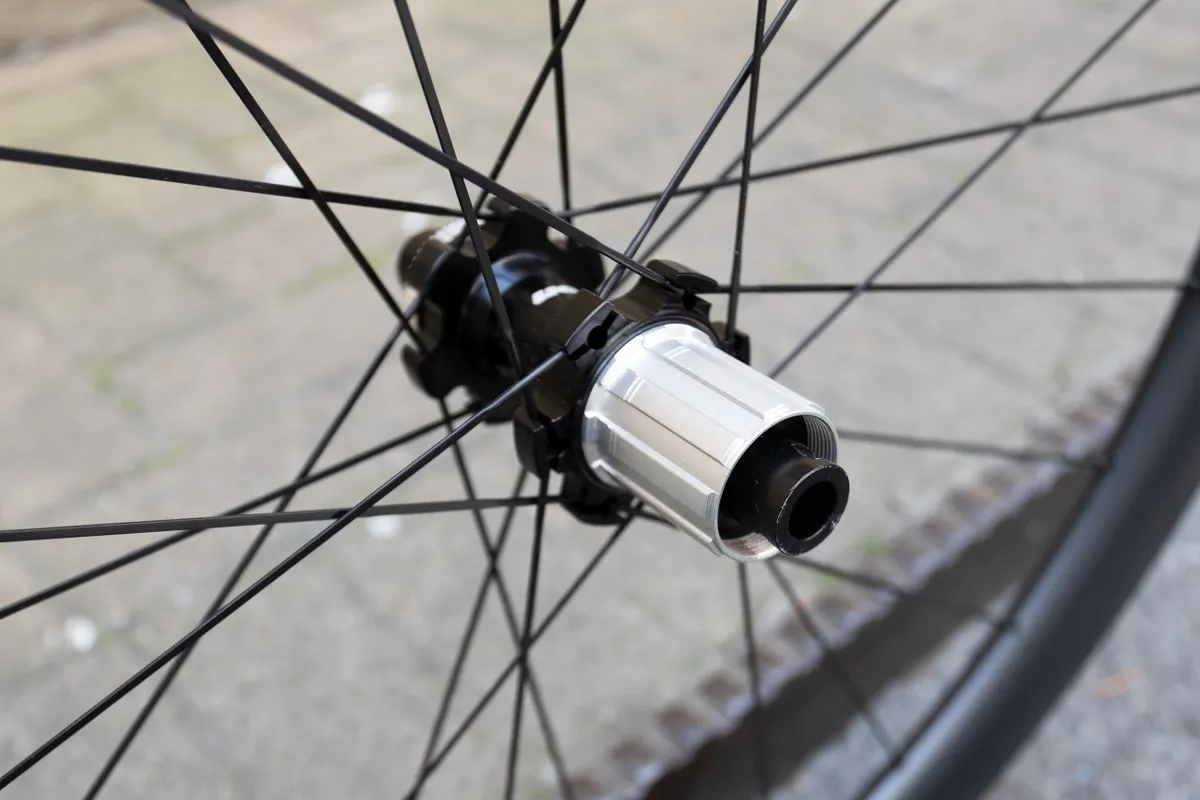
On its right-hand side, the rear hub on a modern bicycle wheel usually has a freehub, which includes a mechanism to let you freewheel, and to which you attach a cassette.
The hubs on the front and rear wheels combined are sometimes referred to as a hubset.
Freehub
The freehub protrudes from the right-hand side of the rear wheel.
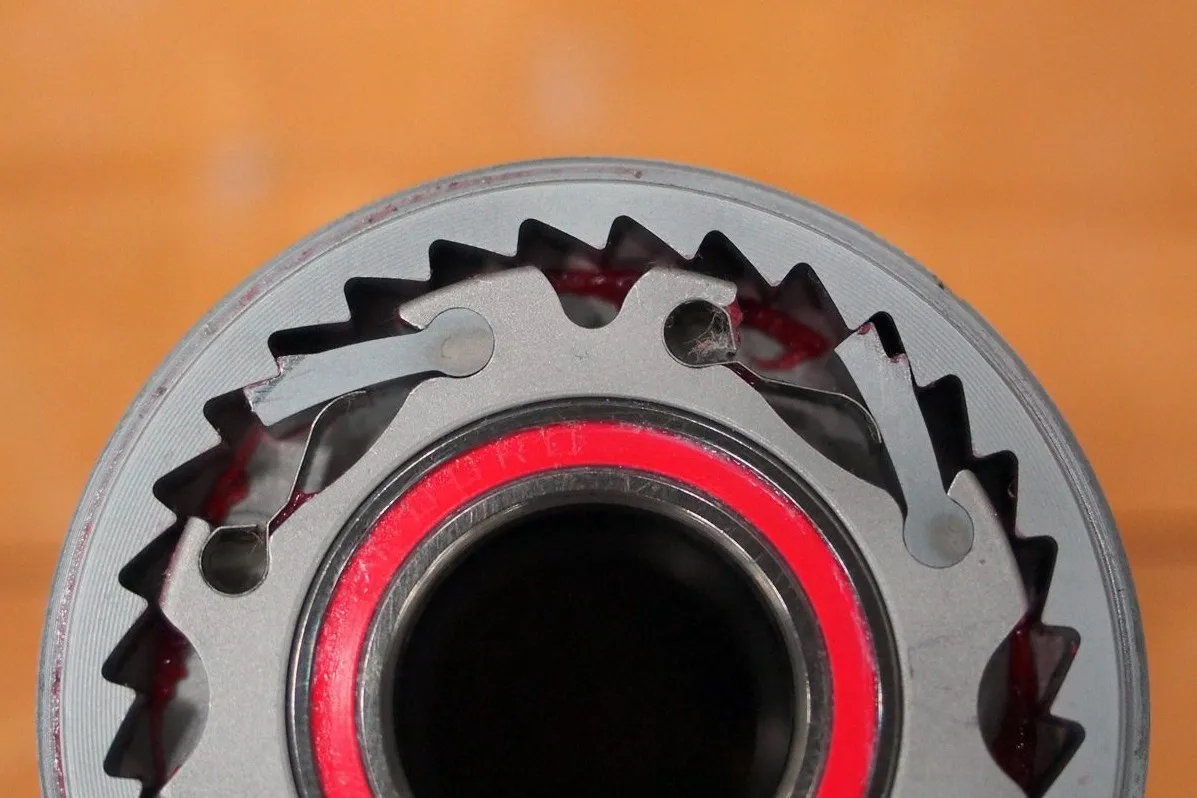
It supports the gearing cassette, which you use to transmit your pedal power to the bike. The freehub contains a ratchet or pawl mechanism that allows you to freewheel.
Axles
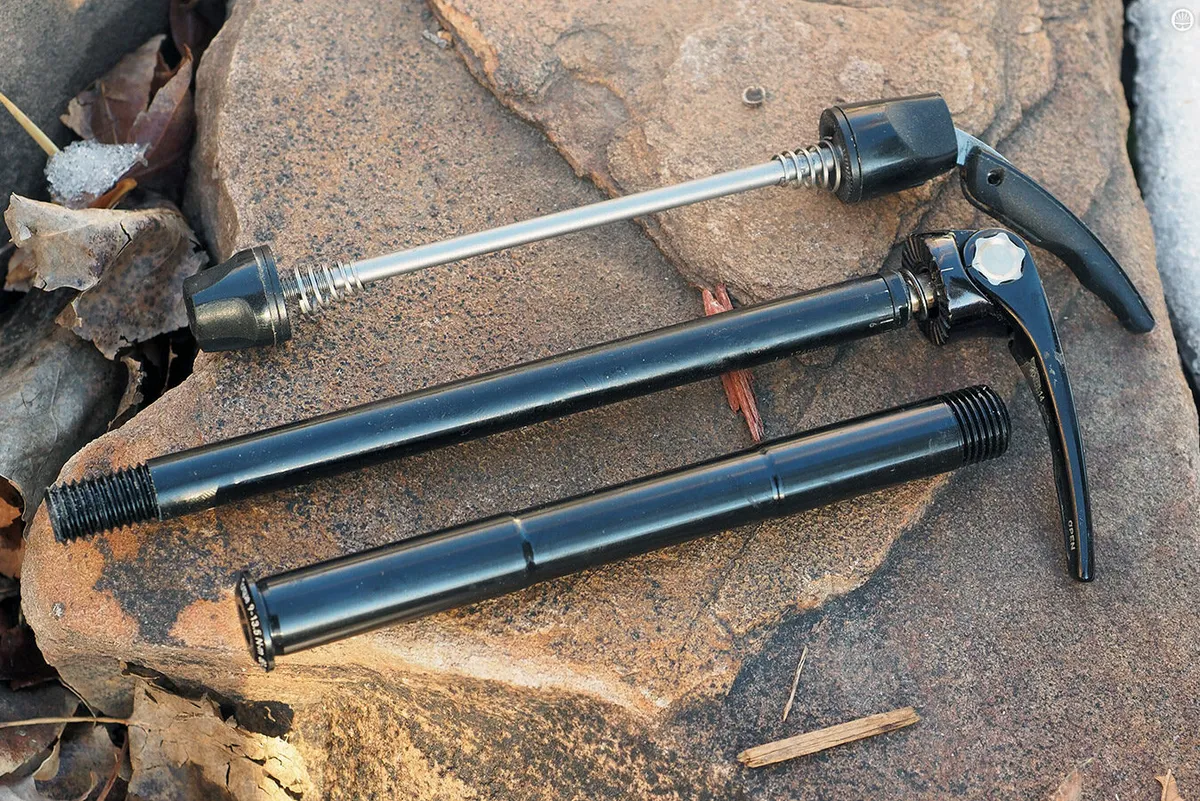
There are two main forms of what people frequently recognise as wheel ‘axles’, which hold the wheels in the frame: the quick-release and the thru-axle.
Quick releases were invented by Tullio Campagnolo. They consist of a central skewer with a cam lever at one end and an adjusting nut at the other to hold them in place in the frame drop-outs, and are commonly used on rim-brake bikes.
Thru-axles are now nearly ubiquitous on disc-brake bikes, after their first first application on mountain bikes. They tighten into circular apertures in the frame, with one end being threaded so that you can tighten the bolt in the frame. Thru-axles give more precise positioning between the frame and the wheel than quick-release skewers.
Some wheel axles have threads at either end and are secured to the frame with nuts. You’ll find them on track bikes and some fixed-gear bikes.
It is worth mentioning, though, that the term ‘axle’ is actually a bit of a misnomer in these cases. Strictly speaking, none of these bolts or skewers are actually axles, because they are not designed to bear any vertical load. Their primary function is to instead provide a clamping force to ensure a secure connection between the wheel and frame.
Groupset
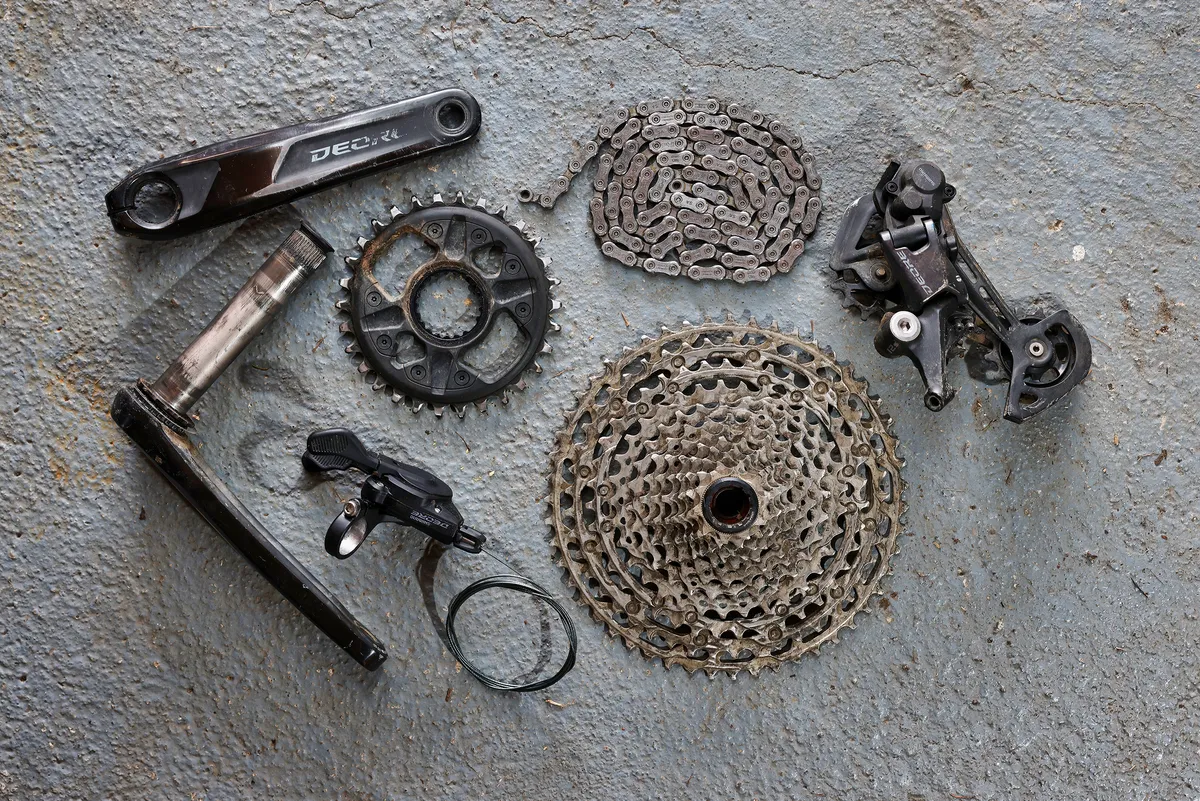
Your groupset includes all the mechanical parts that your bike needs to function, in order to get you from A to B.
The definition of a groupset is slightly loose but the core parts are the crankset (comprised of the chainrings and cranks), bottom bracket, chain, cassette, derailleur(s) and shift levers, along with the cables needed to connect them all together.
In addition, it may include your brakes and the cables or hoses connecting them to your levers.
Component makers will sell groupsets with different levels of finish and function, designating them with different groupset series names. Other components, such as pedals and wheelsets, may also bear the groupset’s name, although they’re sold separately.
Groupsets are either mechanical, with cables used for shifting, or electronic, with wires (or wireless signs) used to change gear.
Road bike groupsets and mountain bike groupsets usually differ in their durability, with mountain bike groupsets designed to take more of a beating.
Drivetrain
The drivetrain is a core part of the groupset outlined above, with the parts that enable you to propel your bike forward. It includes the crankset, chain, cassette, and the rear and front derailleur (if you have one). It excludes the shifters.
Groupset parts explained
Crankset (chainset)

Your crankset – or chainset in the UK – comprises the two crank arms to which your pedals attach, the chainrings over which your chain runs and the bottom bracket that connects the two arms together.
You may have one, two or three chainrings as part of your crankset, depending on the bike. A crankset with one chainring is known as 1x ('one-by').
The crankset sits in the bike’s bottom bracket and turns on bearings.
We've got a full guide to crankset sizes and standards, and more information on crank length.
Chain
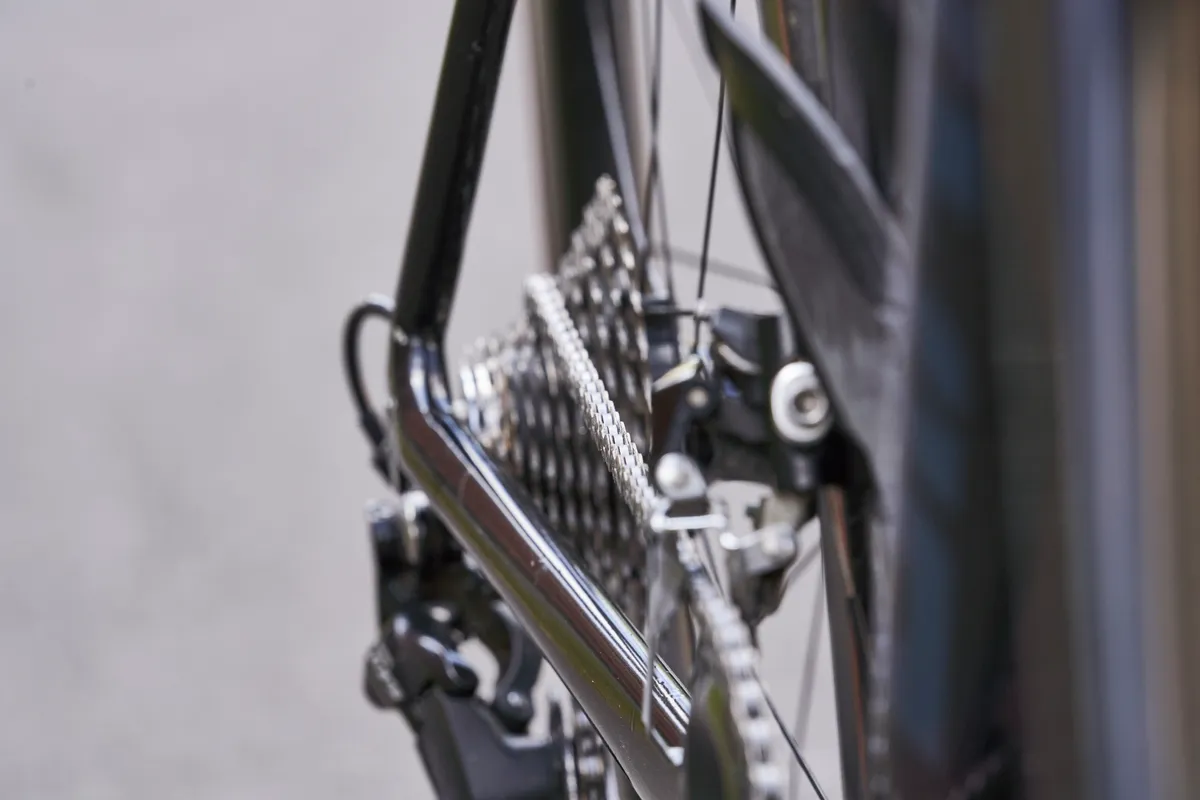
Your bike chain connects your chainrings to the cassette on your rear wheel and enables you to propel yourself forward. Most bike chains are comprised of alternating wide and narrow links, which are held together by rivets that pass through their side plates.
In some cases, the two ends of a chain are joined by a rivet, but in others there’s a split 'quick-link' that connects them. This can be single-use or in some cases is reusable, so that you can split the chain and rejoin it.
Your chain has to be the right width to work with the number of sprockets in your cassette, but the link spacing is standard across all bikes.
It's a wise idea to regularly clean and lubricate your chain for optimum performance and to prevent wear.
Belt drives
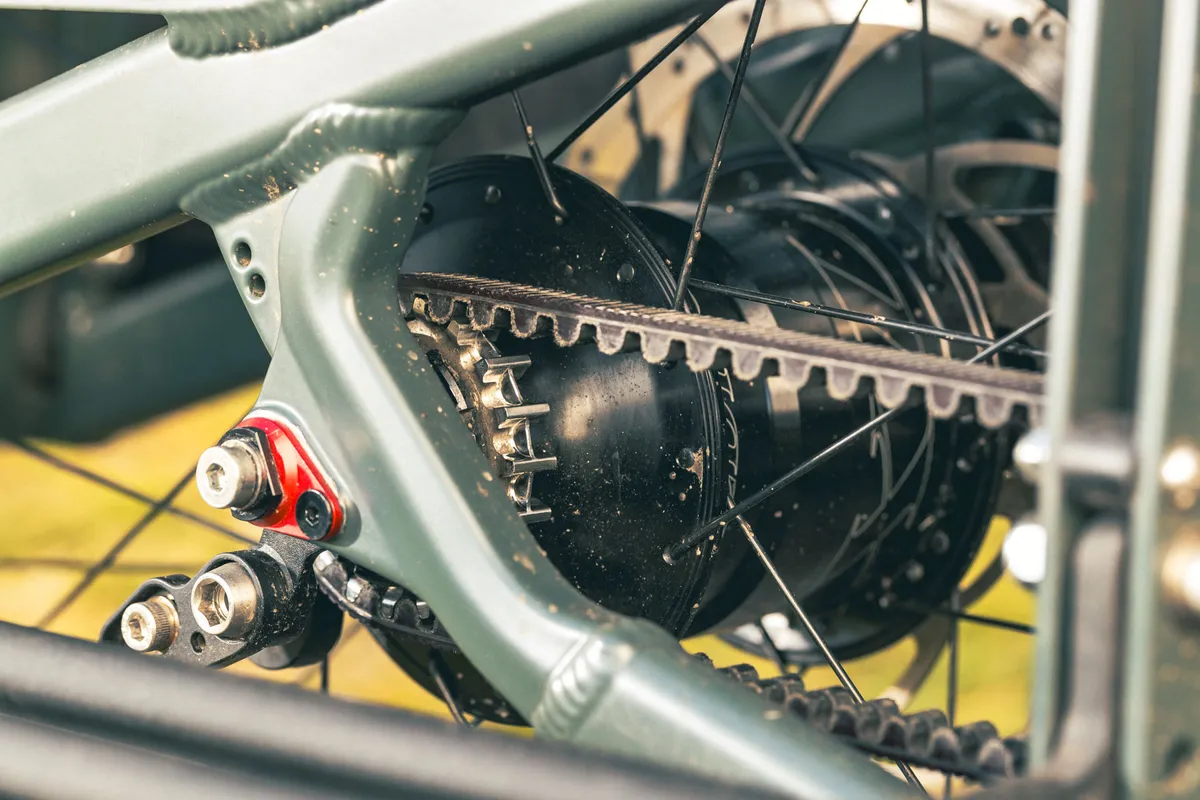
Belt drives are less common than chains and are only compatible with single-speed or internal-gear hub bikes.
Like timing belts found in car engines, most belts are made from rubber reinforced with multiple carbon fibre cords giving the belt teeth to interlock with cogs.
Belt systems require less maintenance than chains and don't require lubing or waxing like a traditional drivetrain.
Front derailleur
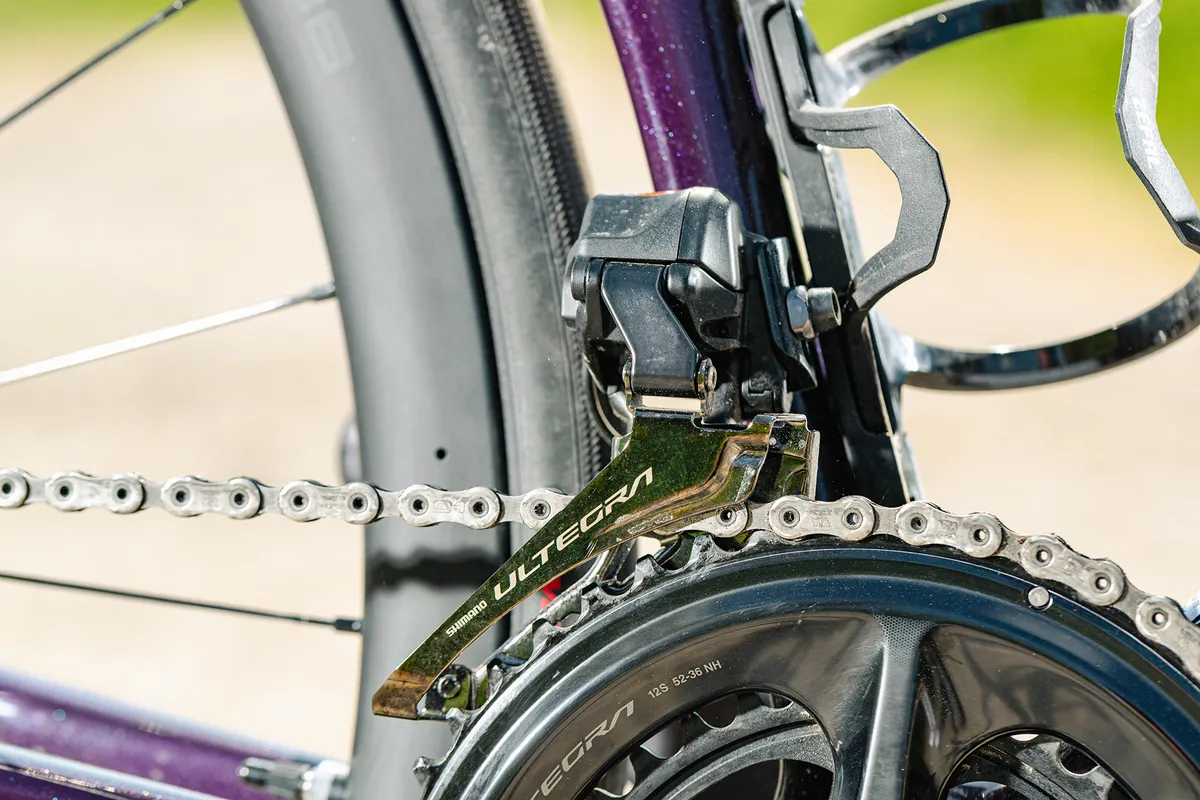
The front derailleur moves the bike’s chain between multiple chainrings by pushing it off one and onto the other. It can be controlled either mechanically, via a cable, or electronically, via a wire or, in the case of wireless groupsets, an electronic signal.
Once the change has been made, the derailleur cage sits either side of the chain and shouldn’t be in contact with it while you ride.
You can get front derailleurs that work with two or three chainrings – they’re not interchangeable.
Not all bikes have a front derailleur though: the trend for mountain bikes is to have a single chainring and a very wide-range cassette at the rear, and it’s a popular choice for some of the best gravel bikes, too.
Rear derailleur
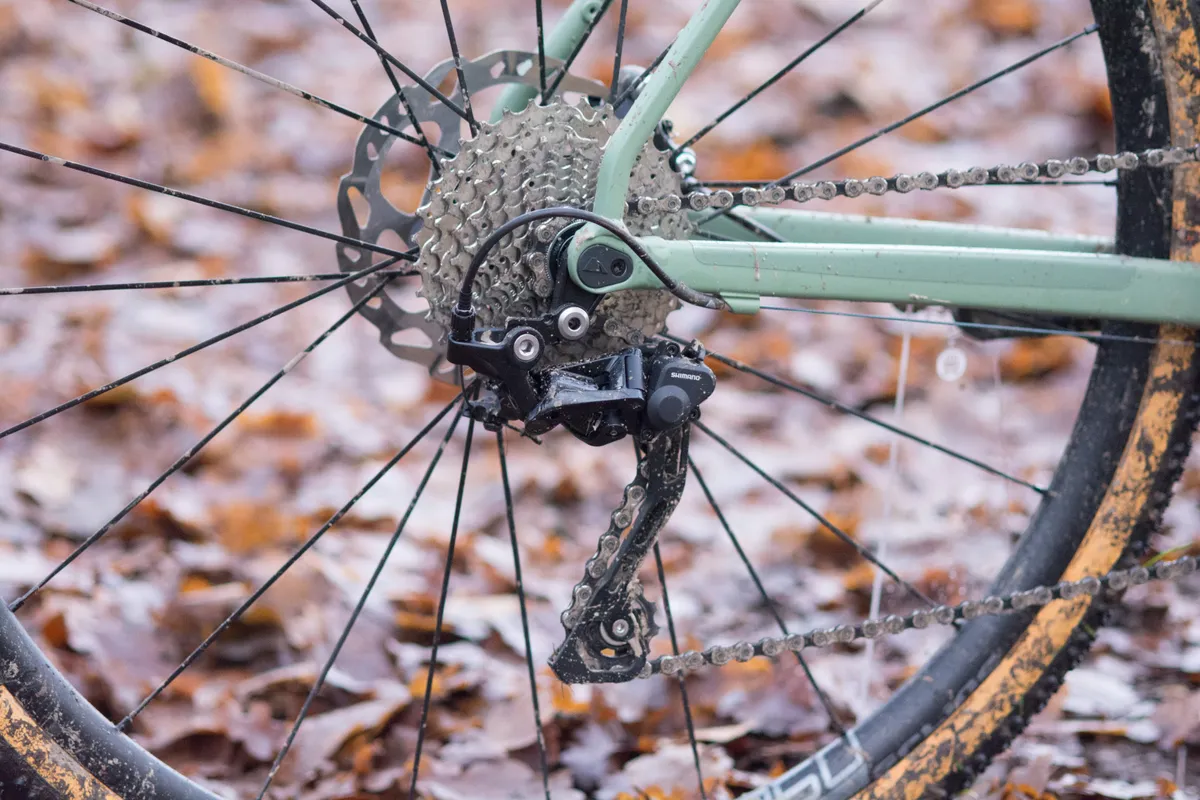
The rear derailleur sits below your rear-wheel axle and is bolted onto a derailleur hanger that protrudes from the underside of the frame.
It has a body that includes a parallelogram, which moves it from side to side when you operate the gear shift lever. This causes the chain to move between sprockets in the cassette to change gears on a bike.
The chain runs continuously over two pulley wheels (sometimes referred to as jockey wheels) in the derailleur cage, which sits below the parallelogram, and this mechanism is under spring tension to keep the chain taut as it moves across larger or smaller sprockets.
On some bike with a 1x groupset, this will be the only derailleur on the bike.
Derailleur hanger
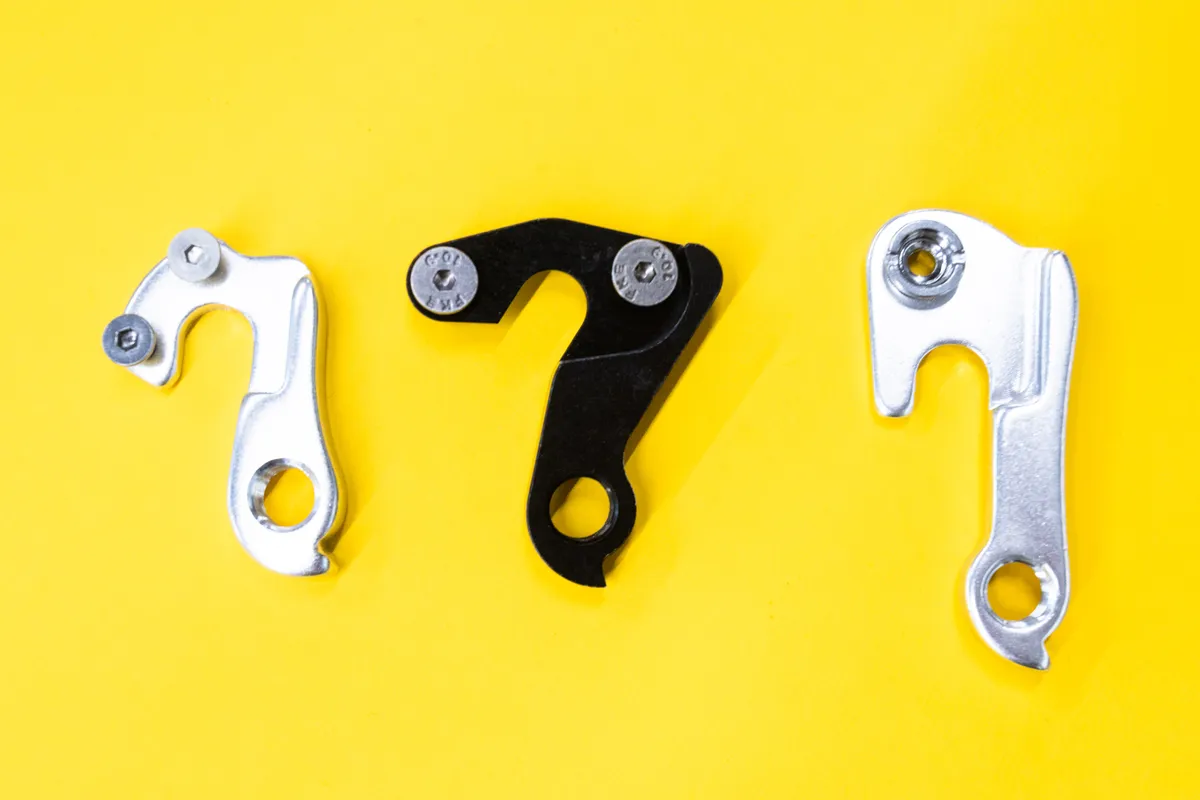
Derailleur hangers sit on the rear axle of the bike and connect the derailleur to the bike.
This piece of metal is designed to bend on impact, sacrificing itself to protect your frame and rear derailleur.
Hangers come in various shapes and are usually frame-specific, though SRAM's Universal Derailleur Hanger is used as a standard on a growing number of mountain bikes.
Cassette
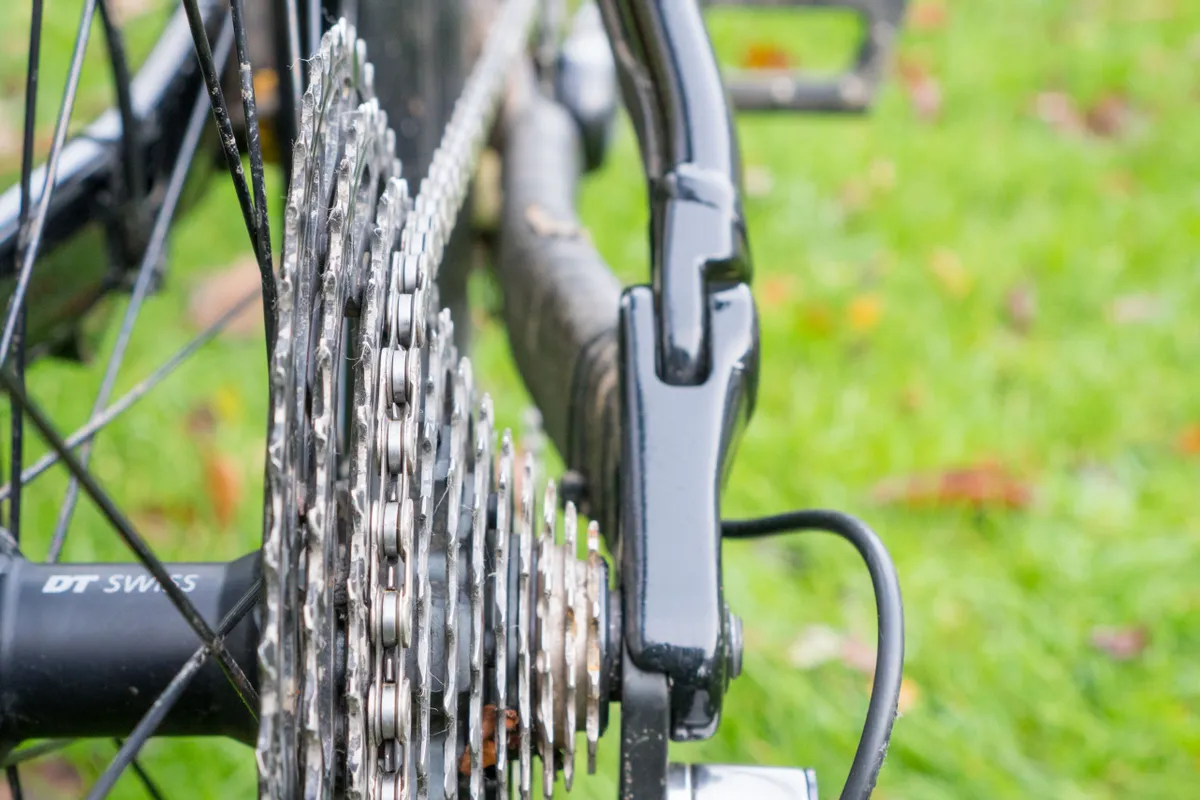
The cassette is the collection of gear sprockets mounted on the rear wheel’s freehub, allowing you to change gears in a derailleur system.
Along with chainring size on the crankset, the cassette plays a big part in the gearing range of your bike. Cassettes will typically be designed for road cycling, mountain biking or gravel riding use.
The sprockets in the cassette are designed to work together as a whole, with ramps and tooth shaping that are engineered for swift gear changes.
To ensure good shifting, the sprockets have grooves in them, which mesh with the freehub body to ensure they're mounted in the correct position and orientation.
Cassettes come in a wide range of sizes, in terms of the number of 'speeds' (i.e. the number of individual sprockets), and the range between the smallest and largest cassettes.
Internal gear hubs
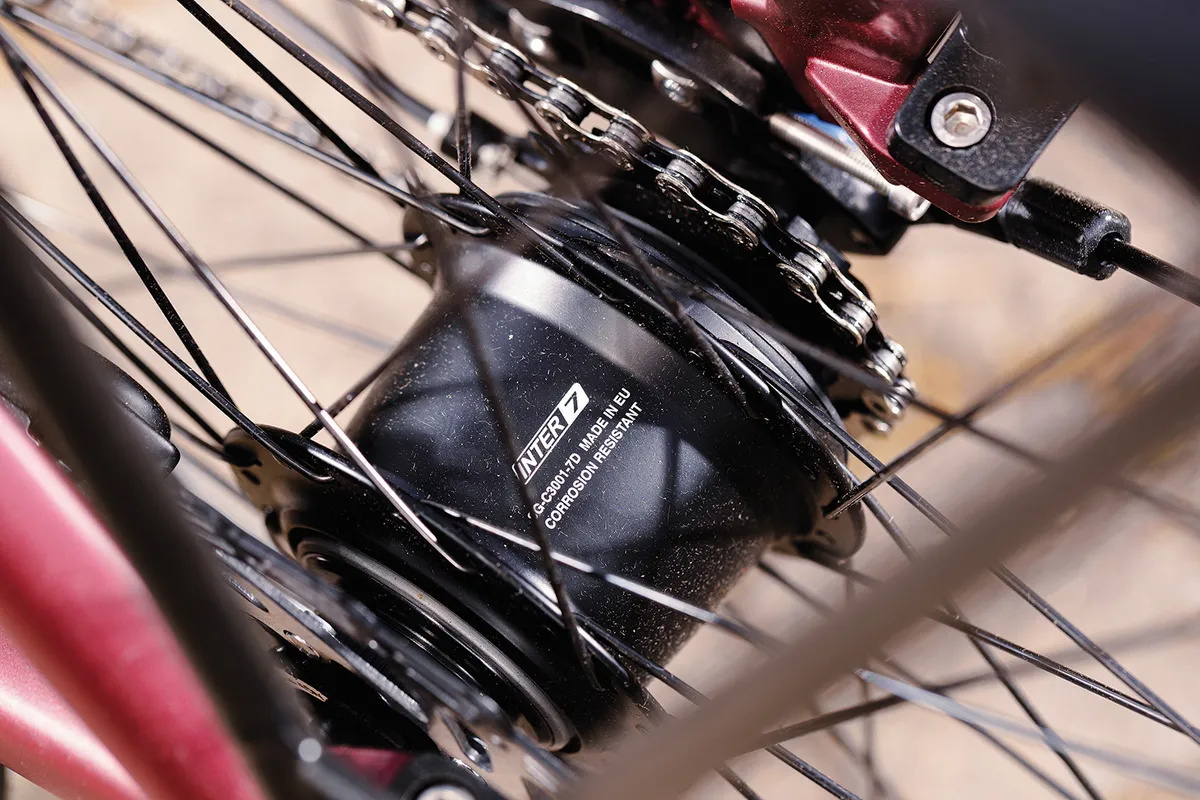
Internal gear hubs provide a range of gears that are enclosed in the rear hub and are often seen on city bikes and touring bikes due to their long servicing intervals and protection from the elements.
The hub receives power from the crankset via a single-speed chain, or belt while an assortment of planetary gears inside the hub are cycled through via clutches similar to those found in a car gearbox.
Internal gear hubs are usually heavier than derailleur systems, and are certainly more expensive if you want the same gear range.
Classified's Powershift hub mixes internal gears with an external derailleur to give 1X drivetrains the same range as a 2X setup, with the brand claiming the system is only 70g heavier than the second chainring and front derailleur it replaces.
Bottom bracket

The bottom bracket is the cylindrical aperture at the bottom of the bike frame in which the crankset turns. It houses two bearings – one on each side – so that the cranks turn smoothly.
A bottom bracket may have threads into which the bearings screw, while many modern carbon fibre frames use pressfit bearings that push into the frame.
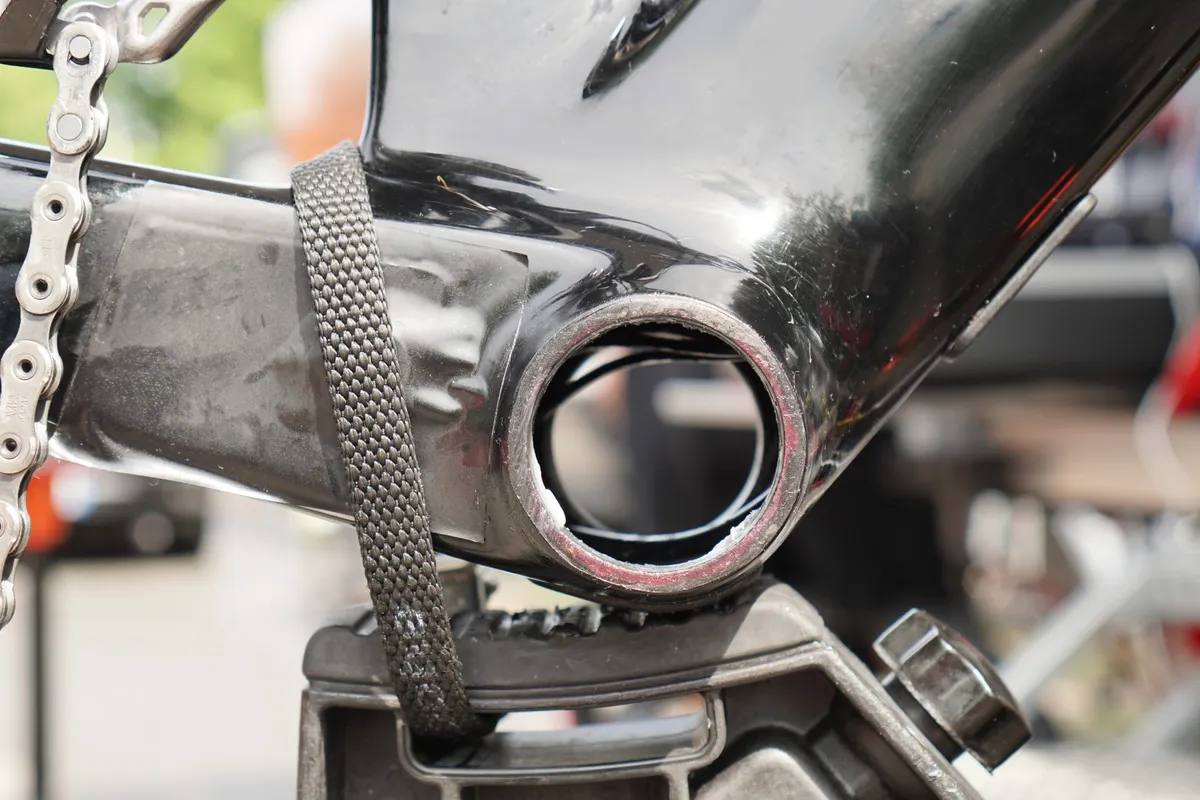
Threaded bearings may sit externally to the frame or within the frame. Again, there are a range of steel, ceramic and roller bearing options.
There are lots of different bottom bracket standards, with limited compatibility, in use on bikes, and bottom-bracket width is different between road bikes and mountain bikes.
Bearings
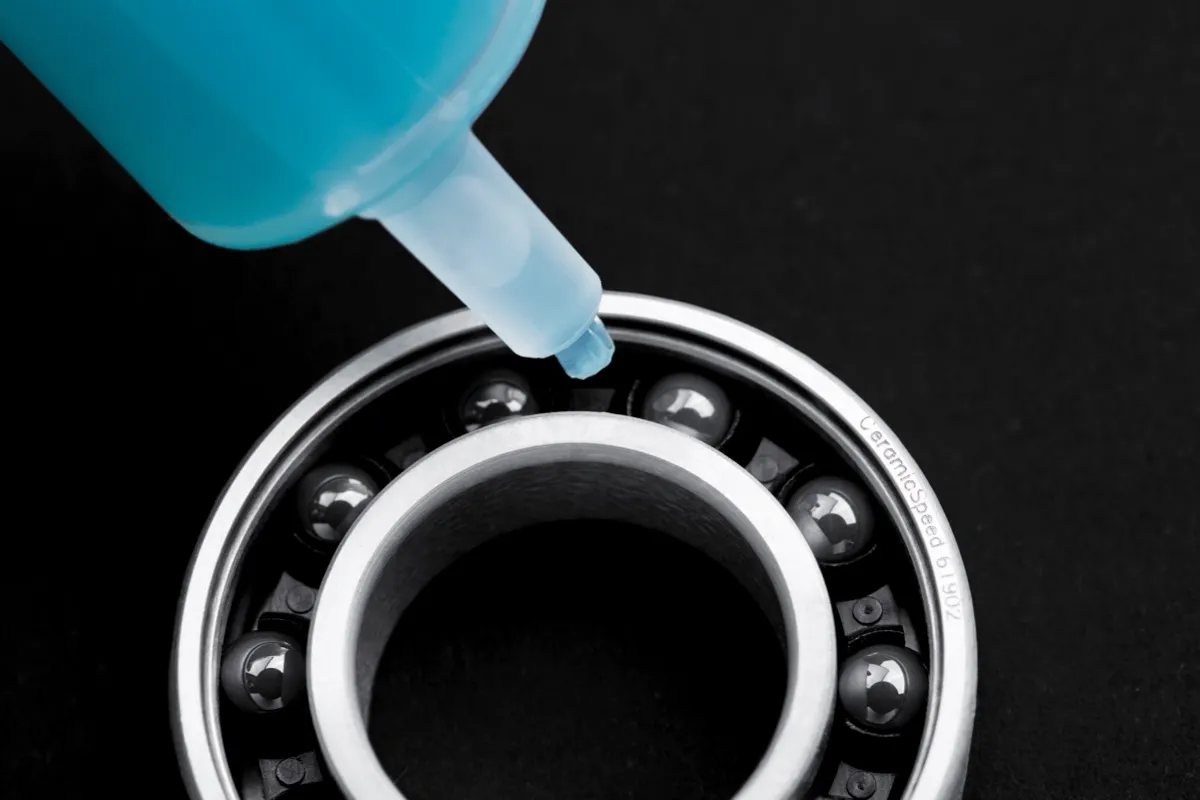
Just about every moving part on your bike, including the headset and bottom bracket, will turn on a bearing, to ensure smooth turning motion with minimal friction. A bearing most commonly consists of lubricated steel balls, which turn in a race and may be held in place by an adjustable cone.
There are different levels of sophistication. Steel ball bearings are the most common; the balls may be loose in the bearing, but sealed bearings, where the balls and races are constructed in a single unit, are common.
More expensive bearings may use ceramic balls instead of steel. It is said that ceramic bike bearings are harder, so they wear better and their dimensions can be made more accurate to reduce friction.
You’ll also find roller bearings or needle bearings used in some components, where balls are replaced with cylindrical rollers.
Headset
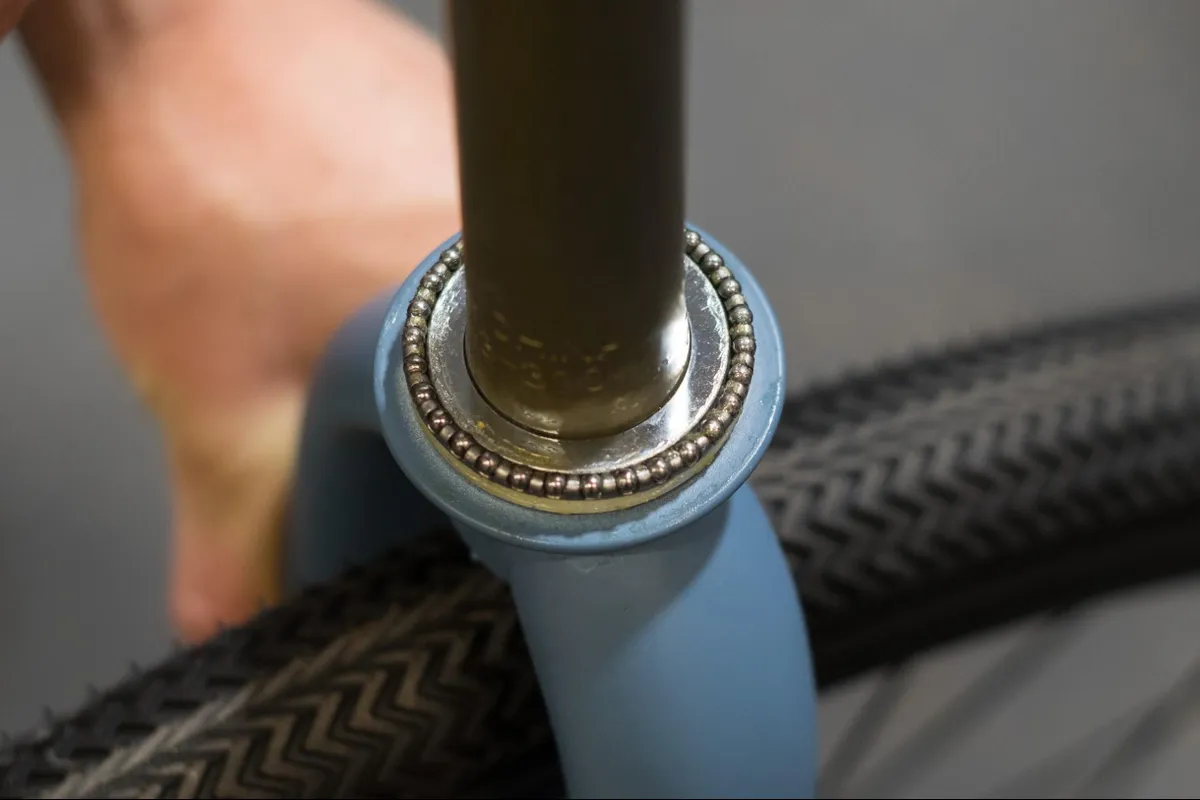
Your bike’s headset consists of the bearings at the top and bottom of the frame’s head tube, which support the fork and allow it to turn in the frame.
They’re important bearings because they need to allow you to turn smoothly, but without play between the fork and the frame, which would affect the bike’s handling.
Most headsets now have a wider-diameter bearing at their bottom than their top to improve steering accuracy, although older bikes and some retro-style bikes still have the same narrower bearing diameter top and bottom.
Bearings on older bikes were threaded too, whereas newer ones press into the frame.
Finishing kit parts
Seatpost
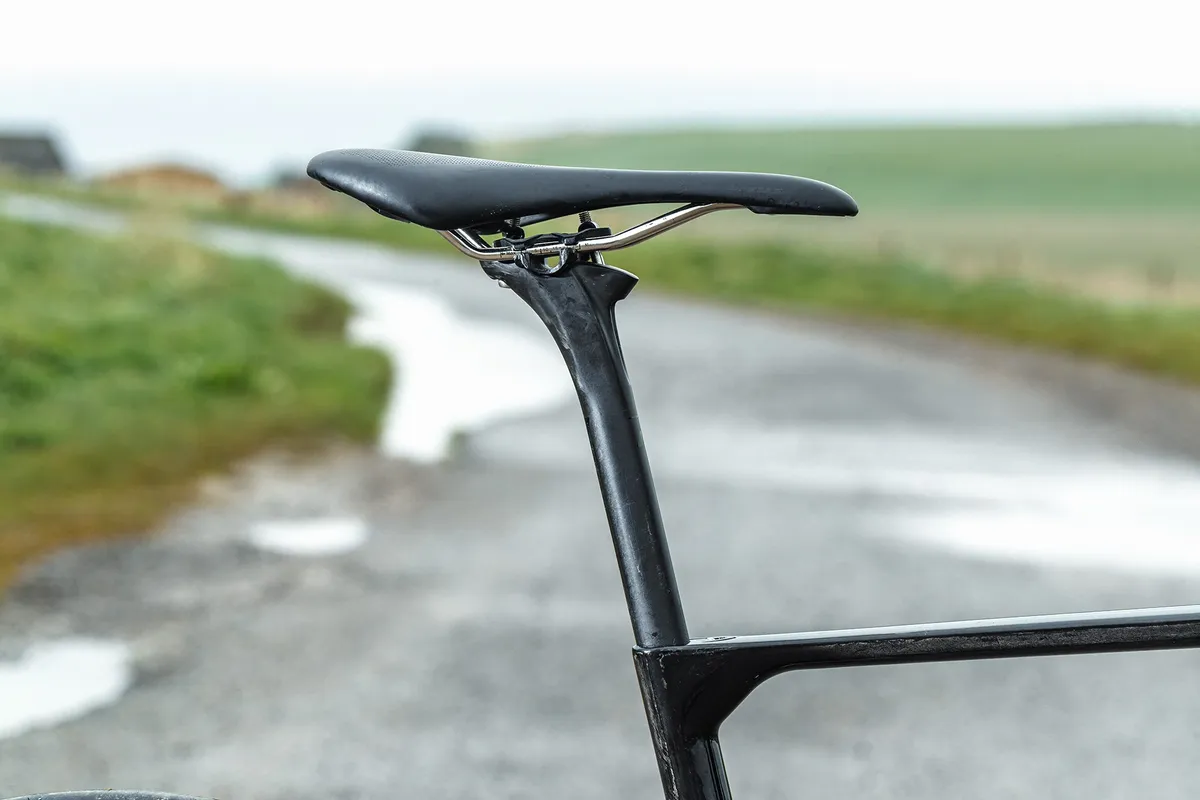
The seatpost protrudes from the top of the bike frame’s seat tube and supports your saddle.
At the top of the seatpost is a head with bolts to hold the saddle in place. A clamp on the frame secures the seatpost so that the saddle is at the correct height.
Seatposts come in a variety of different widths and lengths, and are made of a range of materials: aluminium alloy and carbon are the most common. Road bikes often have aero seatposts, which have a cross-section and design specific to each brand or bike model.
Other road bikes use a seat mast, where the frame’s seat tube protrudes upwards and there’s a stubby head that mounts on top to provide an attachment point for the saddle.
You can also buy suspension seatposts.
Dropper post
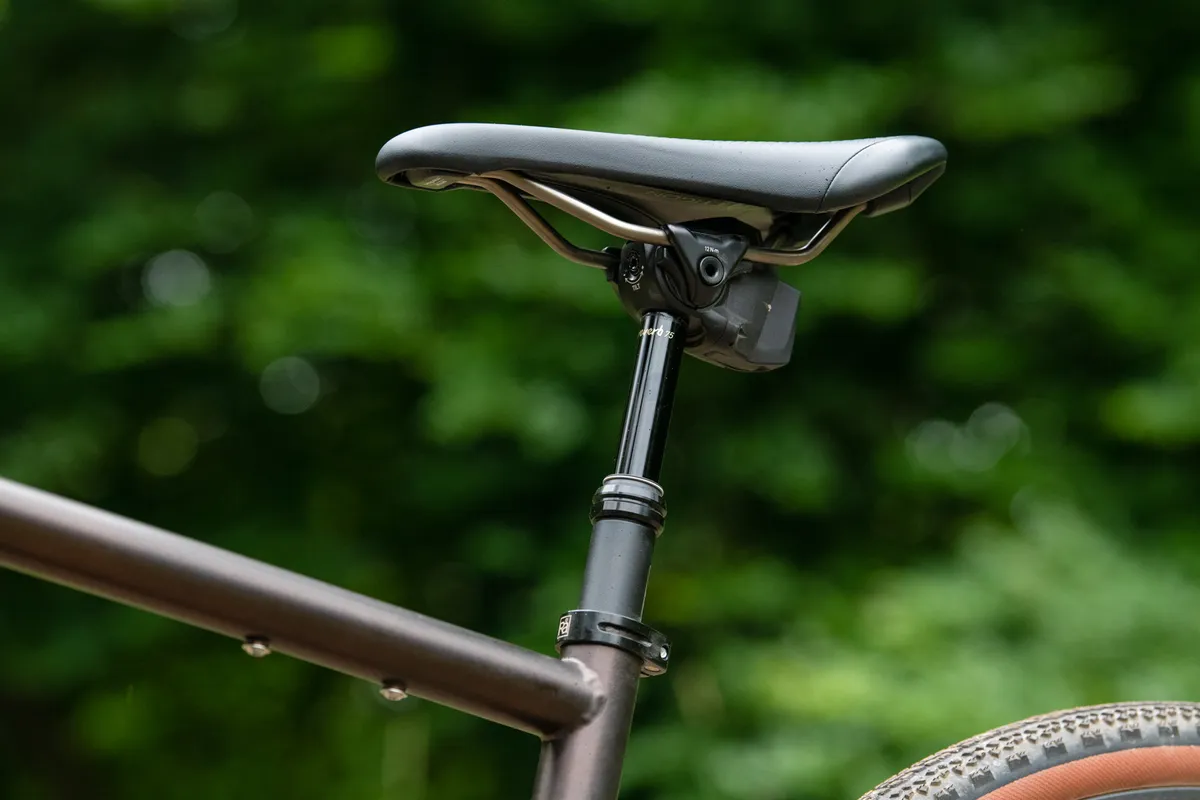
On mountain bikes, a dropper seatpost is a common feature. It means you can push your saddle down out of the way when you’re descending, lowering your centre of gravity, then raise it again for efficient pedalling.
Gravel bike dropper posts are becoming more popular, too, with some featuring built-in suspension.
Stem
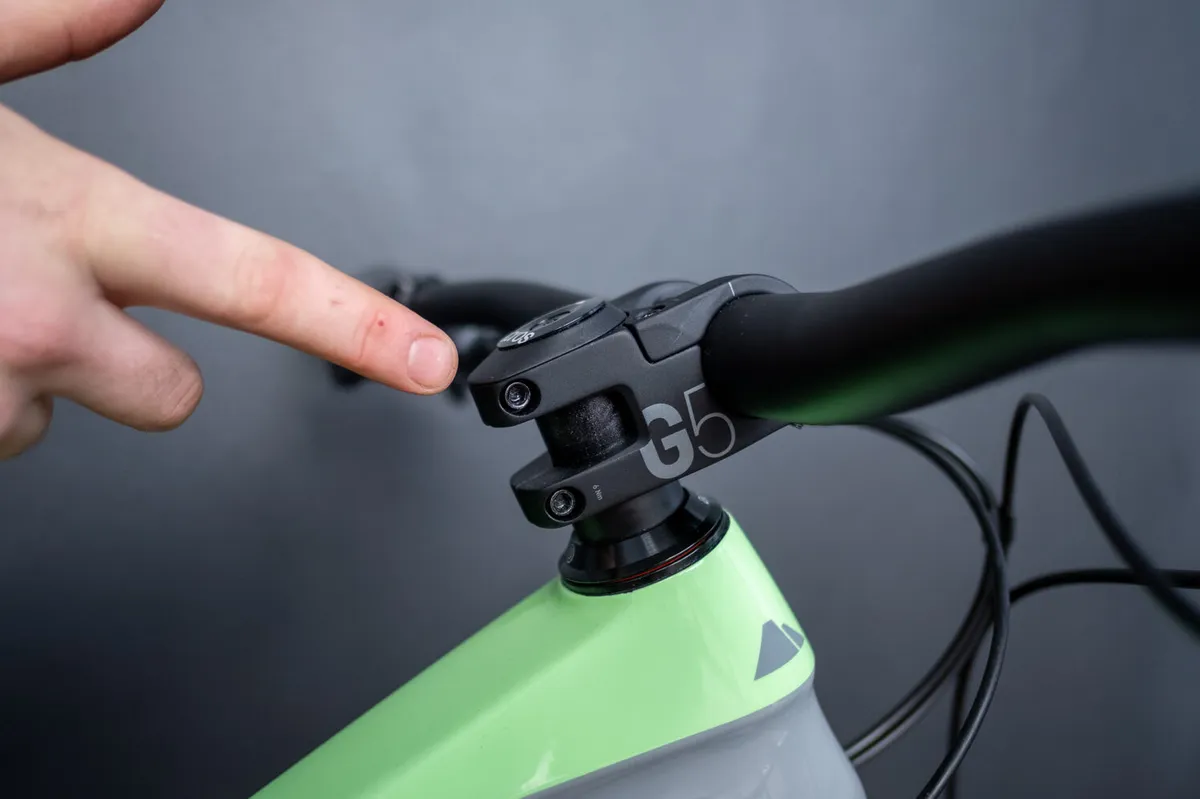
Your stem fits on the top of your fork’s steerer tube and connects it to your handlebars, so you can steer your bike. There are loads of different designs and lengths available; again, alloy and carbon are the most-used materials.
Higher-end road bikes sometimes have a single-piece bar/stem combination to save weight and improve aerodynamics, while internal routing of control cables from the bars through the stem is also common. Although most use the same standards, MTB stems are usually markedly shorter than road bike stems.
Handlebar
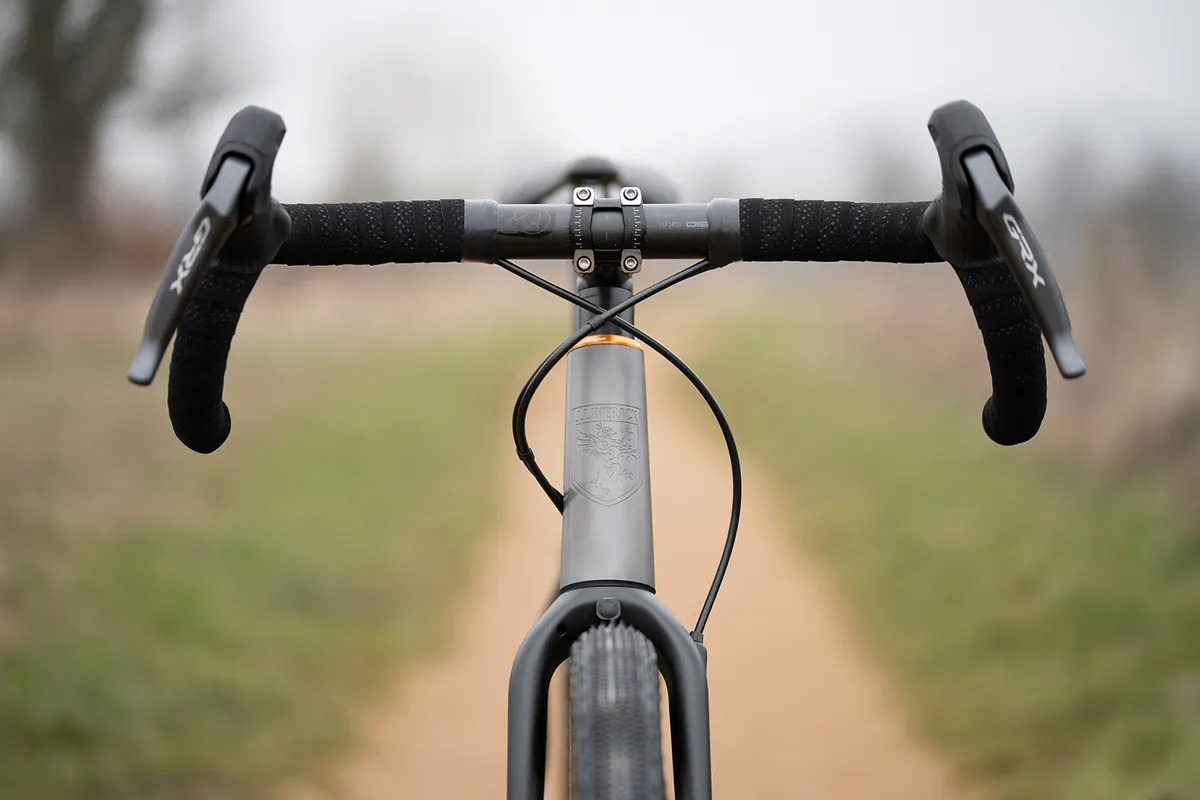
Your handlebar sits top-front of your bike and is used to steer it, as well as supporting controls such as brakes and gear shifters.
Handlebars on mountain bikes and hybrid bikes are more-or-less straight, but may have a slight bend or a rise, while road bike handlebars have the characteristic drops to enable you to lower your position on the bike and thus your air resistance.
Time-trial handlebars include extensions forward from the main bar, which enable you to rest your forearms on the main bar top, to keep a low, aerodynamic position.
Saddle
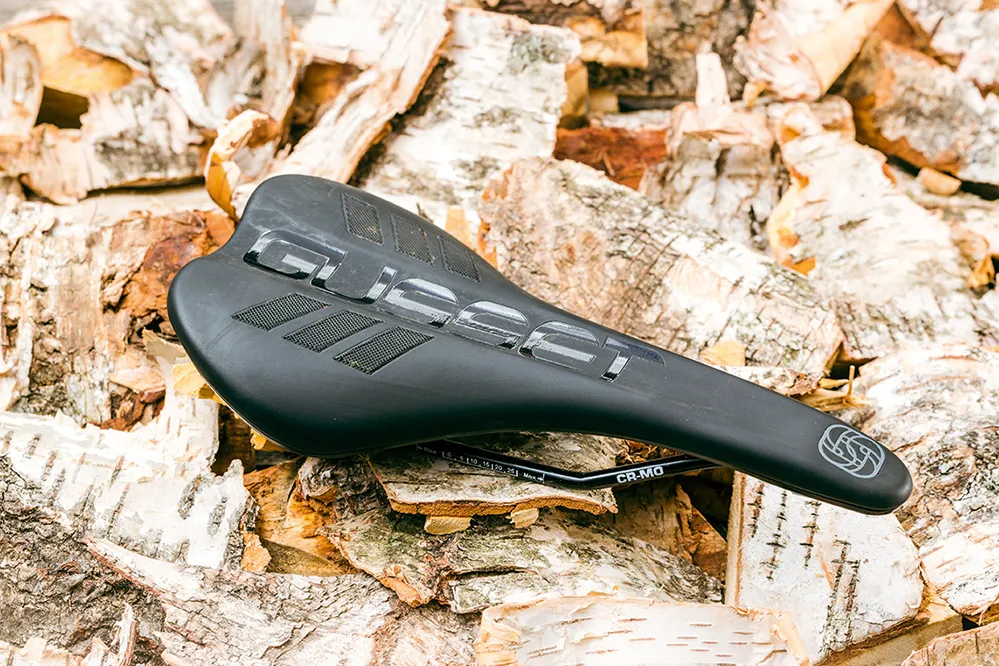
Perched on top of your seatpost, your saddle will usually have two rails that attach to the seatpost’s head.
In cheaper saddles, rails are usually made of steel, but more expensive models might have titanium or carbon rails to save weight.
Saddle choice and comfort are very personal. There are tons of different saddle designs; shorter saddles are popular, while many will have cut-outs in their top surface that are designed to improve comfort. Women’s bike saddles tend to be wider because women's sit bone anatomy is different from men’s.
Many saddle brands have fit systems and try-before-you-buy or exchange schemes to help you find a saddle that suits you.
Road bike saddles are usually different to mountain bike saddles, with flatter profiles and lighter constructions.
Brakes and shifters
Disc brakes
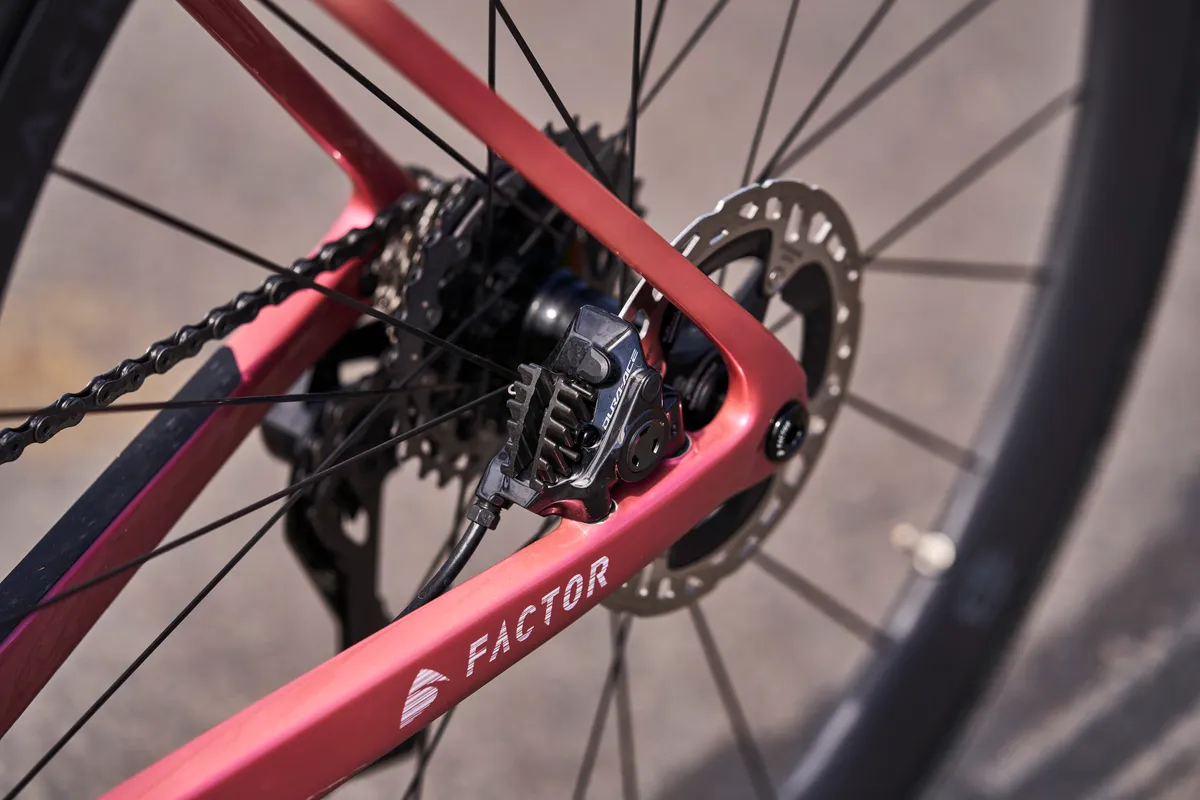
Nowadays, bike brakes most commonly come in the form of disc brakes, where a caliper mounted to the frame presses disc brake pads against a rotor, which is fixed to the bike’s wheel.
It’s a system more-or-less universal on the latest mountain bikes, road bikes and gravel bikes, and increasingly adopted on the best hybrid bikes, too.
Disc brakes may be either operated hydraulically, by fluid pushed through hoses from the brake levers, or mechanically, where a cable runs from the lever to the caliper. There are a variety of different disc brake pad materials used, depending on cycling discipline.
The main alternative to disc brakes is rim brakes, where pads are pushed against the wheel rim via a cable from the brake lever. Rim brakes are lighter, but generally less powerful and consistent than road disc brakes.
Disc-brake rotors are typically made of steel, but may include a layer of aluminium sandwiched between steel faces. They’re attached to the wheels either using six bolts or the Centerlock system, which uses splines and a locknut.
The rotor may include cooling fins and it may be made in one piece or be floating, where the braking surface is attached to a separate carrier spider, so it’s less likely to warp as it gets hot and expands.
Rotors come in a variety of diameters, from 140mm to 203mm, with larger rotors used where more intense braking is needed, such as for downhill mountain bikes.
Rim brakes
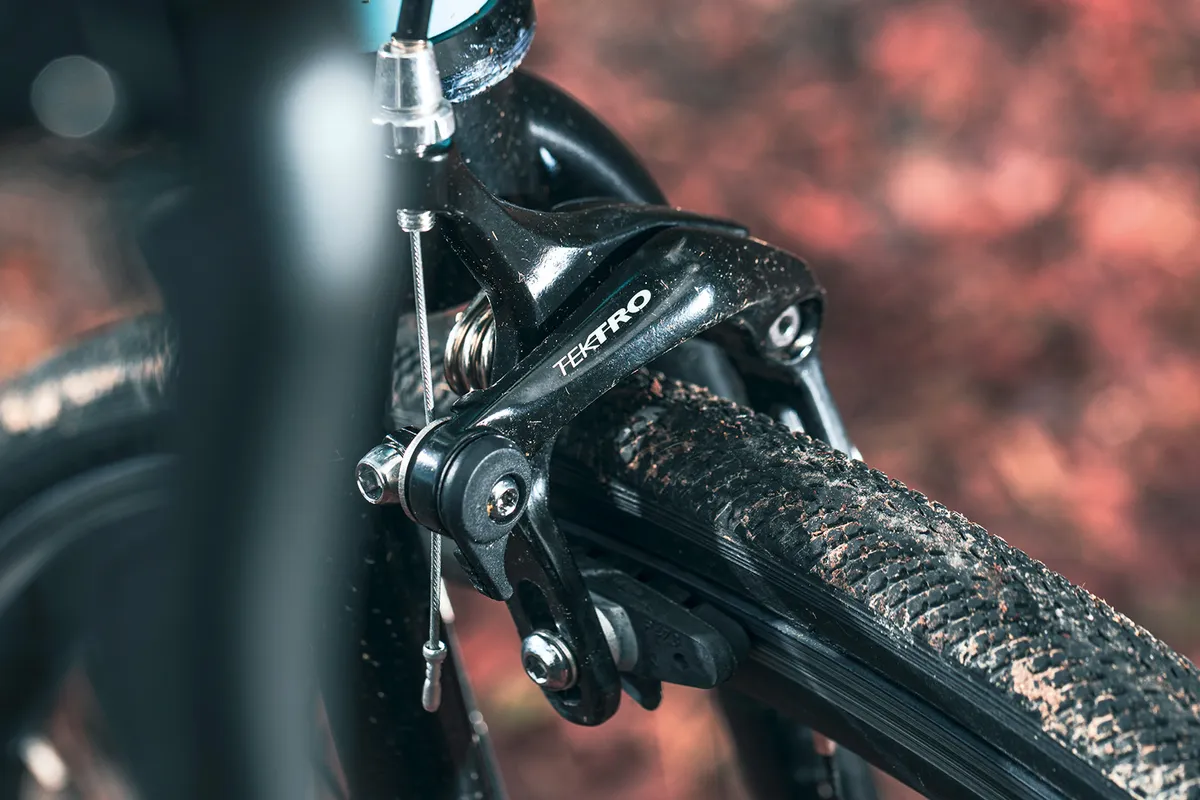
While disc brakes are almost universal on mountain bikes and high-end road bikes, rim brakes are still specced on many cheaper road bikes and hybrid bikes.
Rim brake calipers are mounted to a bike’s frame. The calipers press brake pads onto the brake path on the rim of a wheel to slow it down.
Side-pull caliper brakes are the most common form of rim brake and still prove to be one of the lightest options for braking.
Rim brakes are usually actuated by a cable pulled by a lever on the handlebars, which in turn pulls the caliper closed.
Hydraulic rim brakes do exist, with brands such as Magura providing options that use a similar system to its disc brakes.
Brake paths on wheel rims are usually made of a hard-wearing material, though this can wear down over time and lead to rim failure if not recognised.
Rim brakes are not as effective as disc brakes in wet weather conditions, with carbon fibre rims affected substantially.
This is due to groundwater being easily transferred onto the brake path, which can also lead to grit being lodged into the brake pads.
Cantilever brakes
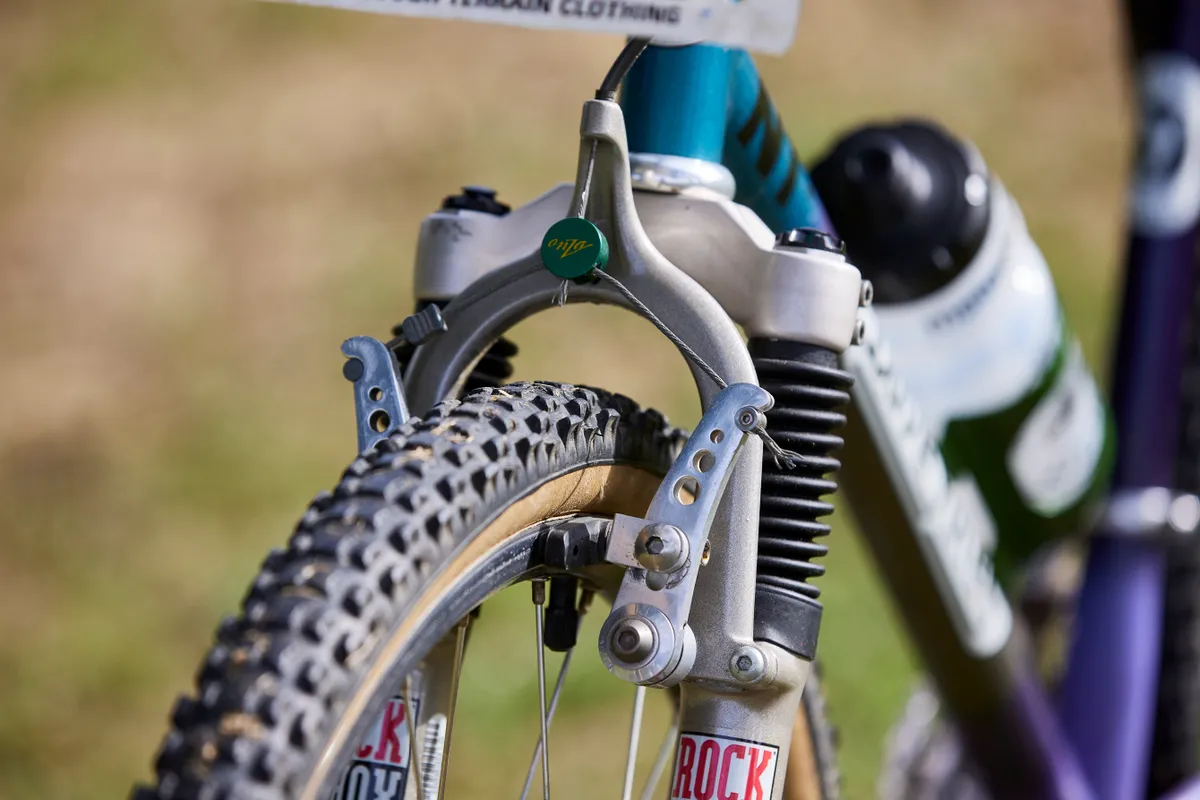
Cantilever brakes are almost extinct, with the veteran brake featuring on some budget mountain bikes and hybrids.
Cantilever brakes – or ‘cantis’ – operate in a similar way to rim brakes by squeezing the rim of the wheel of the bike to slow it down.
In the past, the system was one of the few solutions for riders who needed to run wider tyres on their bike and was the go-to brake design for mountain biking and cyclocross.
Cantilever brakes suffer the same issues as rim brakes, with rain and grit affecting the braking surface and losing power.
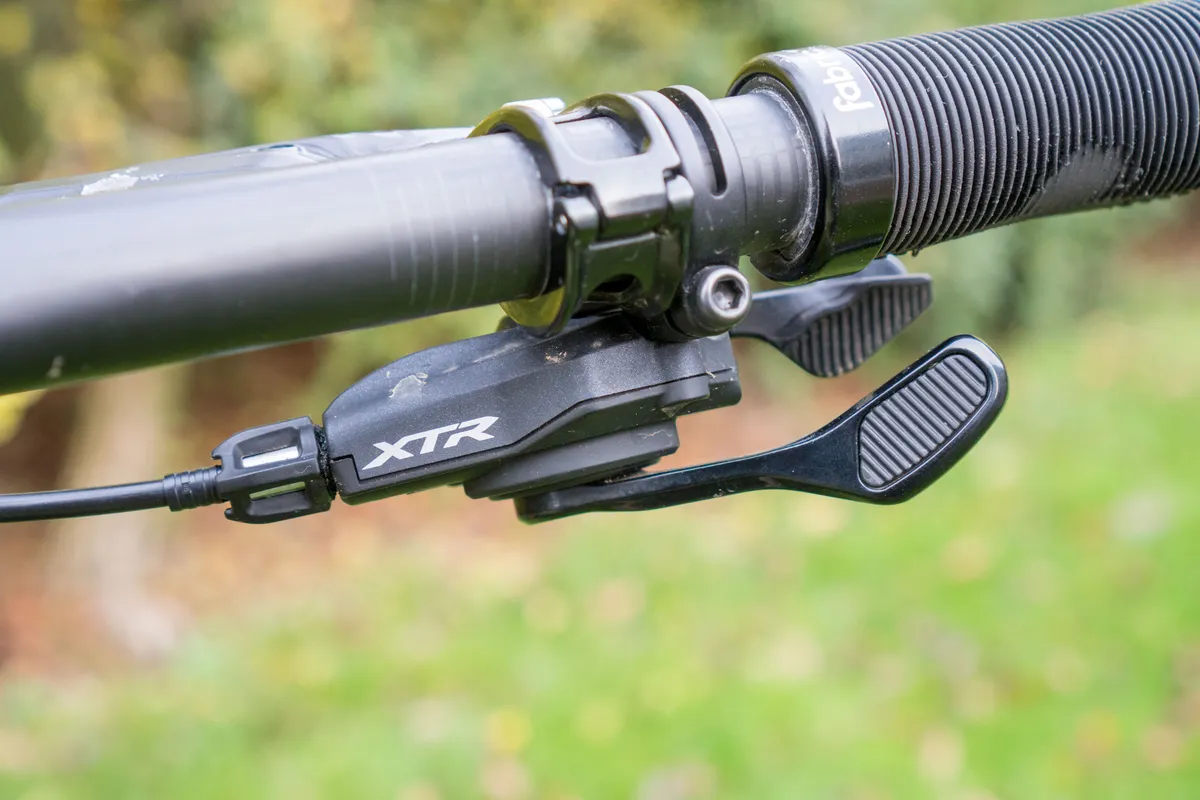
Gear shifters
Your shifters enable you to change gear up or down and adjust your effort levels to suit the terrain.
They’re mostly mounted on the handlebar, and there’s usually one that operates the rear derailleur and one that operates the front derailleur, if you have one.
It’s most common for them to be connected to the derailleurs by wire cables, although electronic groupsets can be found on pricier bikes.
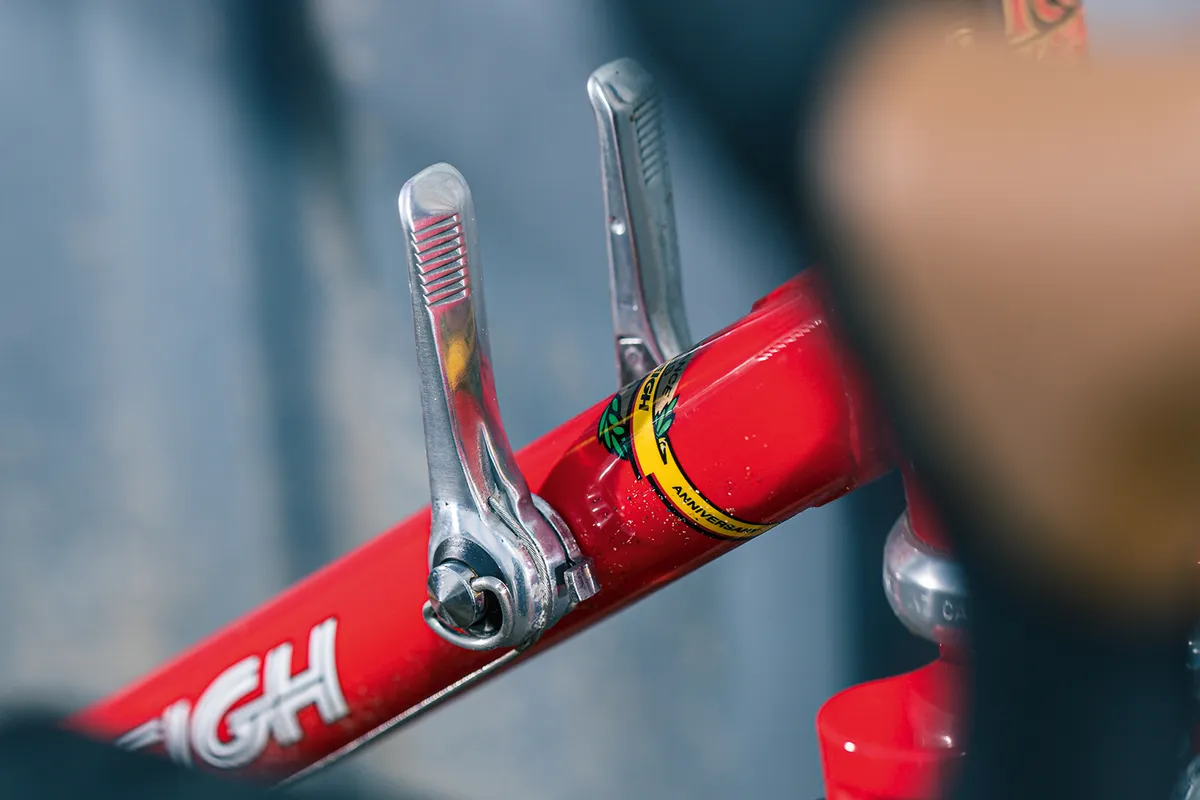
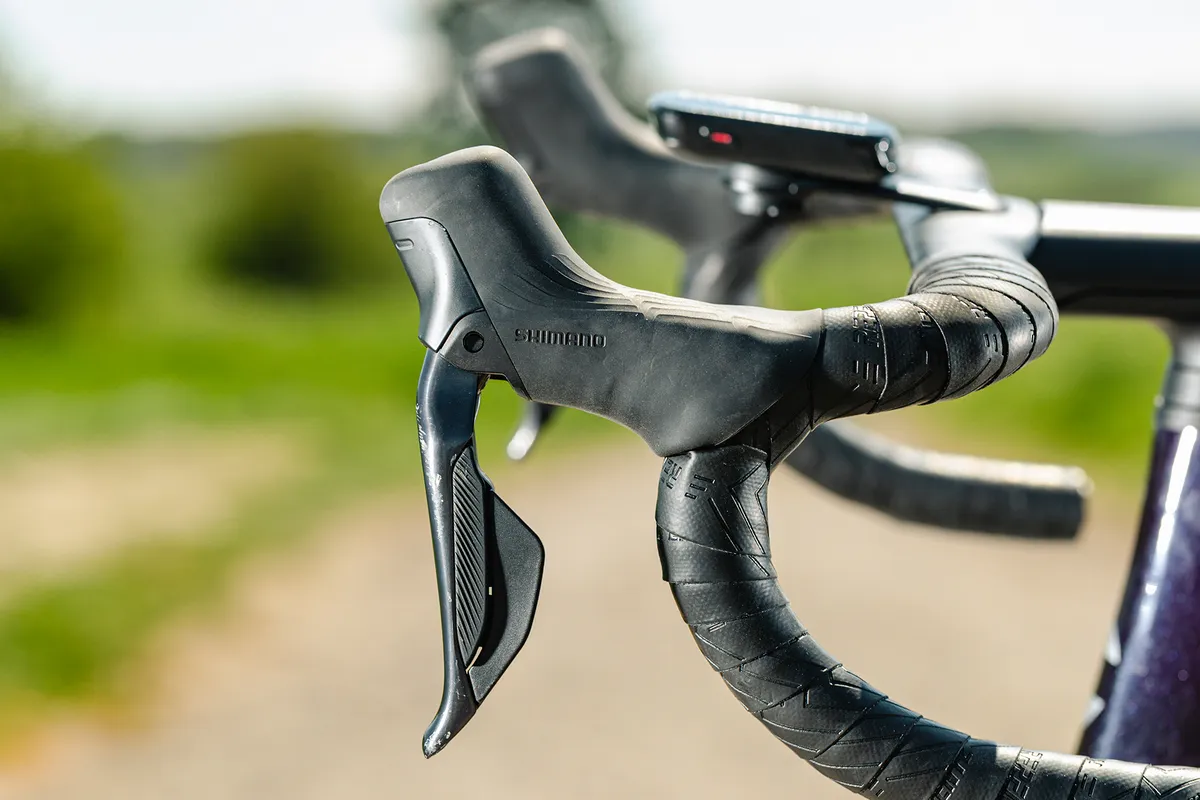
MTB gears and hybrid gears use shifters that are separate from the brake levers, although they can share a common mount to the handlebars. Road bikes usually have combined brake levers and shifters.
Down tube shifters are now only seen on retro bikes.
Tyres

Bike tyres have to balance weight, grip, robustness, speed and comfort.
That means that the best road bike tyres are narrower, lighter and have less tread than the best mountain bike tyres. MTB tyres will be wide, robust and grippy, with lots of air volume to roll over obstacles and handle loose surfaces.
Many bike tyres have inner tubes, which hold the air pressure, but it’s increasingly common in both road and mountain bikes to have tyres designed to run without inner tubes.
Tubeless tyres can give benefits in lower rolling resistance, improved comfort and additional puncture protection over tyres with inner tubes.
Some road bikes use tubular tyres, where the tyre is sewn together and glued to the rim. These, however, are increasingly rare, even with professional road cyclists, who are switching to tubeless.
Tyre liners
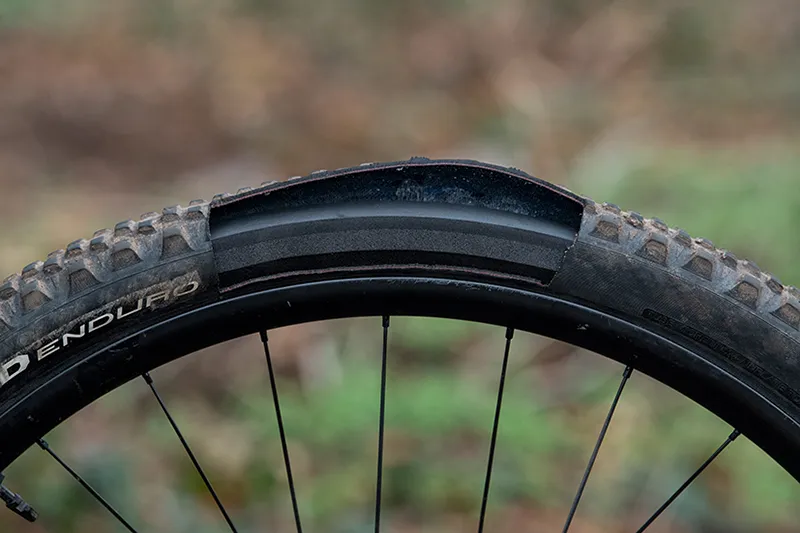
Tubeless tyre inserts are most common on mountain bikes and act as a barrier between the tyre and rim, enabling you to run lower pressures than a usual tubeless setup, reducing the chance of pinch punctures.
Tyre inserts can also provide added stability to the tyre, by reducing the amount of deflection it experiences when going down the trail, making it more difficult for the sidewall to fold when railing corners and plowing through rock gardens.
Many riders also choose to ride inserts to protect their rims, because the protection makes it more difficult for rocks to impact the rim.
Road tubeless tyre inserts do exist, such as Vittoria's Air-Liner, though they work more as a run-flat option to protect the rim in the event of a puncture.
Pedals
Whether you use flat pedals or clipless pedals is, ultimately, down to personal preference.
As a general rule, however, road and gravel riders tend to prefer clipless pedals, whereas mountain bikers are much more split between flat and clipless.
Also, if you're biking to work or just riding for leisure, flat pedals might be preferred due to their ease of use and the speed with which you can put a foot down.
Flat pedals
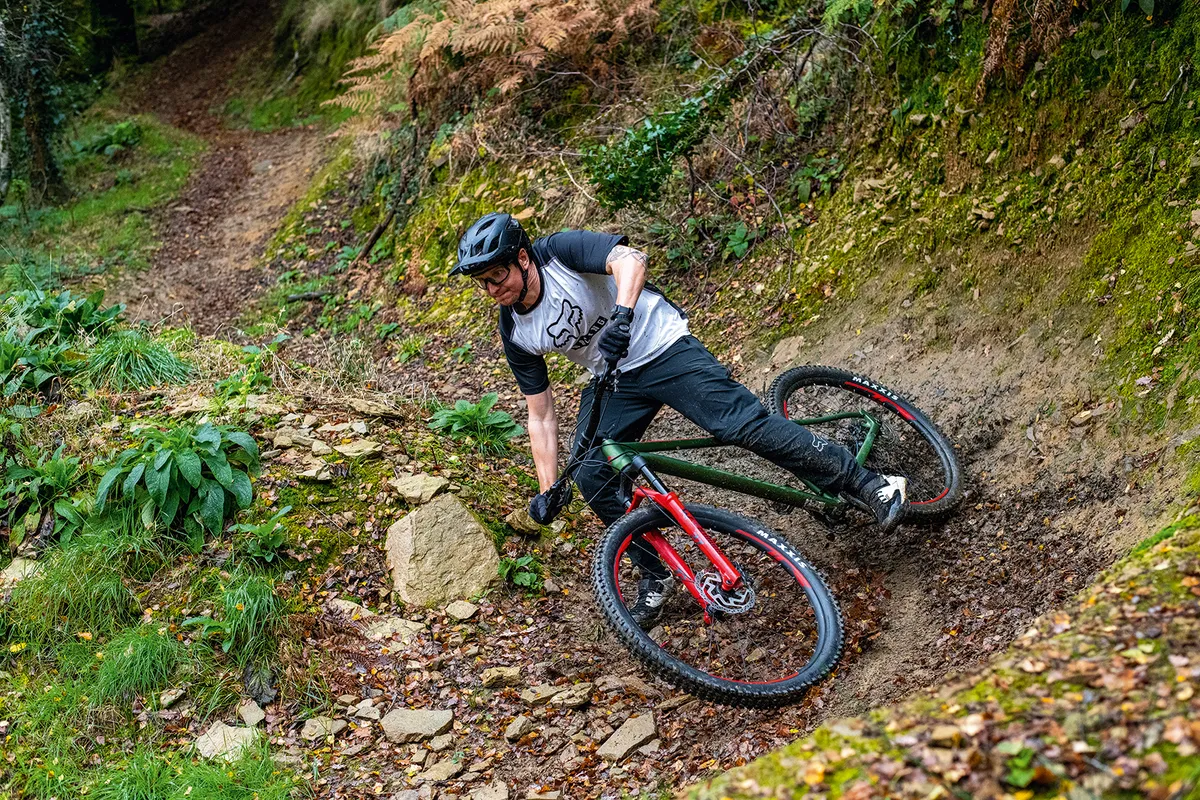
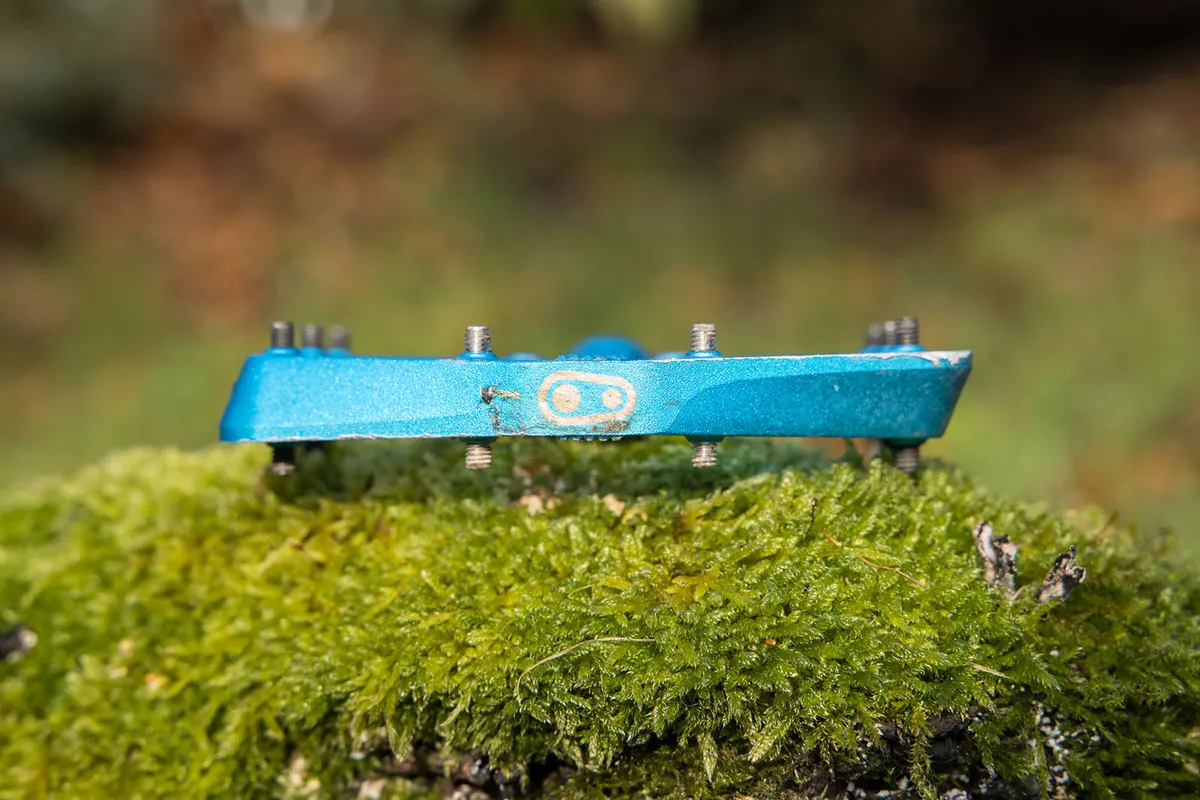
The most basic bike pedals are flat and two-sided.
Most flat pedals will have some means to ensure that your shoe maintains grip on the pedal – the best MTB flat pedals typically have pins that dig into the shoes’ soles.
On that note, the best mountain bike shoes will have a super-grippy sole to help here.
Clipless pedals
So-called clipless pedals let you attach your shoes more securely to the pedal for a perceived increase in pedalling efficiency.
They’re called clipless to distinguish them from the system of toe clips and straps, which was previously used to secure the shoe to the pedal and which you may still find on some bikes.
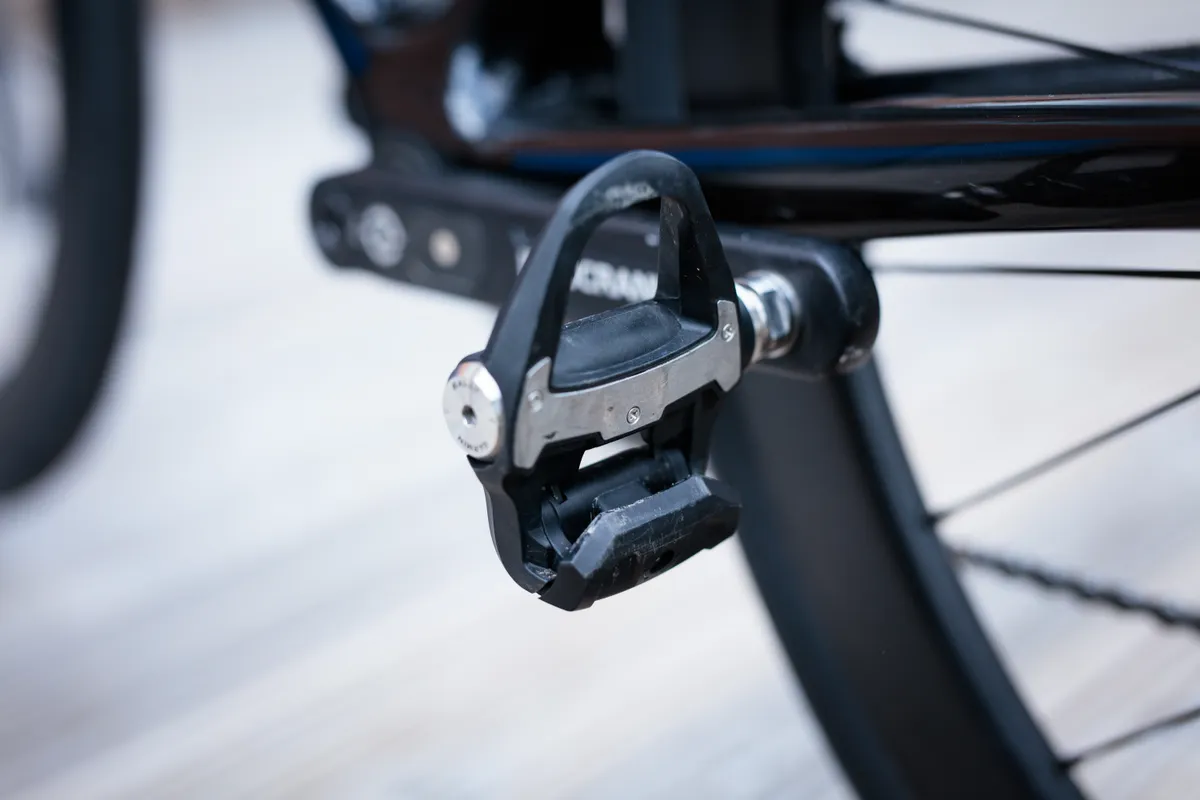
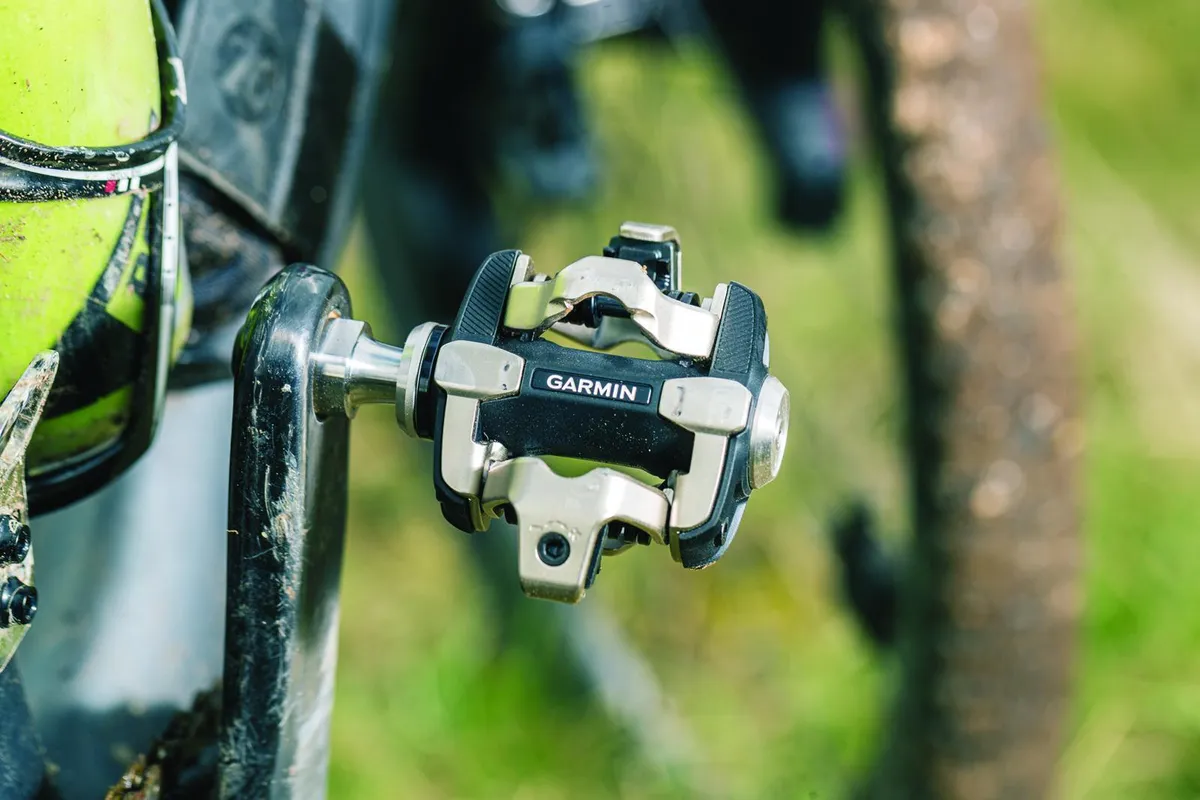
Clipless pedals may be two-sided or single-sided, and you need to have cycling shoes that allow you to bolt cleats to the soles to mesh with the pedal. The cleat mounting bolts need to be compatible with the system used by the pedal – usually either two-bolt or three-bolt.
The best road bike pedals are normally single-sided and clipless, whereas clipless mountain bike pedals, or pedals for gravel riding, are normally double-sided, to aid clipping in on technical terrain and to improve mud clearance.
Some pedals have a power meter incorporated into the design.

