There’s a lot of commercial pressure to simply replace bike parts that stop working or are a little worn, rather than attempting to repair them or maintain them by frequent servicing. If you're determined to fight the good fight, here are a few pro mechanic tips to help you keep your road ride running sweetly.
Tools required
- Multi-tool or 3, 4, 5, 6mm Allen keys
- Adjustable spanner/small screwdrivers
- Mavic tyre lever and pin spanner
- 12, 13 ,14mm cone spanner
- WD-40 or GT85
- Wet lube/Finish Line Cross Country Lube
- Needle nose pliers or small Vise-Grip
1 STI lever woes
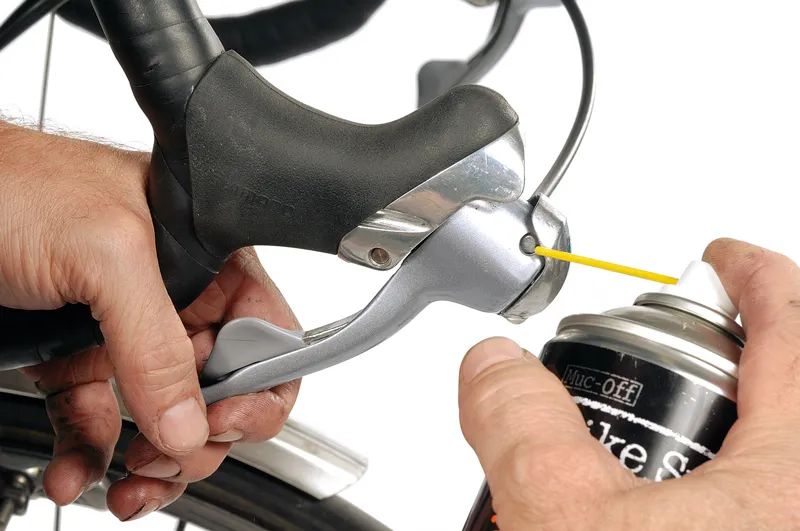
Shimano STI lever failures are usually down to abuse, neglect or crashes. The force required to actuate the shifters should always be light and easy, as forcing the internal mechanism will damage it. Over many years of use or storage, the factory grease will begin gumming up and getting sticky, which is usually the reason they stop working. Use a mid to lightweight spray lube like WD-40 or GT 85 and apply generously into the mechanism, as pictured below, with a cloth or newspaper placed below to catch run-off. Actuate the shifter through the entire range and continue spraying until all détente clics have been recovered and feel positive. Re-apply a heavy weight oil such as Finish Line Cross Country Lube until action is smooth and buttery.
2 Brake lever fine tuning
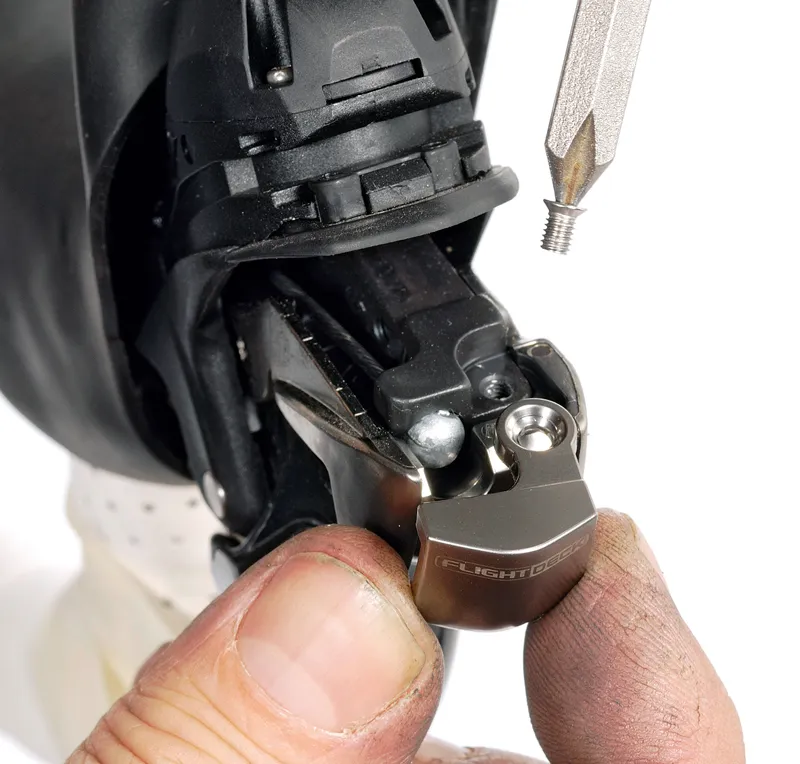
While on the subject of STIs, it’s worth knowing a couple of pointers about adjusting the reach of your levers. This can make shifting and braking more comfortable, while also reducing long term fatigue. People often complain they can’t adequately reach the lever for braking because of small hands. While most of the range use rubber insert shims, Shimano DA levers allow fine tuning with a concealed screw hidden behind the plastic decorative cover. Remove it by unscrewing the small retaining screw as pictured, then gently pry back the cover from the top. This will expose the brake cable anchor and adjuster. Turn this clockwise until the desired lever position is reached, then replace the cover.
3 Additional shifter adjustments
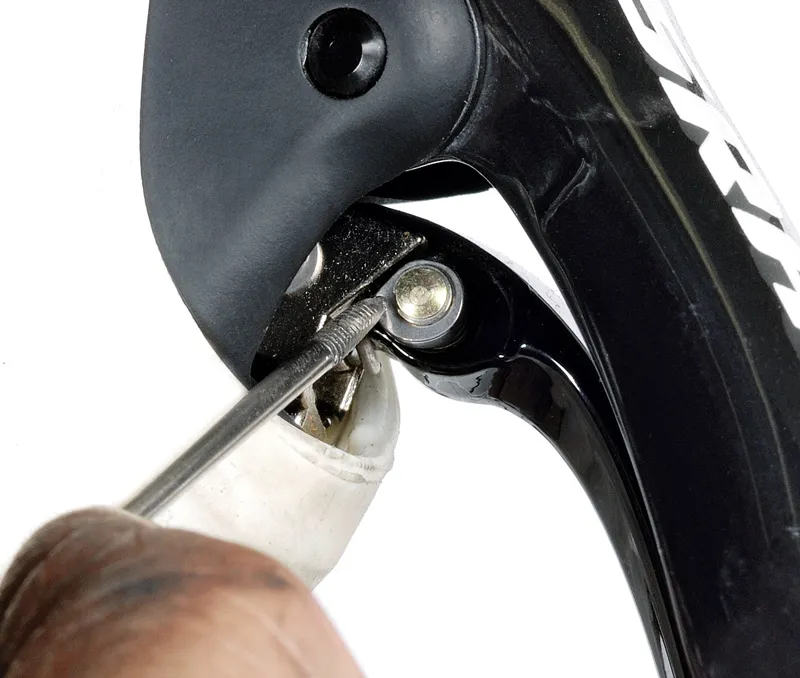
While SRAM Rival and Apex have simple reach adjustment via a 3mm Allen screw behind the hood hump, Force and Red offer additional shifter paddle adjustments with a small eccentric plate. Assuming you’ve got leeway with brake travel, pull the shifter paddle inwards, then set the small cam plate in such a way as the lever sits where desired. There’s a small pinhole in the eccentric plate. Insert a sharp object into the hole and press the plate inwards to disengage. Now rotate to an appropriate position and let it spring back into place. Follow by adjusting the brake lever reach to match the shifter paddle – peel back the hood from the hood ergo-hump, where you’ll see the small adjuster screw access.
4 Centring side-pull brakes
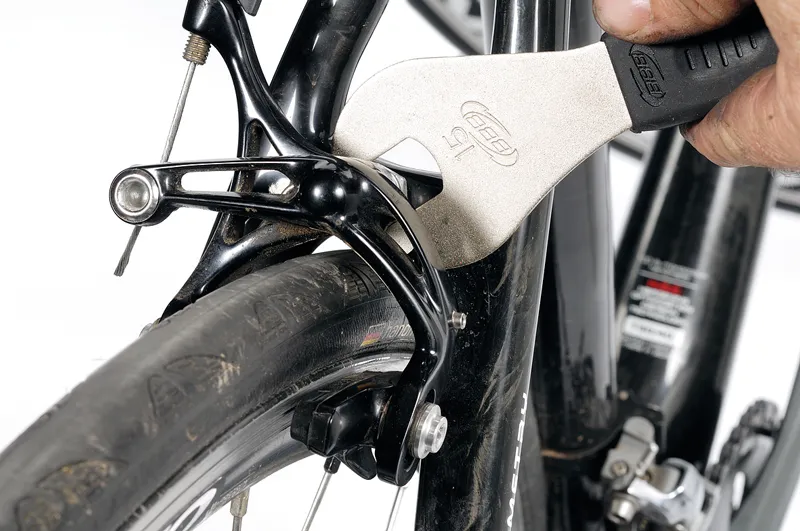
Nothing is more annoying than a brake block that drags against your wheel. While dual pivot callipers are centred by simply pushing the whole unit left or right or using the adjustment screw located on top, standard single pivot designs require the whole assembly to be rotated. The nut that retains it to the frame needs to be just loose enough to allow this to happen. Using the appropriate sized cone spanner, slide it onto the spring anchor flats provided for this purpose and gently prise the brake in the desired direction. Squeeze it a few times, allowing it to snap back and find its natural position. Nip the retaining nut back up tight. Some brake pivot assemblies provide front access for a 5mm Allen rather than cone wrench flats.
5 Heavy braking action
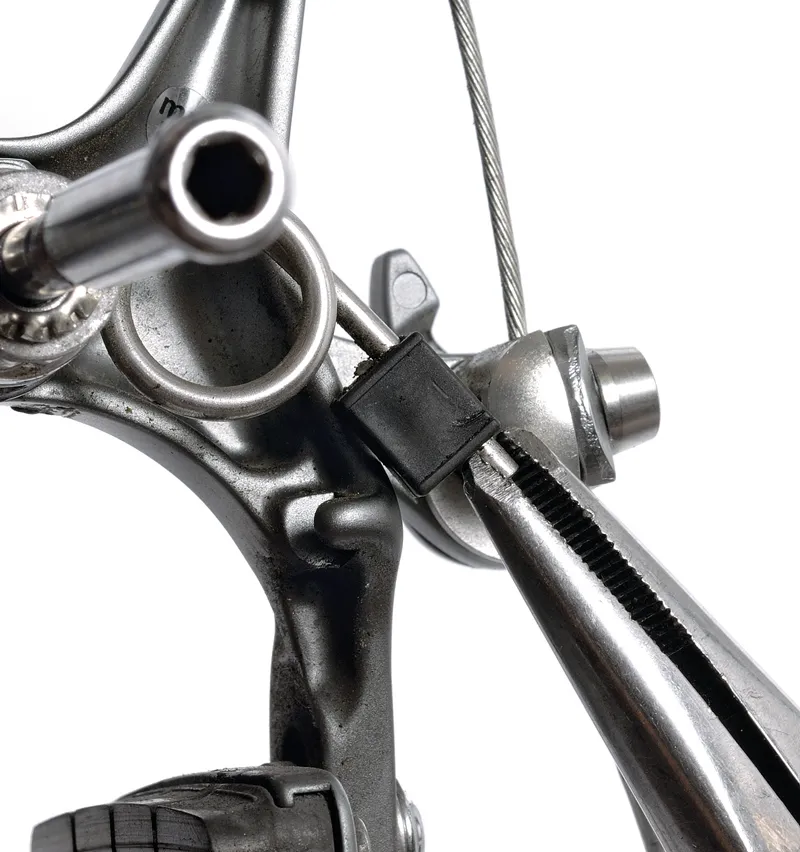
With more and more bikes running awkward internal cabling for rear brakes, the standard brake return spring sometimes doesn’t snap back open after a good squeeze of the binders. This is more often than not compounded by neglect, which means the cable is contaminated with grit, while the calliper is often impaired by a contaminated or over-tight bushing. Besides cleaning and lubricating the brake calliper, one way to improve sluggish return is by increasing the spring tension. Shimano has a unique way of achieving this in that it requires the reversal of the spring bushing. This can be done with the calliper either on or off the bike. Begin by removing the brake block adjacent to the spring and go to the next step.
6 Full force return
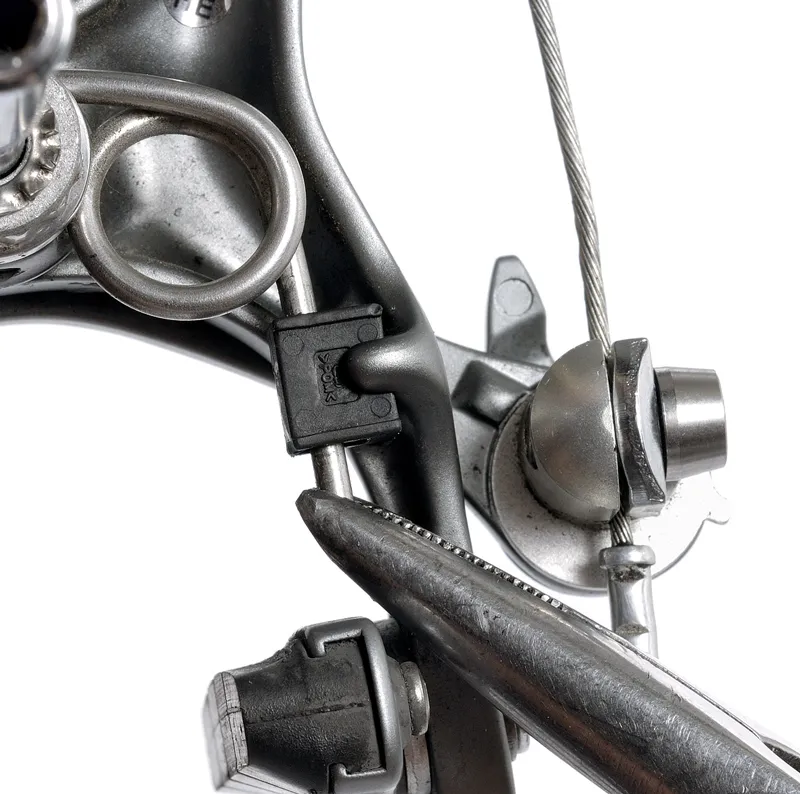
For purposes of demonstration, we’ve removed the calliper from the frame. This method requires that you grasp hold of the calliper firmly, whereas keeping it on the bike allows the use of your extra free hand (be careful not to slip with the pliers, to avoid injury). Once disengaged, reverse the position of the square nylon bushing so as to increase the space between the spring anchor and spring, as pictured. This step requires a fair bit of hand and finger strength, and can be difficult. It can help to have the brake jaws open to their maximum by releasing the cable anchor first. Make sure you’ve got a firm hold of the spring end and wear a protective glove on the hand holding the calliper, in case you slip.
7 Hubs on the fly
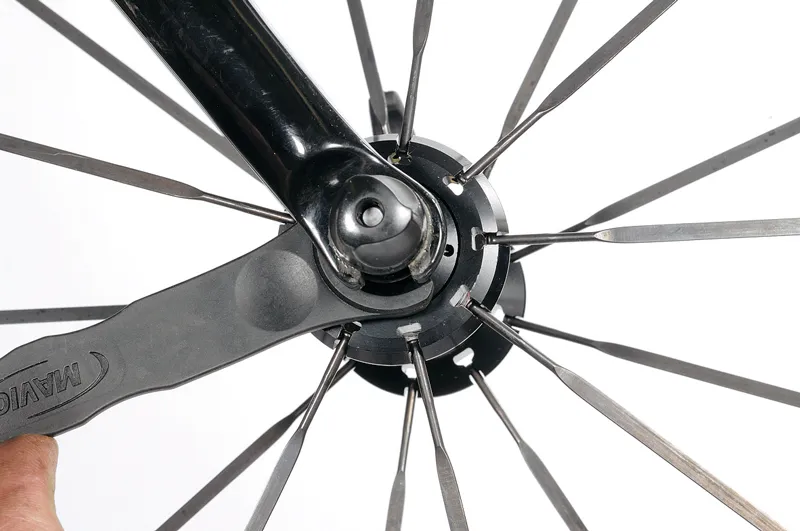
With Mavic such big players in the pre-built wheel market, you’re bound to come across a set of these during your cycling lifetime. The mysterious black nylon tyre lever pictured below is the best one on the market, and it also happens to include a small bearing adjustment pin-spanner at its other end. A hub adjustment can be performed on the bike without removing the wheel and will work on either the front or rear. While it won’t work on lower range hubs, which require standard cone spanners for adjustments, upper range wheels such as Mavic's Ksyrium Elite and above allow for their use. Turn the adjuster plate clockwise just a little until no more play is felt. A touch of play is okay, but no binding is allowed.
8 Campagnolo Ease
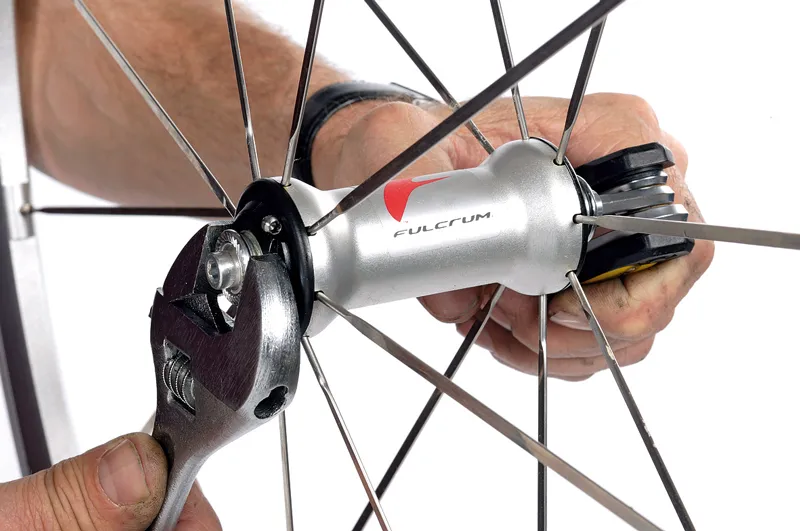
This only applies to the ball and cone hubs with oversized aluminium axles, both Campagnolo and Fulcrum. Lower range hubs with steel axles and sealed cartridges – for example, Veloce or Mirage – can’t be adjusted. A 21mm cone wrench can be used with the wheel in the bike, or a small adjustable spanner with the wheel out. First, with the wheel in the bike, feel for that little bit of play by grabbing the tyre and gently trying to rock the wheel sideways a bit. With the wheel out, feel for a little wiggle in the axle. Loosen the small 2.5mm Allen grub screw holding the adjuster cone plate, then rotate clockwise a smidgeon while immobilising the axle with a 5mm Allen in one end until play is nearly gone. Re-tighten the grub screw.
9 Top jockey
Derailleur pulleys (aka jockey wheels) are usually neglected to the point of impaired shifting accuracy and can add a surprising amount of friction to the drivetrain, increasing pedalling effort. Telltale signs are severely pointed teeth and excessive angular play. A small amount of lateral movement is acceptable (1 to 2mm or so) and required in the upper jockey wheel. Servicing the pulleys will ensure your shifting stays crisp and reliable. Don’t let your fingers get trapped by the stiffly sprung jockey cage, so drop the chain off the inner ring to release tension in the rear derailleur first. Use a sharp 3mm Allen for Shimano and Campagnolo, or a 2.5mm Allen key in the case of SRAM to remove the bolts, which can be quite tight.
10 Exploding pulleys
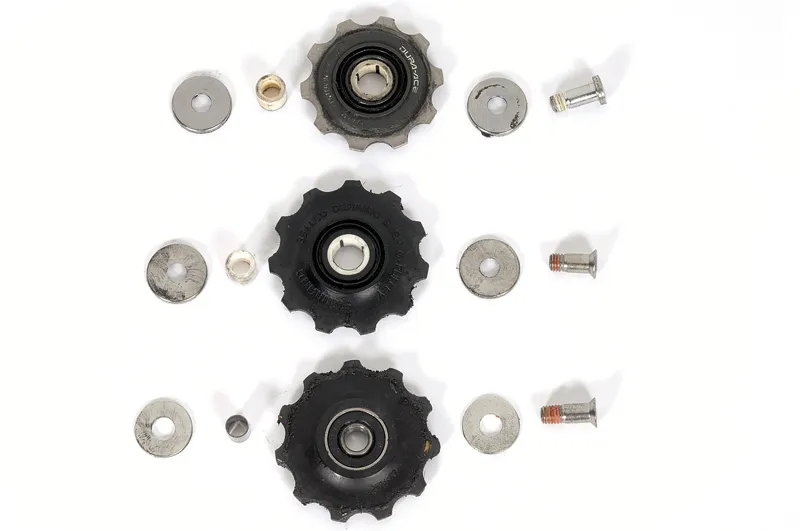
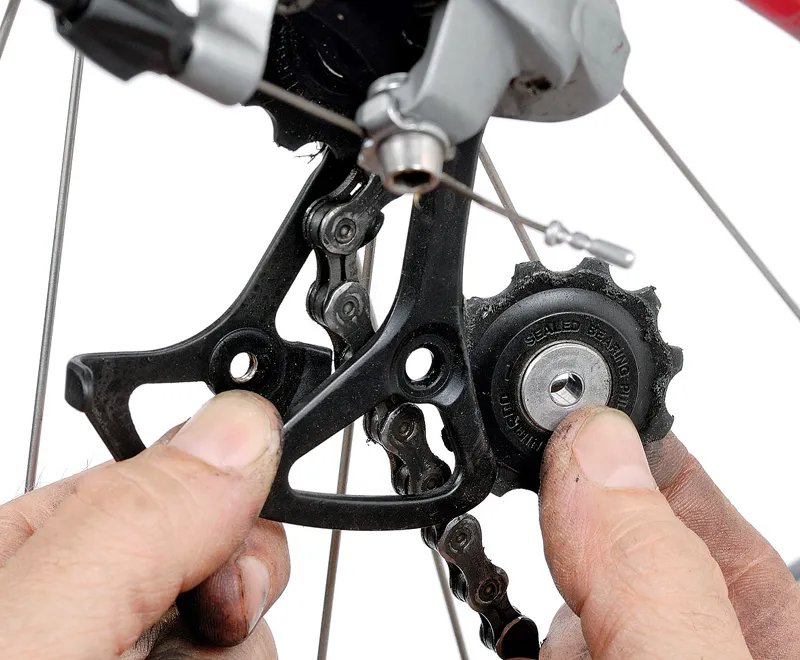
As visible in this exploded layout, there aren’t a lot of separate parts involved. The upper wheels are marked Centeron and/or G-Pulley for Shimano, and have left and right movement ability on a simple bushing. The lower ones will often have cartridge bearings or simple bushings. What’s more important is how clean they’re kept and whether you’ve got the right one in the correct position. Remove the cover plates and central bushing, and clean thoroughly using citrus degreaser or WD-40. Inspect for excessive wear and replace if required. If not, re-assemble with a dab of grease and a few drops of oil on all contacting surfaces. Put back onto the derailleur while re-routing the chain, and ensure bolts are snug without being excessive.
